Outdoor Great Room Lodge II Pergola User Manual
Page 13
Lodge II Pergola Assembly Instructions – Optional Steel Roof
11
If you purchased an optional steel roof system for your Lodge II ,
use the instructions in this section to assemble your roof.
Included in your roof kit:
9 Roof Panels
Small roof screws
End cap
Ridge Flashing
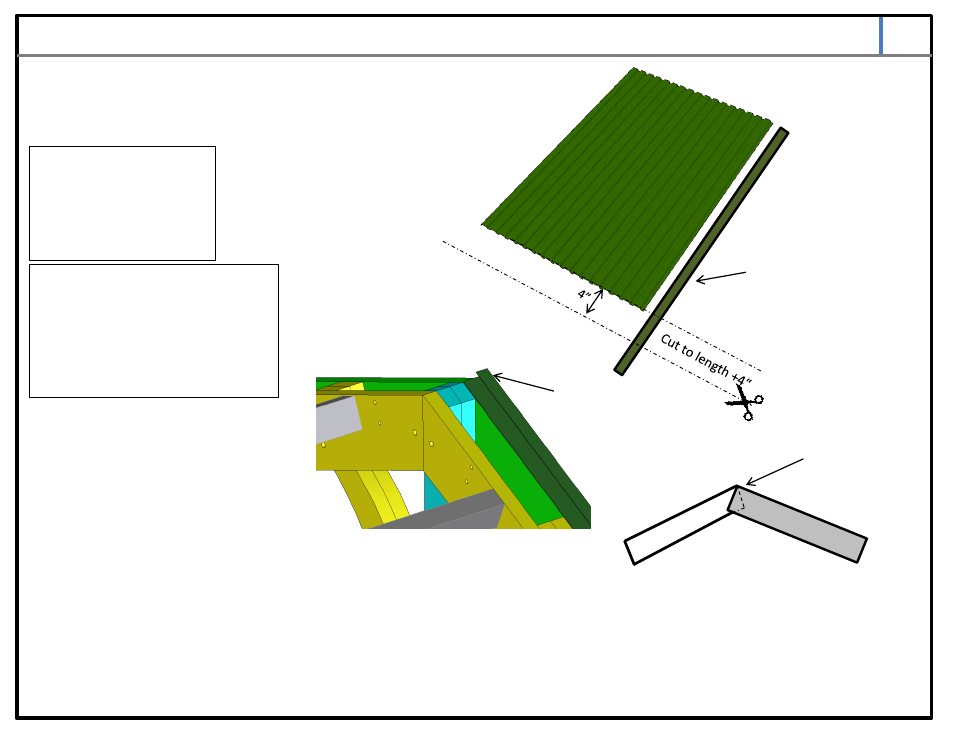
Step 1 :
Cut end flashings to the length of roofing
panels plus an additional 4 inches to allow
for overhang.
End Flashing
Step 3 :
Lay roof panels on pergola structure, grooves in the
direction of the slope of the roof, leaving peak exposed
and panel ends flush with end of ridge flashing,
overlapping as necessary (do not leave gaps between
panels). 4 ½ panels will be required for each side. One
panel should be cut to size and used for both sides of
the roof. Once panels have been cut to fit, ensure they
are even and level, mark stud locations and attach to
frame with supplied screws.
Step 2 :
Using supplied screws, fasten end flashing to
roof frame with front edge flush with front of A-
frame as shown. Overlap ends to form a
continuous peak.
Flashing
Required Tools (not included) :
Power drill
Tape measure
Level
¼ “ hex socket
Electric or pneumatic metal shears
Overlap flashing
ends
Step 4 :
Cut ridge flashing to desired length (2”
overhang on each end suggested) , Lay on top
of pergola and fasten to roof with supplied
screws.