Set up – Xpres Easy Dome User Manual
Page 5
5
Preparing Transfers for Doming
Transfers should be rounded at the corners, and the corner angle
no less than 90 degrees. The ‘corner radius’ should be at least
3mm.
Although right angled corners can be domed when care is taken,
it is recommended that all relevant corners need to be curved.
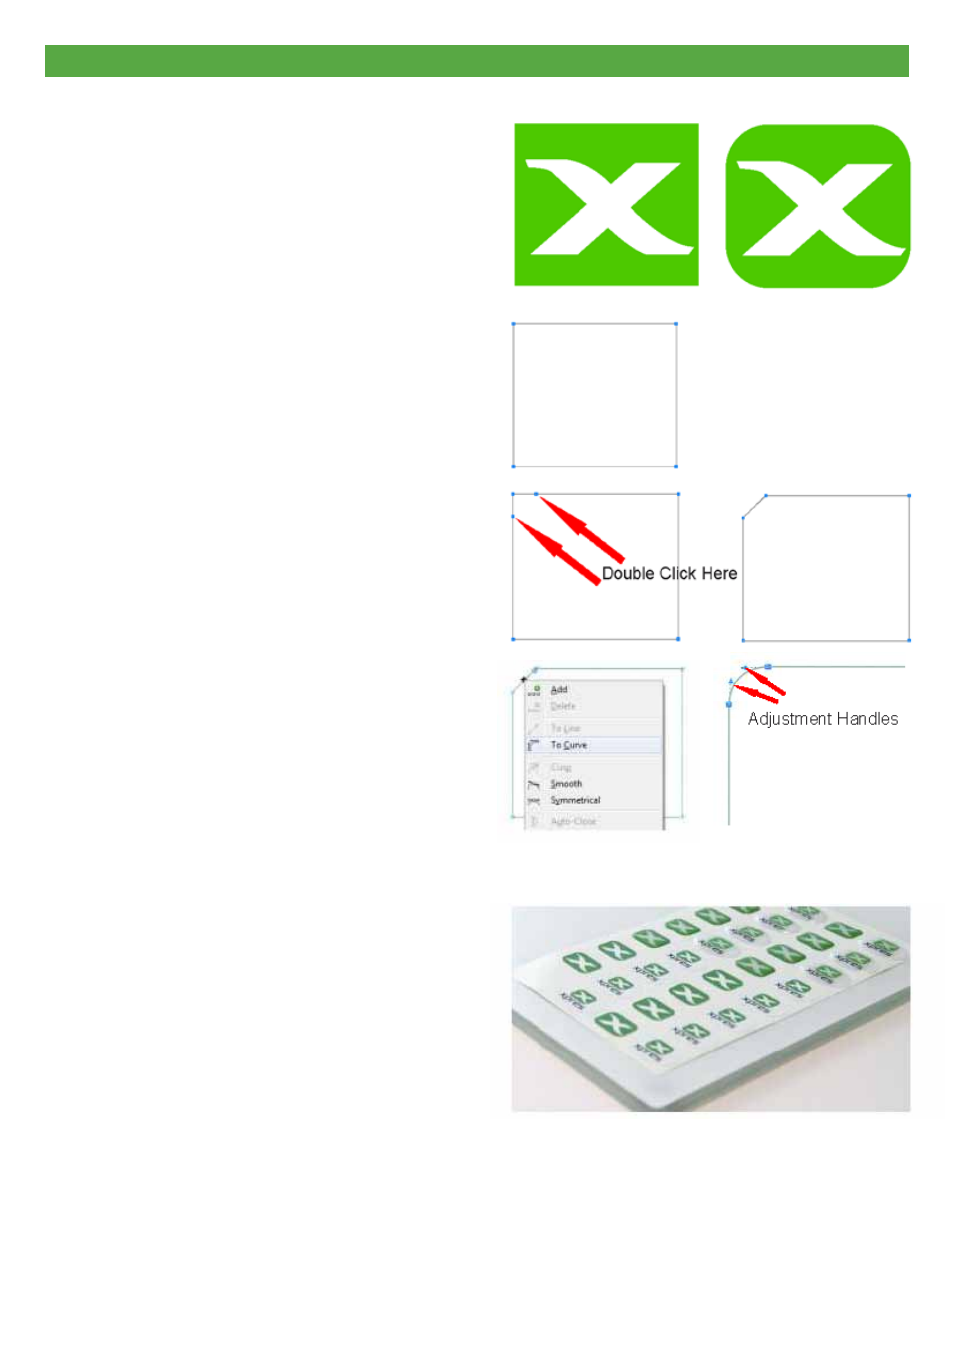
The example right shows a design where the corners have been
adjusted. If left as shown in the ‘before’ diagram the Xpres easy
Dome Resin could over-spill.
Curving Angles:
To curve the corners on a design ready to cut, select your shape
Tool within corelDRAW and click on your design or cutline. You
will see the nodes appear (Blue) - these nodes can be deleted,
moved, added etc as needed (you may need to convert the
object to curves if the nodes do not show). The example right
shows a square cutline with the nodes visible which we can edit.
Using the shape Tool, double click on the cut line either side of
the node at the point we are trying to remove, this will add two
new nodes (Diagram 1). We can then double click on the original
node which made the point of the original angle, this node will
now be deleted and you will see the example right (diagram 2).
now Right click on the line directly between the two nodes
you have created with the shape Tool, and select ‘to curve’ as
shown right.
With the shape Tool you can now Left click on the cutline
between the two nodes previously added, whilst holding the
Left click down drag the cursor outwards, you will see that this
creates your curve, which you can fine tune with the Adjustment
Handles.
continue this process around the design on internal and external
angles until the cutline has no sharp points - the cutline is now
ready for output.
Positioning Transfers:
once cut, weed away the excess film and place the transfers
on to a Doming Glass Tray as shown below. Make sure that
the transfers lay flat on the surface of the glass (no air bubbles
underneath), and also make sure that the surface is level, we
recommend using a spirit level - this is important to create even
resin thickness over a transfer and also to reduce over-spill.
Mounting spray is recommended to keep the transfers flat on
the surface of the glass.
Tip:
We recommend that transfers are produced with at least a
5mm gap between logos/transfers. This is to help prevent any
resin over-spills having a knock-on effect in to the next
logo/transfer, reducing waste.
note:
one 50g resin cartridge will be able to dome
approximately 50 25 x 25mm (1 inch)2 transfers.
Set up
Before
After
Diagram 1
Diagram 2