Workrite Sierra HX Crank Assembly Instructions for 2-Leg Crank models User Manual
Page 9
Workrite Ergonomics | 800.959.9675 www.workriteergo.com
9
Workrite Sierra HX™ 2-Leg Crank Workcenters - Assembly Instructions
11
a
b
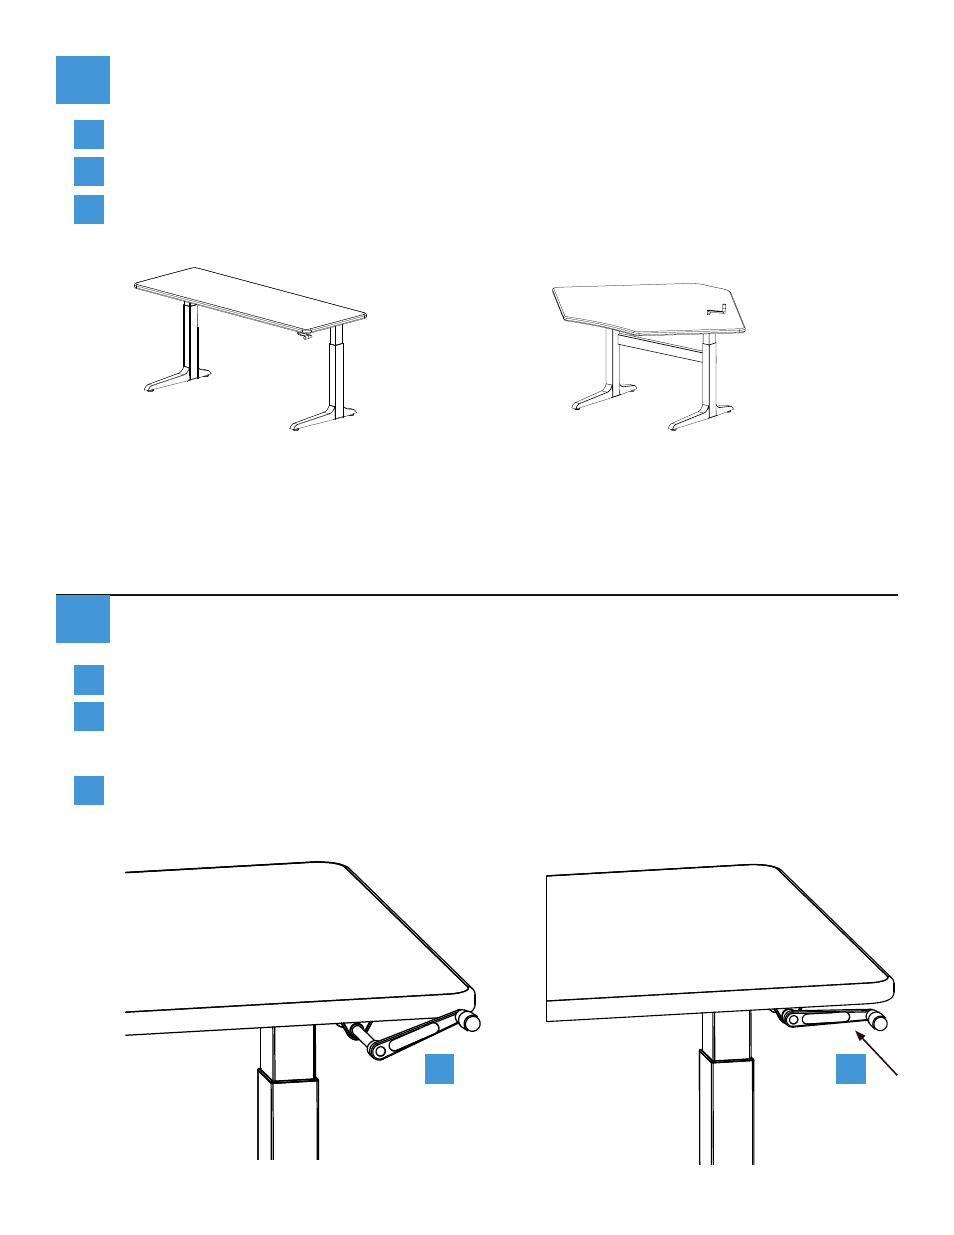
Tighten All Screws and Flip Table Over
Tighten all Sheetmetal Screws connecting handle, braces and legs to desk.
Flip table over and adjust Leveling Glides if required so that table is steady and does not rock.
Top-Crank models only: Insert Crank Handle into hole in worksurface over the right leg so that it
engages the gearbox. Turn Handle to raise or lower table.
c
HANDLE UP AND OUT
HANDLE DOWN AND OUT
HANDLE UP AND IN
HANDLE DOWN AND IN
HANDLE UP AND OUT
HANDLE DOWN AND OUT
HANDLE UP AND IN
HANDLE DOWN AND IN
Front-Crank Models Only: Store Crank
Pull out and turn handle to raise or lower table.
Before storing the crank under the desk, lift the handle slightly higher than the desk before pushing
back down to the proper position. If it is too low to begin with and is raised only slightly it will tend
to drop.
Push the crank under the desktop for storage.
a
b
c
b
c
12