Workrite Sierra HX Crank Assembly Instructions for 2-Leg Crank models User Manual
Page 5
Workrite Ergonomics | 800.959.9675 www.workriteergo.com
5
Workrite Sierra HX™ 2-Leg Crank Workcenters - Assembly Instructions
b
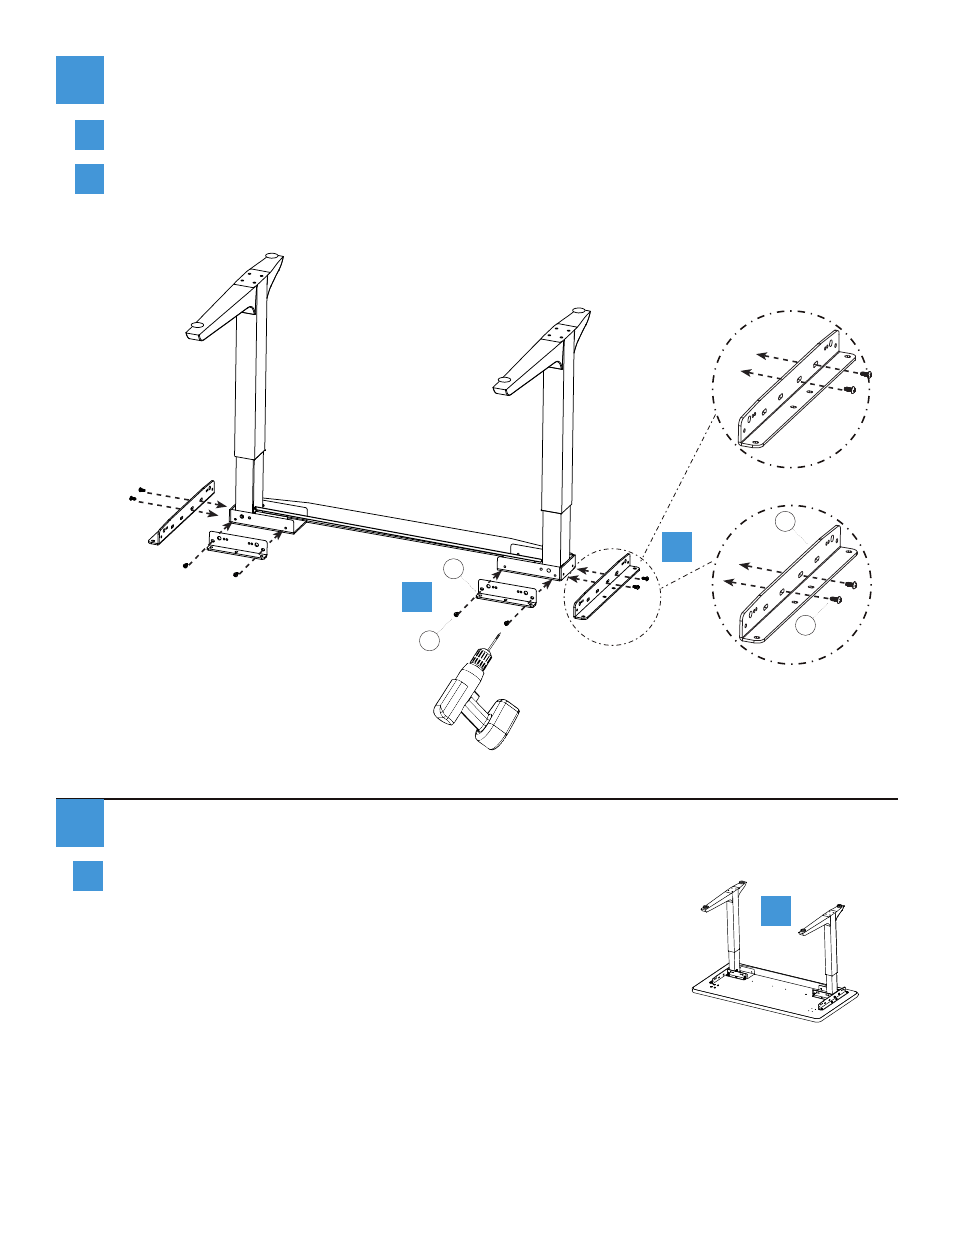
a
24" deep or less
more than 24" deep
6
Attach Short and Medium Braces to Leg Assembly
Use power drill to attach both Short Braces (C) using Button Head Screws (H). Do not tighten
screws completely - allow them to slide left and right in brace.
a
Attach Medium Braces (F) to sides of Legs using Button Head Screws (H). If you have a 24” deep
or less worksurface, use the holes to the rear of the brace as shown. For deeper worksurfaces, use
the center holes of the brace as shown. Do not tighten screws completely - allow them to
slide left and right in brace.
b
7
Attach Legs to Table
Again, placement of the legs is very important. Lay out the leg
assembly in the proper location. Note that the Right Leg will be on
your left and vice versa when the assembly is upside down.
If you do not have a Workrite tabletop:
Skip to step 8 for Front-Crank models, or to step 10 for Top-Crank
models.
If you have a Workrite tabletop:
Continue to step b.
a
Right Leg
Left Leg
a
J
C
J
F