Wine cellar - part identification, Installation, Unpacking – Vintage Cellars CL:DV315MGN3U User Manual
Page 6
6
12. Heating system's power (if > 100 W)
13. Defrosting system's power
14. Refrigerant gas and quantity
15. Insulating agent's chemical formula
16. Maximum pressure
17. Minimum pressure
18. Note : read the user instructions
19. Note : conformity to the certificates
20. Note : device to be recycled according to the regulations in force
21. Note : conformity to the directive in force
22. Manufacturer's note
23. Acronym specific to the refrigerant gas used
IMPORTANT: WHEN YOU ARE LOOKING FOR INFORMATION OR TECHNICAL ASSISTANCE, ALWAYS SPECIFY
THE REFERENCE, SERIAL NUMBER, AND THE PRODUCTION NUMBER PRINTED ON THE NAME/DATA PLATE.
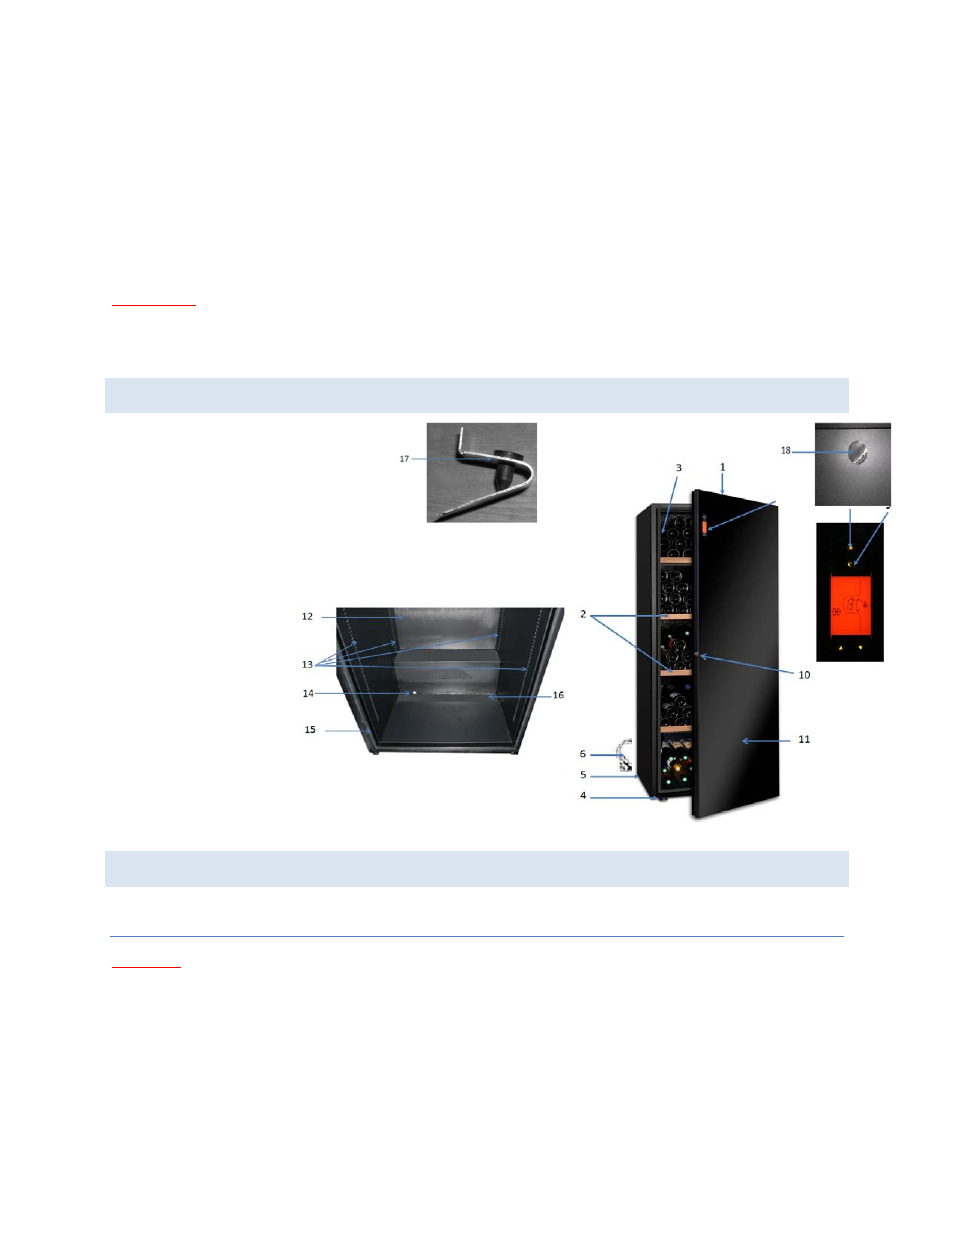
WINE CELLAR - PART IDENTIFICATION
INSTALLATION
UNPACKING
WARNING
:
DO NOT tilt the unit forward to lean on the bottom edge of the door. This will cause irreversible damage
to the door, and will not be covered under the warranty agreement!
Depending on the models, remove the transport pallet on which your wine cellar is placed by removing the two
screws securing it to the frame at the rear of the device. Remove all the wedging (under the door for example) and
protection elements present inside.
1 Lighting
2 Wine bottle tray
3 Name/data plate
4 Height adjustable feet (x 2)
5 2 castor wheels
6 Power cable with contact pin
7 Temperature control system and thermometer
8 Light switch
9 ON/OFFswitch
10 Lock
11 Door
12 Evaporator (cold wall)
13 Shelf fastening slots
14 Drainage hole
15 Seal
16 Condensate gutter
17 Shelf support
18 Activated charcoal filter