Vetter leak sealers – Vetter Leak sealers User Manual
Page 16
2
1
3
4
5
3
2
1
3
4
5
Vetter Leak Sealers
Page 16/39
9
Before use, check to see whether the high pressure leak sealing
system is resistant against hazardous materials.
9
Wear specified protective clothing necessary for operation
6.4
Operation instructions
9
Select the sealing hose most suitable for the leak, respectively
lay a sealing plate (EODM, NBR, glass fibre reinforced plastic)
underneath.
9
Entwine the pipe to be sealed so that the first point of the
sealing hose completely covers the leak position.
9
Feed through, as shown below, one layer under the sealing
hose.
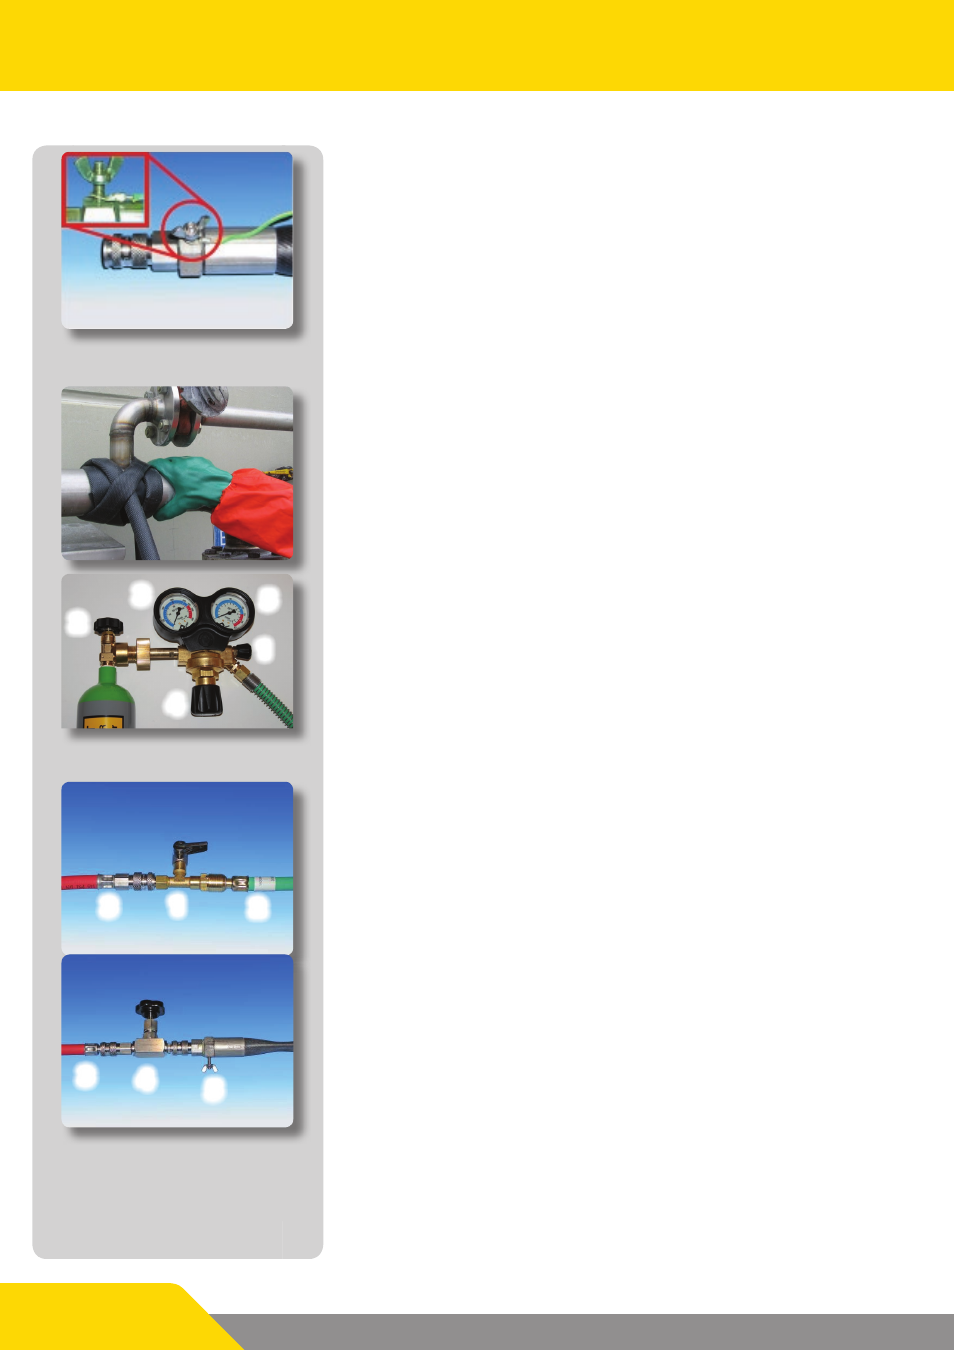
After this connect the inflation device as follows:
9
Connect the pressure regulator to the compressed air bottle.
9
Close the outlet valve (1) by turning clockwise.
9
Open the valve on the bottle (2).
9
The pre-pressure manometer indicates the pressure in the
bottle (3).
9
Adjust the backpressure on the regulator (4) to a maximum
of 10 bar.
9
The reduced pressure is indicated on the backpressure mano-
meter (5).
9
Connect the ventilation valve (1) to the connection hose (2) of
the pressure regulator.
9
Connect the ventilation valve (1) to the red inflation hose (3).
9
Close the ventilation valve!
9
Connect the red inflation hose (3) to the closed inflation valve
(4) and couple to the sealing hose (5).
9
In order to inflate the sealing hose, open the outlet valve on
the pressure regulator by turning counter-clockwise.
9
Now carefully open the inflation valve and inflate the sealing
hose until the damaged point is just sealed.
9
Close the inflation valve.
9
In order to remove the inflation device, close the outlet valve
on the pressure regulator and open the ventilation valve. The
inflation hose, which is now not under pressure, can be un-
coupled from the inflation valve without any difficulty.
9
The connected high pressure leak sealing system is to be con-
tinually monitored.
9
The damaged pipeline can now be switched off without dif-
ficulty and can be repaired after emptying.