Qwik install – Tycon Power RPDC12-9-10 User Manual
Page 2
2
Qwik Install
STEP 0:
Mount the solar panel to the bracket and to the pole. It’s best
to mount so that the solar panel shades the enclosure.
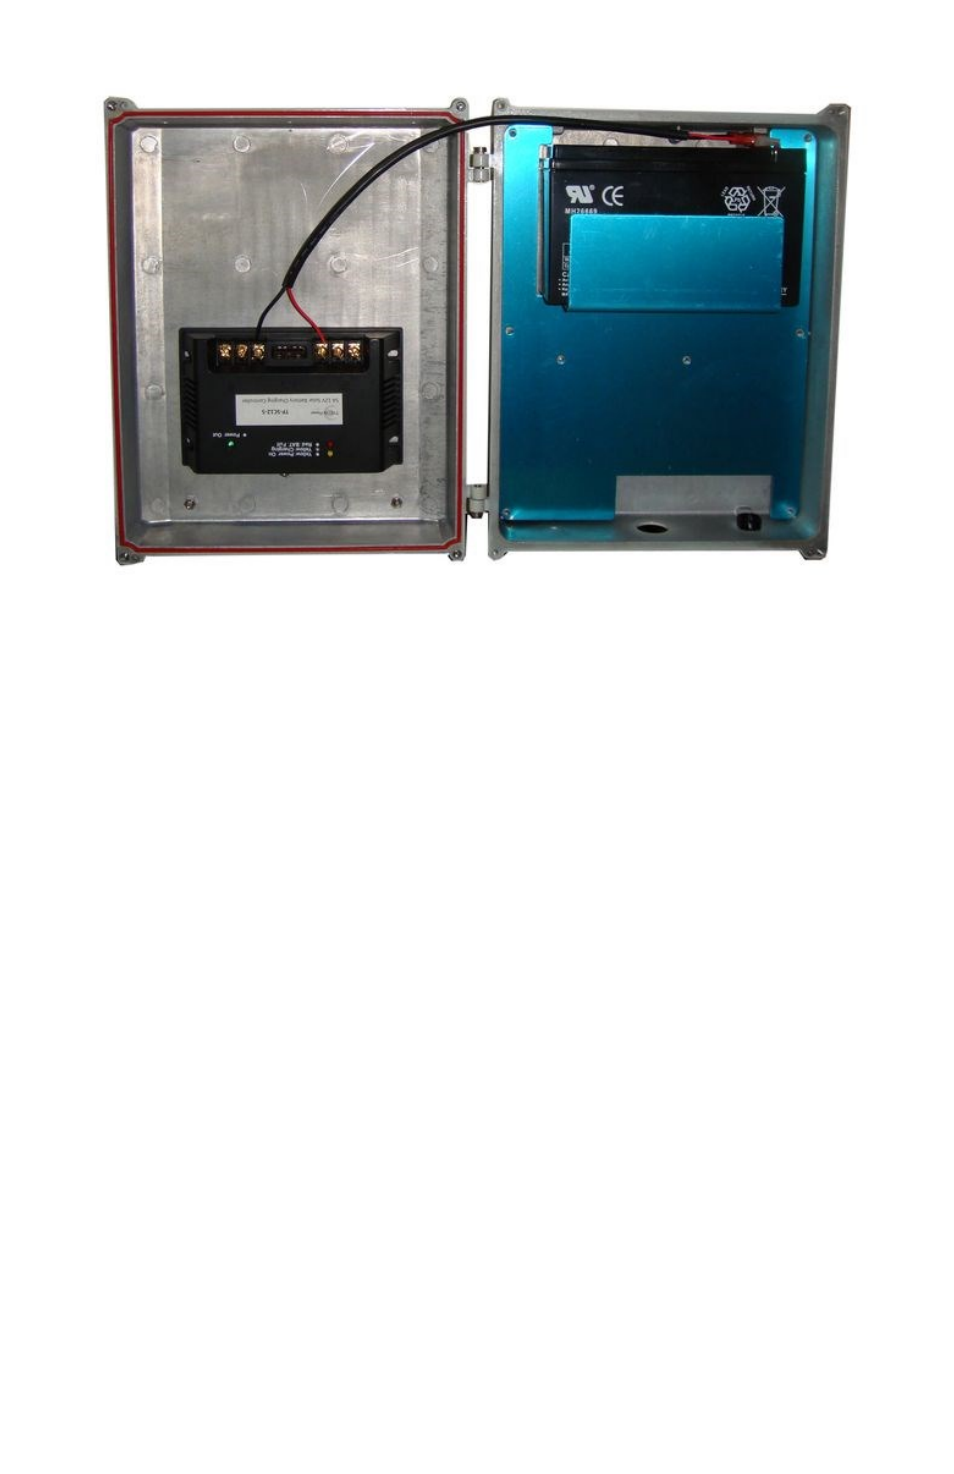
STEP 1:
Connect the Battery to Controller BAT terminals. Be sure to
observe polarity. Black wire connects to battery negative terminal and
BAT(-) terminal on the controller. When a fully charged battery is con-
nected, the Green LOAD LED should light on controller.
STEP 2:
Install battery to enclosure with battery terminals on right. In-
stall metal plate using 8 screws.
STEP 3:
Install Cable Feedthru into center hole in bottom of enclosure.
Feedthru gasket is on outside of enclosure and nut inside. Tighten nut.
OPTION: add a drop of threadlocker to the nut to prevent acci-
dental loosening.
STEP 4:
Install two bracket pieces to the back of enclosure using 4
screws. Bracket can be used for wall mounting or pole mounting.
STEP 5: Wire solar panel to the controller solar inputs. Observe
proper polarity. The solar panel should be facing South if in Northern
Hemisphere. Face North if in southern hemisphere.
STEP 6:
Mount any electronics boards to the metal plate. Connect
your load to the controller LOAD output.
On the bottom of the enclosure there are two double D cutouts for
standard N Female bulkhead connectors which can be used for an ex-
ternal antenna or RF device. Just remove the hole plug to use this cut-
out.