Qwik install – Tycon Power UPS-DC1212-9 User Manual
Page 2
2
Qwik Install
STEP 0:
The UPSPro™ is Solar Ready™ so a solar panel can be add-
ed at any time to provide supplemental or full time power.
STEP 1:
Connect the Battery to Controller BAT terminals. Be sure to
observe polarity. Black wire connects to battery negative terminal and
BAT(-) terminal on the controller. When a fully charged battery is con-
nected, the Green LOA LED should light on controller and power will be
present at the POE output and also the green secondary output on the
back of the controller.
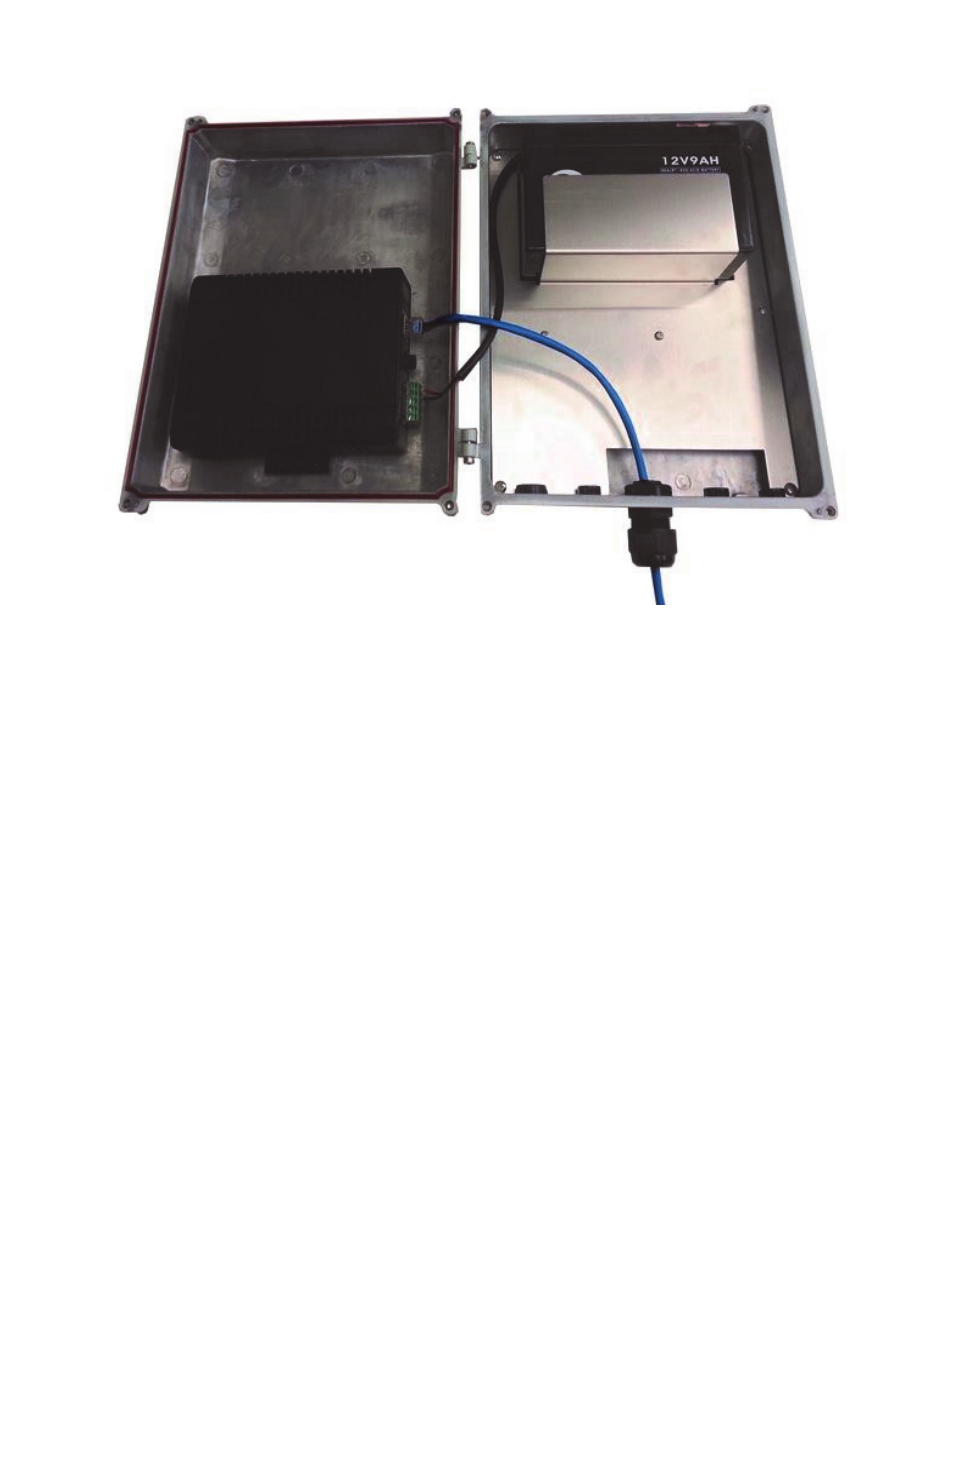
STEP 2:
Install battery to enclosure with battery terminals on right. In-
stall metal plate using 8 screws.
STEP 3:
Install controller to inside cover of housing using Velcro tape.
Be sure that controller doesn’t interfere with battery when cover is
closed. Mount all the way to the left side to give room for CAT5 cables.
STEP 4:
Install Cable Feedthru into center hole in bottom of enclosure.
Feedthru gasket is on outside of enclosure and nut on inside. Tighten
nut.
OPTION: add a drop of threadlocker to the nut to prevent accidental
loosening.
STEP 5:
Install two bracket pieces to the back of enclosure using 4
screws. Bracket can be used for wall mounting or pole mounting.
STEP 6: Install CAT5 cable between POE inserter/Power Supply inside
building and the UPS Pro™ unit controller RJ45 IN connector.