Pressure-plate-glazing – Oldcastle BuildingEnvelope Reliance FRP User Manual
Page 6
5
R E L I A N C E C U R T A I N W A L L I N S T A L L A T I O N M A N U A L
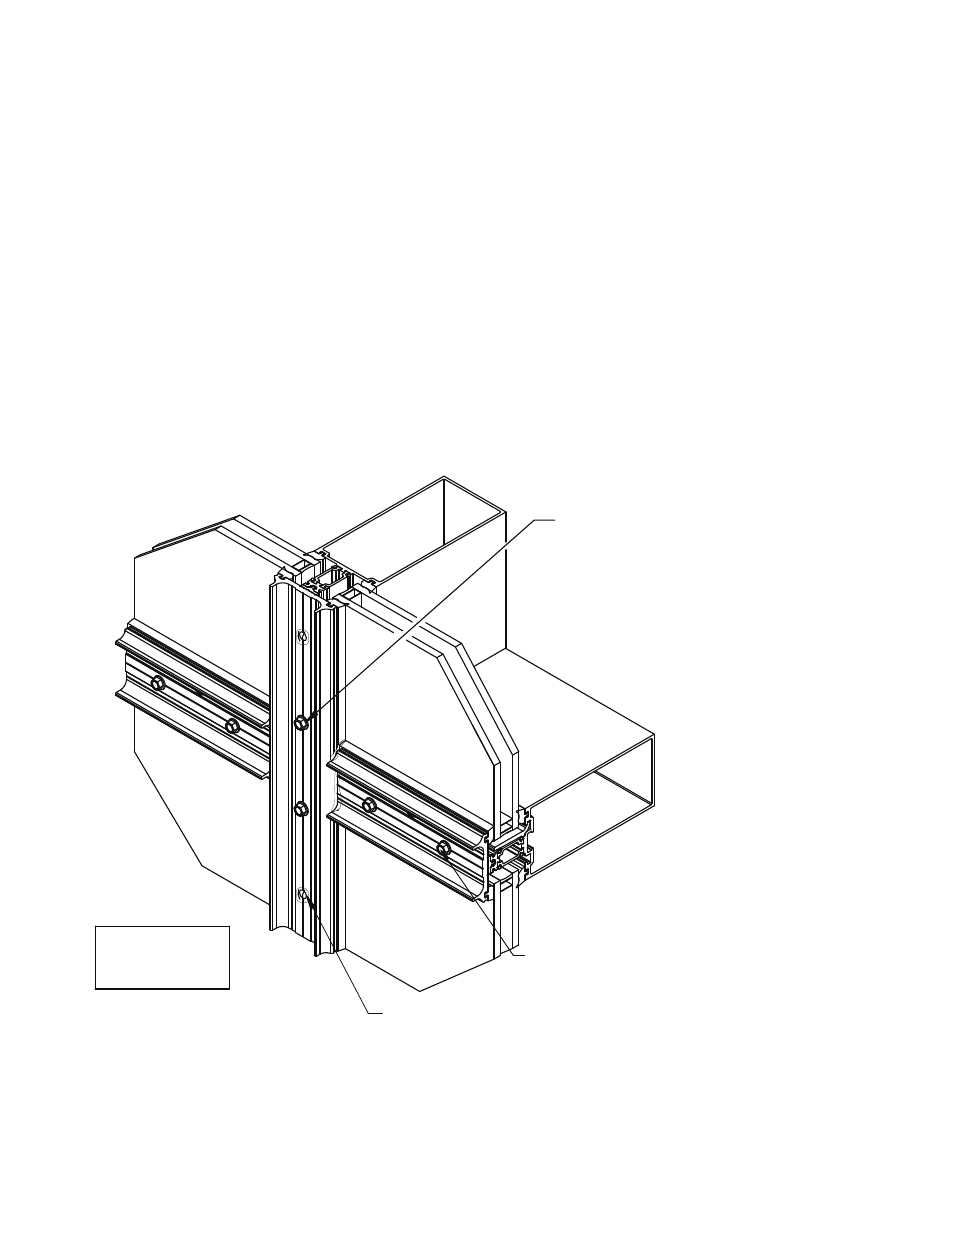
FS-325 Drillflex fastener
Locate at 9" o.c. typical
Torque to 80 in/lbs.
Fastener to be located at
maximum 3" above and below
the center line of each horizontal
Seal all unused
holes in pressure
plate
2.1 When installing AW-162 FRP pressure plate follow all standard installation steps as noted in appropriate
Reliance
™
system installation and glazing manual. Install fasteners located at 12" from each end first. then end
fasteners in pressure plates last, be sure to hold firm pressure on pressure plate while installing the FS-325
fasteners to prevent pressure plate from pulling away from face of system and disengage the thermal isolator.
Torque fasteners to 80 in/lbs. Fasteners will be located at a maximum of 9" on center. Fastener location may vary
based on project specifications, so consult shop drawings for additional information. Additional fasteners should
be added where needed to insure a fastener is located above and below each horizontal.
See FIGURE 3
2.2 All unused holes in vertical and horizontal pressure plates must be sealed.
See FIGURE 3
2.3 Seal horizontal pressure plate to verticals and install face caps. Reference system installation manuals for
more information. See FIGURE 4, page 6.
2.4 Horizontal face caps are to be cut D.L.O. minus 1/16". Drill 5/16" weep hole on bottom of cap at centerline.
See FIGURE 5, page 6.
FIGURE 3
Sealant and Fastener
Locations
FRP PRESSURE PLATE
GLAZING
Install fasteners beginning
with hole at 12" from each
end. Install end fastener last.
See instructions above.
Note: Vertical cover
omitted to show
fastener locations.
™