Mercedes-Benz CLK-Class 2007 Owners Manual User Manual
Page 409
408
Practical hints
Where will I find...?
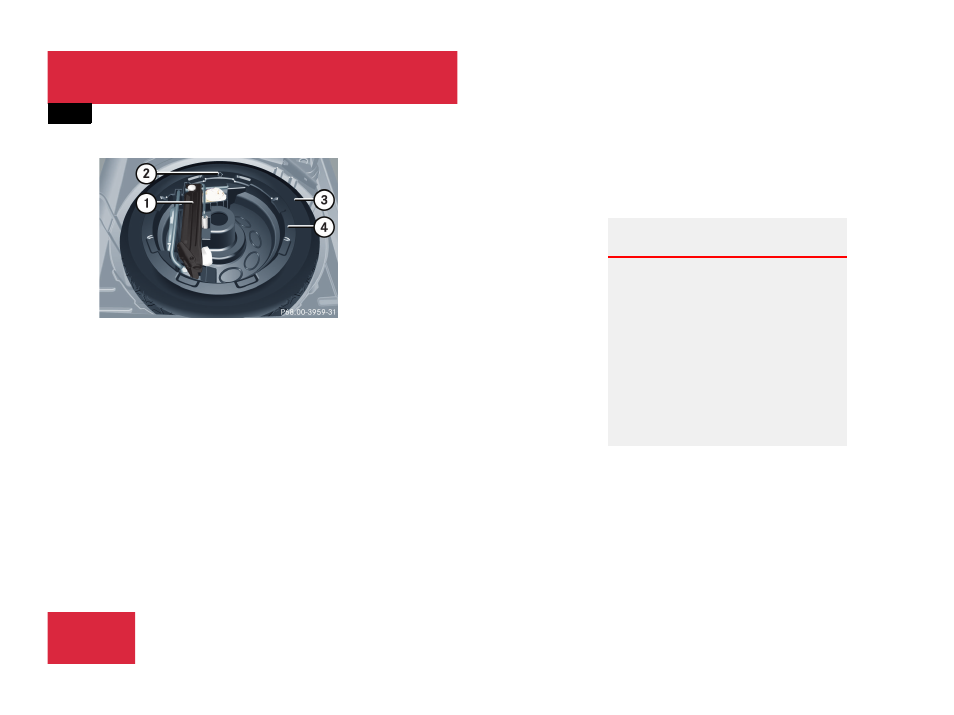
1 Vehicle tool kit
Wheel wrench
Jack
2 Arrow
3 Minispare wheel, Wheel bolts for
Minispare wheel
4 Vehicle tool kit storage well casing
̈
Remove vehicle tool kit storage well
casing
4.
̈
Remove Minispare wheel
3.
Storing the Minispare wheel
̈
Place Minispare wheel
3 in wheel
well.
̈
Place vehicle tool kit storage well
casing
4 over the Minispare wheel.
Make sure arrow
2 on vehicle tool kit
storage well casing
4 points in the
direction of travel.
̈
Place storage well casing (
over the vehicle tool kit storage well
casing
4 and turn the retaining screw
page 405) clockwise as far it will go
to secure the Minispare wheel.
̈
Disengage trunk floor handle in upper
edge of trunk and lower trunk floor cov-
er.
i
Arrow
2 on vehicle tool kit storage well
casing
4 must point in the direction of travel.
Otherwise you cannot place the storage well cas-
ing (
page 405) on top and secure the Minis-
pare wheel with the retaining screw
(
!
To prevent damage, always disengage trunk
floor handle from upper edge of trunk and lower
trunk floor before closing the trunk.
Warning!
G
The dimensions of the Minispare wheel are
different from those of the road wheels. As
a result, the vehicle handling characteristics
change when driving with a Minispare wheel
mounted.
The Minispare wheel should only be used
temporarily, and should be replaced with a
regular road wheel as quickly as possible.
Do not switch off the ESP
®
when a Minis-
pare wheel is mounted.
୴୴