L8_started p02_v5.pdf – Losi LOSB0081 Getting Started Guide User Manual
Page 2
Page 2
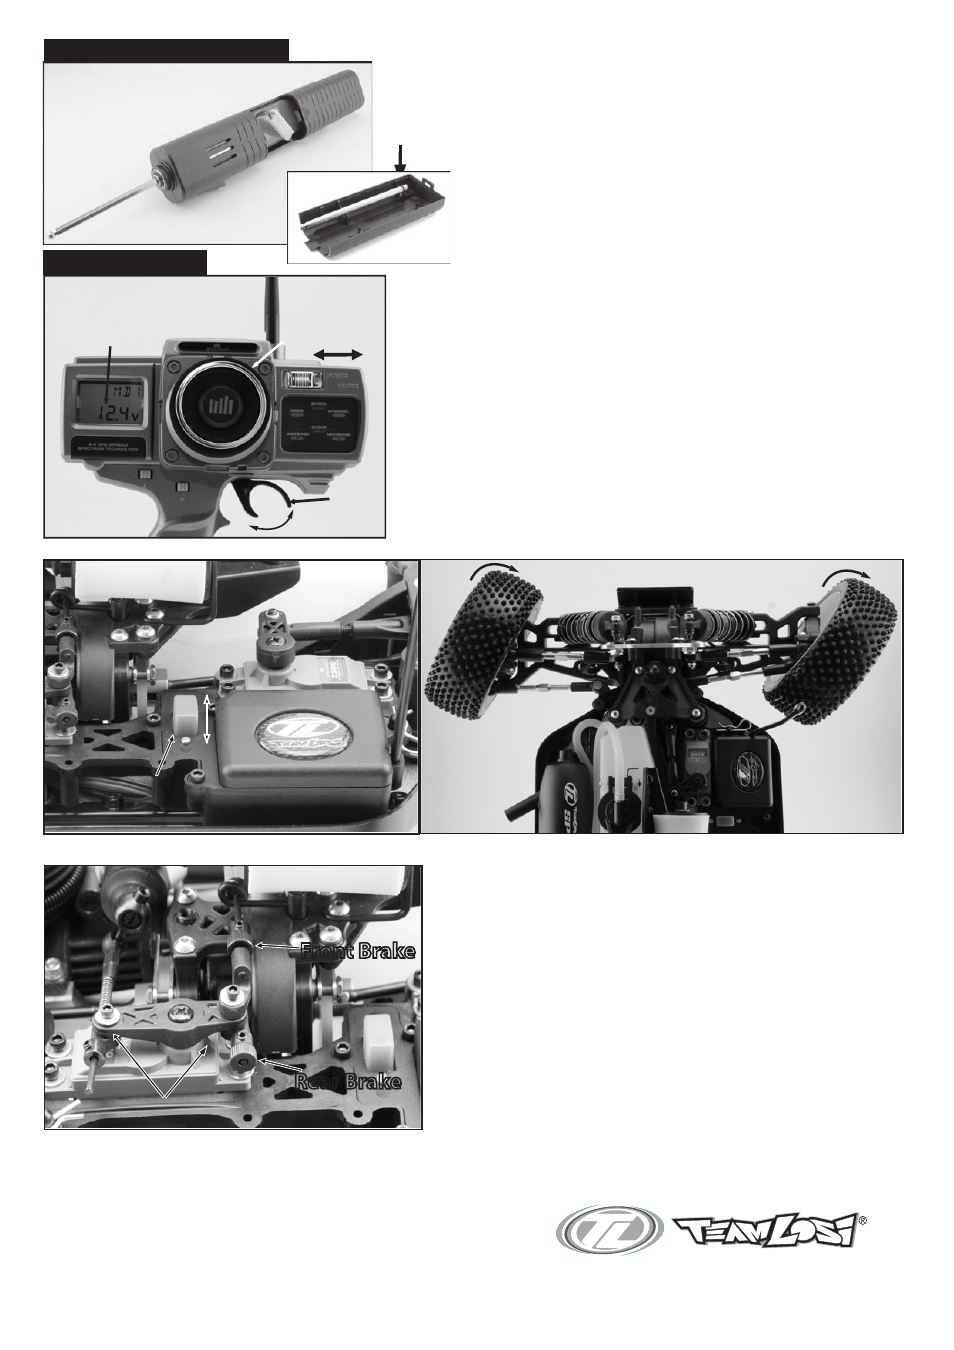
Turn on the transmitter and check for proper voltage, 10 - 12.4
volts (fig. 6). Slide the switch on the radio tray to the ON position
(fig. 7). With the front tires off the ground turn the steering
wheel on the transmitter left to right (fig. 8). The wheels should
turn smoothly and with ease. Also operate the throttle and
brake checking for smooth operation. Do not try to operate your
8IGHT RTR if any of the servos or any part of the radio is not
operating correctly. If the servos operate slowly it is possible the
batteries are low and must be recharged. Never try to operate
your 8IGHT RTR if either the transmitter or receiver batteries are
low.
O-ring
end.
Slide the battery access panel opposite the hand strap back
and remove the cover (fig. 5A). Remove hex starter shaft from
the back side of the cover, (fig. 5B), and press the o-ringed
end into the drive cup. Slide the 6 cell, 7.2 volt, "stick pack"
(not supplied), into the Spin-Start and plug it in. Note that the
plug is made such that it can only be plugged in one way.
Carefully tuck the plug wires under the battery access panel
and slide shut.
Your 8IGHT RTR is equipped with front and rear adjustable
brakes (fig. 9). The upper blue knob adjusts the front brakes
and the lower blue knob adjusts the rear brakes. To adjust the
brakes turn the blue knob counter-clockwise for more brakes,
clockwise for less brakes. These adjustments are for fine
tuning and setting the brake bias. You will perform most of
your brake adjustments from the transmitter. The collar with
the set screw is used to adjust your throttle linkage.
Operations Check
5A
5B
Throttle
Steering
ON
OFF
6
ON/OFF
Switch
7
8
Throttle/Brake
Linkage
9
Spin-Start Battery Installation
Voltage
Rear Brake
Front Brake
ON
OFF