Pyromaster, H33bdvrrn/p, Decorative bay windows – Vermont Casting H33BDVRRN User Manual
Page 30
30
Pyromaster
©
H33BDVRRN/P
10004798
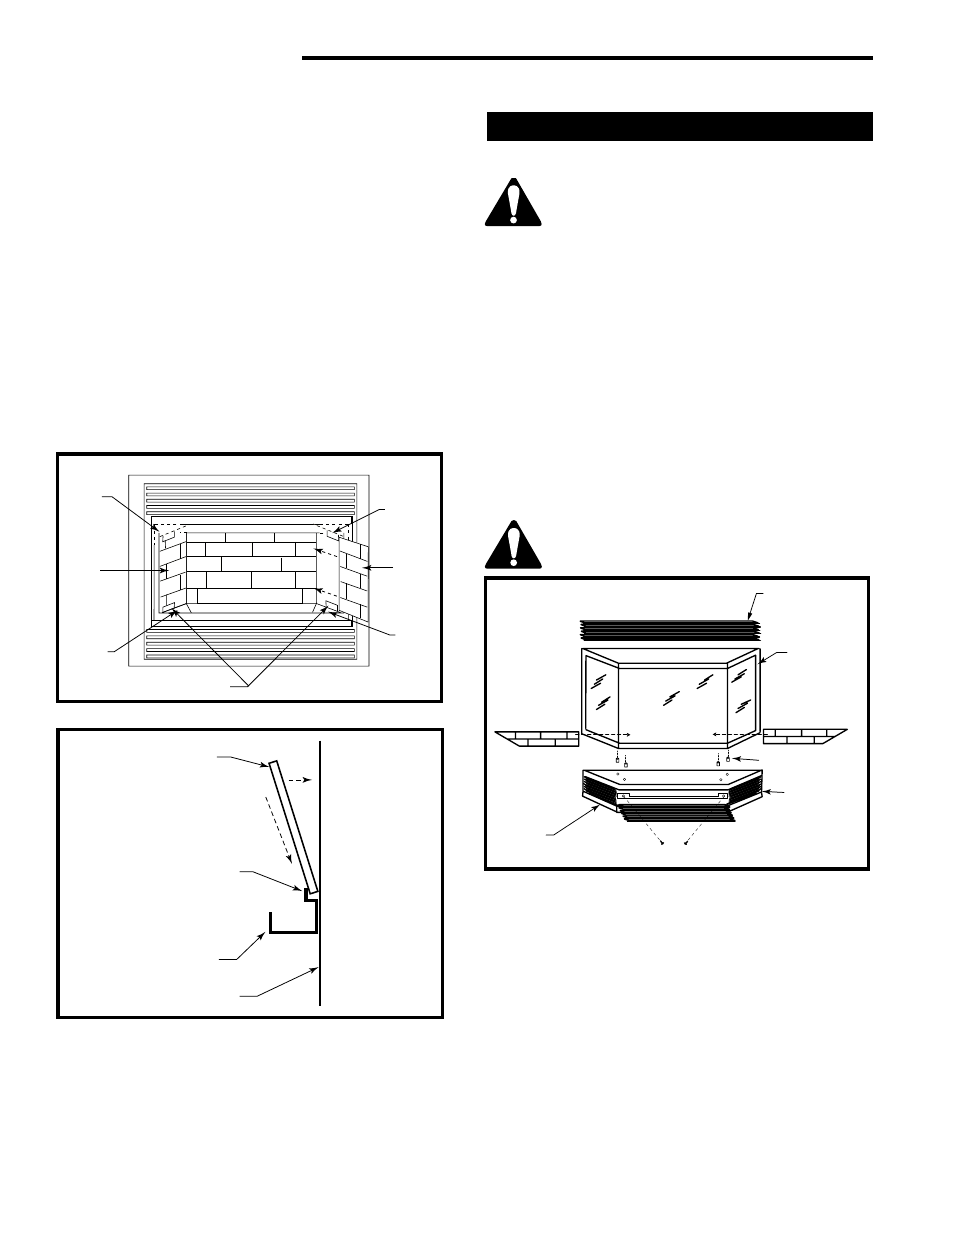
Do not remove the existing window frame
assembly.
Top Louvre
Bay Window
Frame
Bottom
Brass
Trim
Bottom
Louvre
Assemblies
Spacers
Ceramic
Refractory
Screws
FP1195
Fig. 47 Bay window installation.
Ceramic
Refractory
Decorative Bay Windows
4. Lay the angular base panels in place on the floor of
the firebox on either side of the burner housing
assembly.
5. Loosely attach the top adjustable tabs to the studs
located in the top of the firebox toward the front
corners.
6. Place the rear refractory panel in place. Locate the
lower edge of the panel in the ledge formed by the
top of the rear log support bracket.
7. Slide the side refractory panels into place to hold
the rear panel secure. Adjust the top adjustable
tabs to hold the side panel against the firebox wall
and secure the tab. Repeat the procedure on the
other side.
8. Replace the logs and window frame assembly.
For aesthetic purposes we recommend lining up
the horizontal mortar lines.
Fig. 45 Ceramic refractory installation.
Adjustable
Tab
Side
Panel
Floor
Refractory
Panel
Lower Side Supports
Floor
Refractory
Panel
Side
Panel
Adjustable
Tab
FP1193
Rear Refractory Panel
Rear Panel Support Bracket
Rear Log Support
Firebox Back Panel
FP1223
Fig. 46 Install rear refractory panel.
A bay window kit is available for the H33BDVRRN/P.
When fitting the Bay Window Kit the
original window frame assembly must
remain in place. The Bay Window kit is
fitted over the existing front glass.
Installation
1. Remove the upper and lower brass window trims.
2. Remove the existing bottom louvre assembly
complete with the hinges.
3. Remove the top louvre assembly.
4. Assemble the Bay Window Kit according to the
instructions supplied with the kit.
5. Place the 2 pieces of ceramic refractory along the
base of the bay window. (Fig. 47)
6. Hang the Bay Window Assembly over the existing
window frame assembly.
7. Reinstall the upper louvre assembly.