JDC Electronic SA Geos 11 SkywatchLog User Manual
Page 4
- 4 -
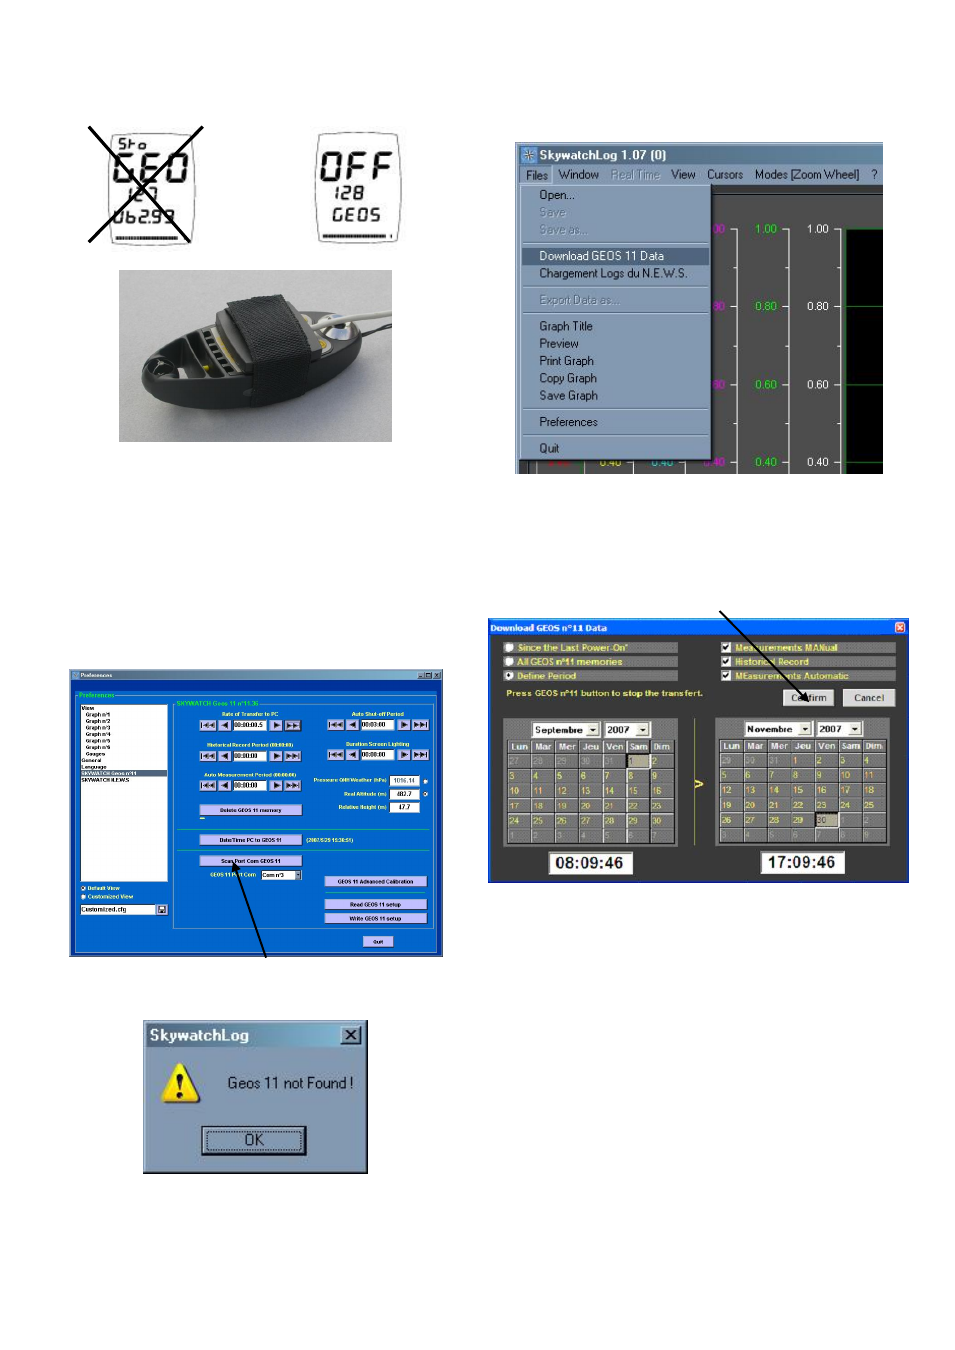
IMPORTANT: The GE
OS cannot be in the “STORAGE”
mode to communicate with the PC. The GEOS can be
in either the off or on mode for downloading and
viewing real time data.
Place the flat disc over the LCD screen, padded side
down and secure with the included strap. Connect the
USB or RS232 connector to your computer.
Start SkywatchLog (default location is START -> ALL
PROGRAMS -> SKYWATCHLOG).
The program starts in the historical graph mode, with
no data showing.
Select FILES -> PREFERENCES.
The Preferences screen is now displayed.
On the left pane (white) select “SKYWATCH GEOS
n°11”. This is the calibration screen for the GEOS.
Click on “Scan Port Com GEOS n°11. The program
then searches for the GEOS. Due to sensitivity, it may
not find the GEOS on the first try. Re-try the Scan Port.
If the GEOS is still not found, remove the disc from the
face of the GEOS, turn the GEOS off, then back on.
Replace the disc onto the GEOS and repeat the scan.
2. DOWNLOAD DATA FROM GEOS N°11
To download all data from the GEOS, select
FILES -> Download GEOS n°11 Data
You can choose to download all the data in the GEOS,
data since the last power-on of the GEOS, or define a
period. This is useful if you are interested in gathering
data during a certain trip, climb or weather event. You
can also choose to download measurements made
manually or automatic data saves. Click “Confirm”.
The data will be downloaded from the GEOS. This will
take some time, depending on how much data is
stored in the GEOS. Please note that the data will NOT
be erased from the GEOS; that is done in the
“Preferences” section of the program. It is not unusual
to take up to an hour to download large amounts of
data.