Hollywood Racks Swing Away (Boomer style) User Manual
Page 5
Loosen the locking knob of the top plate by inserting the key provided. Remove key.
Rotate the knob(s) in a counter-clockwise direction to remove. Remove locking top plate
assembly. Mount the top tube of the bicycle on the lower rubber pad provided. Balance the
bike(s) as much as possible.
Important Note: When carrying one bike, place that bike closest to vehicle. When
installing more than one bike, face the bikes in opposite directions to facilitate saddle &
handlebar clearance. Whenever possible, place bikes of similar top tube diameter on same
pad group to equalize clamping pressure on the top tubes.
Place top plate over bicycles, and replace locking knob in vertical threaded coupling
nut. Thread the locking knob(s) into the coupling nut, and turn in a clockwise direction to
secure bike(s) onto your rack. Tighten locking knob securely, but do not over-tighten. Insert
and turn key. The knob should rotate freely without threading up or down. This indicates that
the bikes have been successfully locked.
Pull the black pin out and turn the anti-sway bar 90 degrees in the channel, then re-
insert the pin. Once the bikes have been secured by the locking top plate(s), place the 86”
straps through both front and rear wheels of each bike and through the eyelet loops on the
anti-sway bar. Thread end of strap through buckle provided at end of strap and tighten. This
will prevent the bikes from swaying as you drive, and MUST BE USED at all times. The
additional strap should be placed around the main boom and the bike wheels to further
stabilize the bikes on the rack. The anti-sway bar may be rotated to the side when the rack is
not in use.
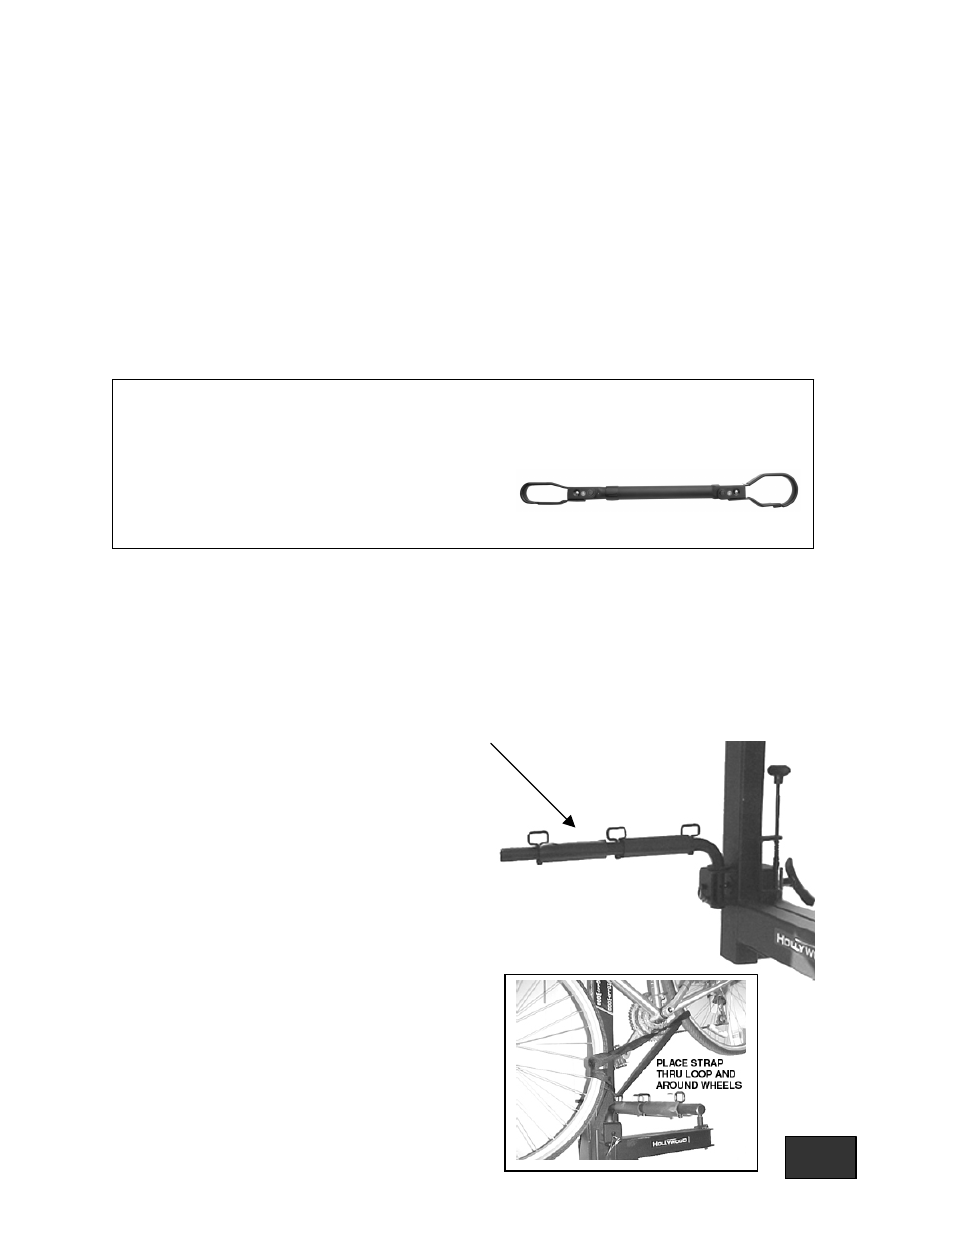
Using Anti-Sway Bar: The anti-sway bar
is the horizontal “arm” at the bottom of the rack that
that prevents the bikes from swaying on the rack
during transport. The bar will “rotate” as the rack
is opened and closed by pulling the small pin at the
base of the brace. There is one tie-down strap
provided for each bike. Simply thread the strap
through the eyelet on the lower brace, then through
both wheels of the bike, and back to the eyelet. Pull
until snug. Since there are three eyelets, there will
be one unused on the Swing Away 2, where as the
third and fourth bikes will share an eyelet on the
Swing Away 4.
If you are carrying a ladies’ frame bicycle, or a mountain bike with a non-standard frame
design configuration (esp. “V,” “X,” and “Y” frame mountain bikes), it may be necessary
to use a Hollywood “Boomer Bar” or similar “replacement top tube” to use the Swing
Away type rack. This accessory
attaches to the stem and the seat post of the
subject bike, and clamps into place between
the upper pivoting plate and the locking top plate
Final Tie-down strap: There is one extra
tie-down strap provided with the rack for
extra holding security. Wrap this strap
around the back of the rack and through
the bikes, then insert strap end through
buckle and tighten securely.
Pg. 5