Hollywood Racks Swing Away (Boomer style) User Manual
Page 3
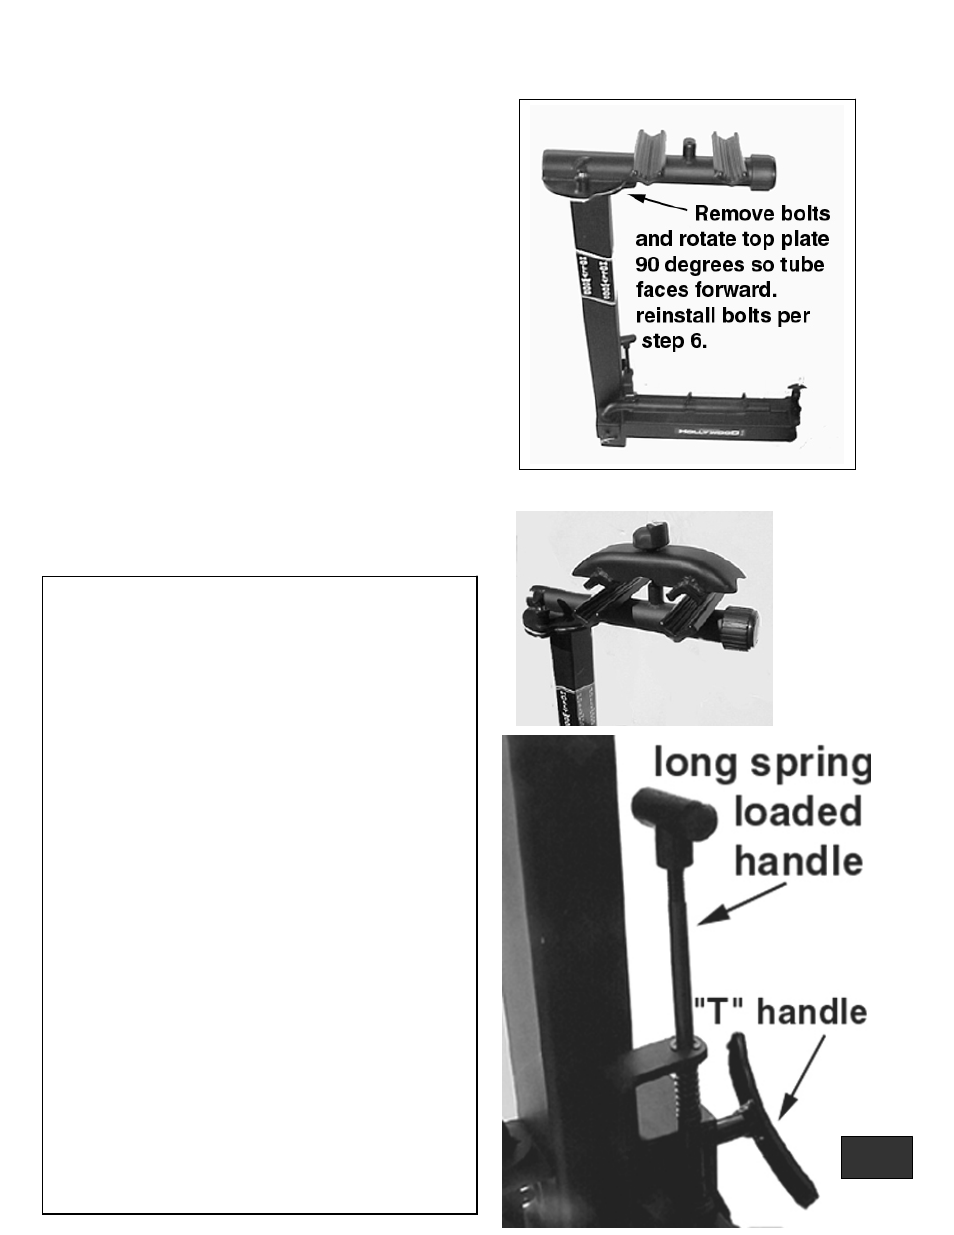
Step 6: Rotate the pivot plate: The pivot plate has been
attached for shipping in a position (facing towards the right
side of the car) that is not functional for rack use. You will
need to loosen and remove the two allen head bolts
(attached to the pivot plate), rotate the upper pivot plate
section 90 degrees (all the way around, so that it faces you ).
Reinstall the bolts and nuts using the 6mm allen wrench
(provided) and an adjustable wrench . The washer must be
placed between the plate & nut before tightening. See fig. 8
Note: These bolts should not be over-tightened! Tighten
them so there is only enough play so that the plates can
rotate about each other when the spring loaded knob is
loosened and pulled up.
Step 7: Attach locking top plate: The final assembly step
is to attach the locking top plate to the upper pivoting plate.
Note that there will be one locking top plate with knob for
the Swing Away 2, and two locking top plates with knobs
for the Swing Away 4. Use the key in the locking knob to
engage the bolt (the threaded section under the knob), and
thread it into the corresponding threaded connector into the
bike holder tube on the pivoting plate. See Fig. 9
Using the “Swing Away” feature to access the
cargo area of your vehicle
To get your Swing Away rack to “Swing Away”
from your vehicle, please use the following procedure.
Note: Never use the Swing Away feature when the
vehicle is moving.
1. Loosen the Large “T” handle bolt located on the
Inside frame. This is a “safety” device and should
always be securely tightened when you are not using
the Swing Away feature, and when your vehicle is in
motion. Do not attempt to remove this “T” handle,
only loosen it until the threads are no longer engaged.
See Fig. 10
2. Pull up on the long spring loaded “T” handle a
about ½” to release the Outside frame, and allow it to
“Swing Away.” The tension on this spring has been
adjusted to be tight to ensure safety, so you may have
to pull up with a small degree of strength.
Note also that when closing the rack, the rod below
this small straight “T” handle will slide up the ramp,
causing it to “lock” into place. The rack can now
“swing” open about 180 degrees. This will be enough
to access your luggage compartment if you don’t have
bikes on the rack.
Fig. 10
Fig. 8
Fig. 9
Pg. 3