Gastroback 41409 Design Mincer Advanced (standard size 8) User Manual
Page 8
causing serious accidents. Do not put any cloth or napkins underneath the appliance to avoid
endangering by fire and electric shocks. Never place the appliance on paper towels or uneven
working areas. The air has to able to circulate.
IMPORTAnT: Always ensure that the plug is not connected to the power outlet before
assembling or disassembling the appliance. Place the mincer on a flat, dry surface such as
a bench top.
Assembling for mincing
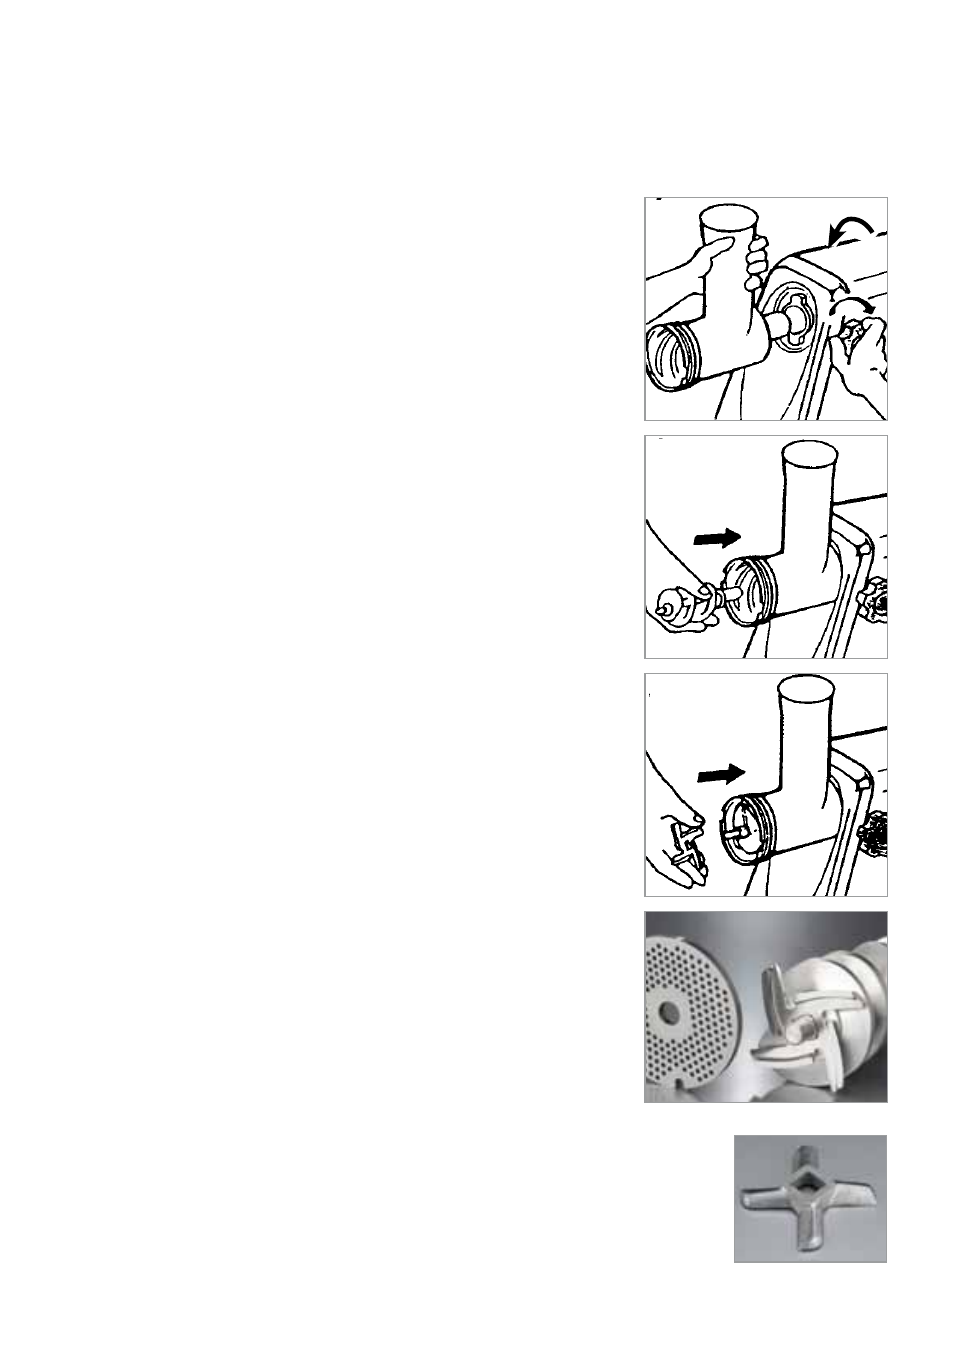
1.
Loosen the screw plug on the right side of the mincer by
turning it counterclockwise until you can fit the slim end of the
worm housing all the way into the opening for the drive shaft.
The opening of the worm housing should be upright (picture A).
The worm housing is correctly mounted when the worm housing
is flush with the motor housing. You should not be able to see
the slim end of the worm housing anymore.
Turn the screw clockwise for tightening. Do not use force and
be careful to not overwind the screw thread.
2.
Insert the worm with the longer, narrower end into the worm
housing and turn slightly until it is securely seated in the worm
housing (picture B). Make sure that the worm is placed completely
in the inside of the worm housing.
If necessary turn the worm a little bit to make it fit. If mounted
correctly only round about 9 mm of the axis of the worm are visible
outside of the worm housing.
3.
Attach the needed accessories (in this case: crossed-blade
knife and grinding disc). Take the crossed-blade knife and
attach it to the worm. The rounded side of the knife must face
the worm when attaching it to the axis of the worm. Ensure the
square opening of the crossed-blade knife fits over the four
cornered shaft of the worm (picture C and D).
ATTENTION: Ensure the rounded side of the knife faces
the worm when assembling it. Otherwise it can
cause damage to the motor.
wARnInG:
The blades of the crossed-blade knife are very
sharp. Pay attention when you handle the crossed-blade knife.
ATTenTIOn: Never use the crossed-blade knife and the grind-
ing disc together with the sausage filling attachment. How to work
with the attachments is explained further in the instructions.
4.
Mount the grinding disc on the knife. The arresting pin must
lock precisely into the corresponding recesses (picture F).
IMPORTAnT: If the tools overlap the edges of the worm housing the
worm is not placed all the way inside the worm housing. Turn the worm a
little bit to make it fit inside but do not use force. If mounted correctly the
grinding disc is visible outside approx. 2 mm of the front of the worm hous-
ing and the axis of the worm is visible outside 5 mm of the grinding disc.
A
B
C
D
rounded side
E
24
25