Series 406x storefront installation instructions – EFCO 406X Series User Manual
Page 18
Series 406X Storefront Installation Instructions
EFCO 2014
Page 18
Section 4B. Sill Flashing Installation (cont.)
Splicing Steps:
1. Verify Sill Flashing - Check to see that sill flashing has been installed correctly. Sill flashing to be spliced every 20’
- 25’. Splice locations are to be located at least 6” from any vertical intermediate mullion.
2. Splice Gap - Make sure a 1/4” gap is left at every sill flashing splice location.
3. Splice Material - Use a silicone type sealant and a strip of WM01 bond breaker tape. Tape is to be 1 7/8” wide by
approximately 7 1/2” long.
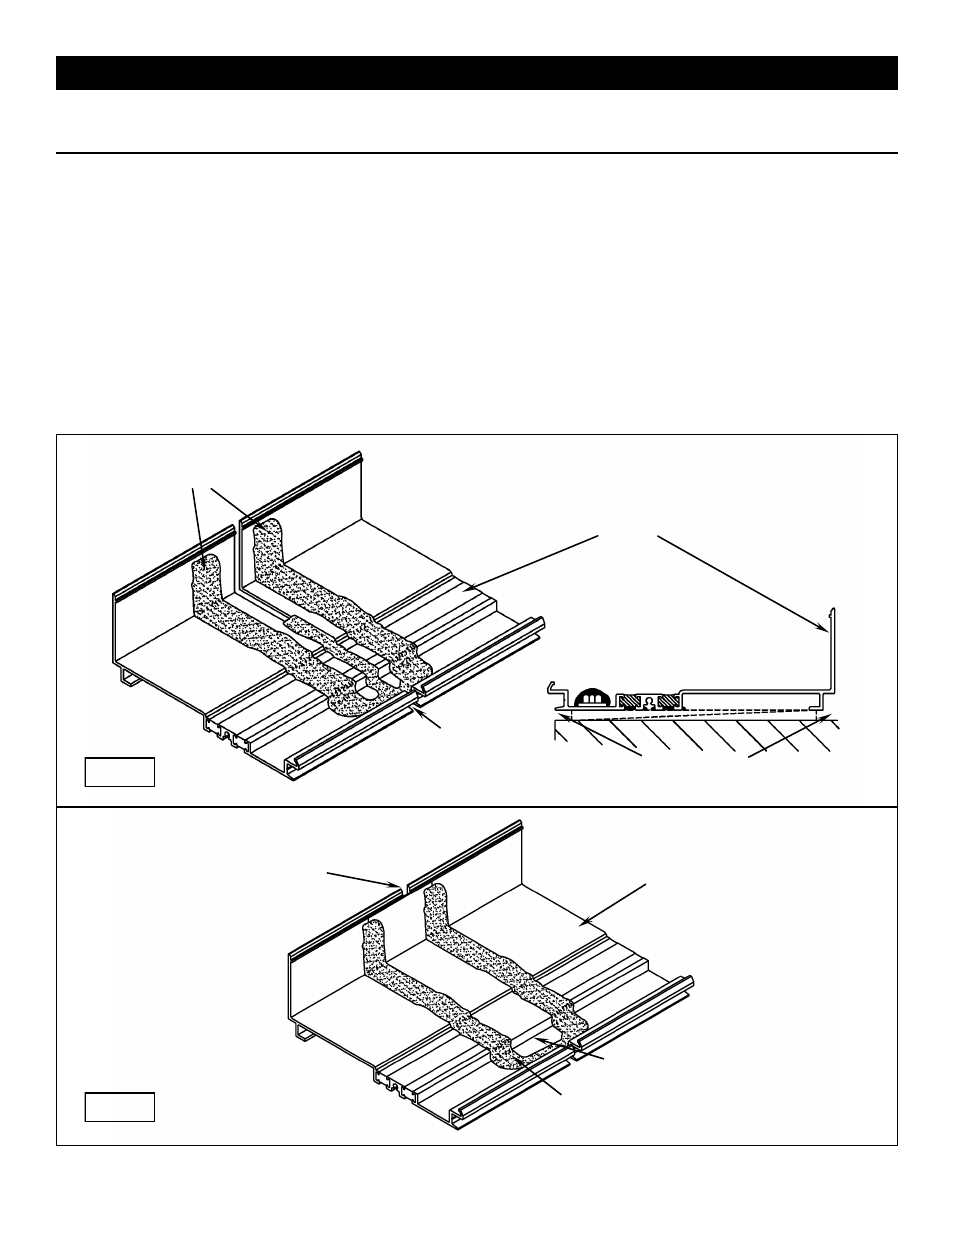
4. Apply silicone to both sides of sill flashing ends and fill 1/4” void between sill flashing ends as shown in Fig. #19.
5. Center bond breaker tape splice over gap and set into sealant. Tool the sealant over the edges of the splice to
create a watertight seal.
6. Interior Gap - After the splice is installed, apply a cosmetic seal to the interior gap vertically up the splice. (Fig. #20)
Notes:
These recommendations are for general erection procedures only.
For actual job conditions, see the details on the shop drawings.
Follow these splice guidelines at sill flashing corners also with one modification. No Gap.
Sealant
21V1 Sill Flashing
Sealant
Apply sealant to
interior gap.
21V1 Sill Flashing
Run sealant in 1/4” gap at
these two points.
Fill 1/4” void
between sill
flashings.
Bond Breaker Tape Splice
Fig. #19
Fig. #20