Series 406x storefront installation instructions – EFCO 406X Series User Manual
Page 15
Series 406X Storefront Installation Instructions
EFCO 2014
Page 15
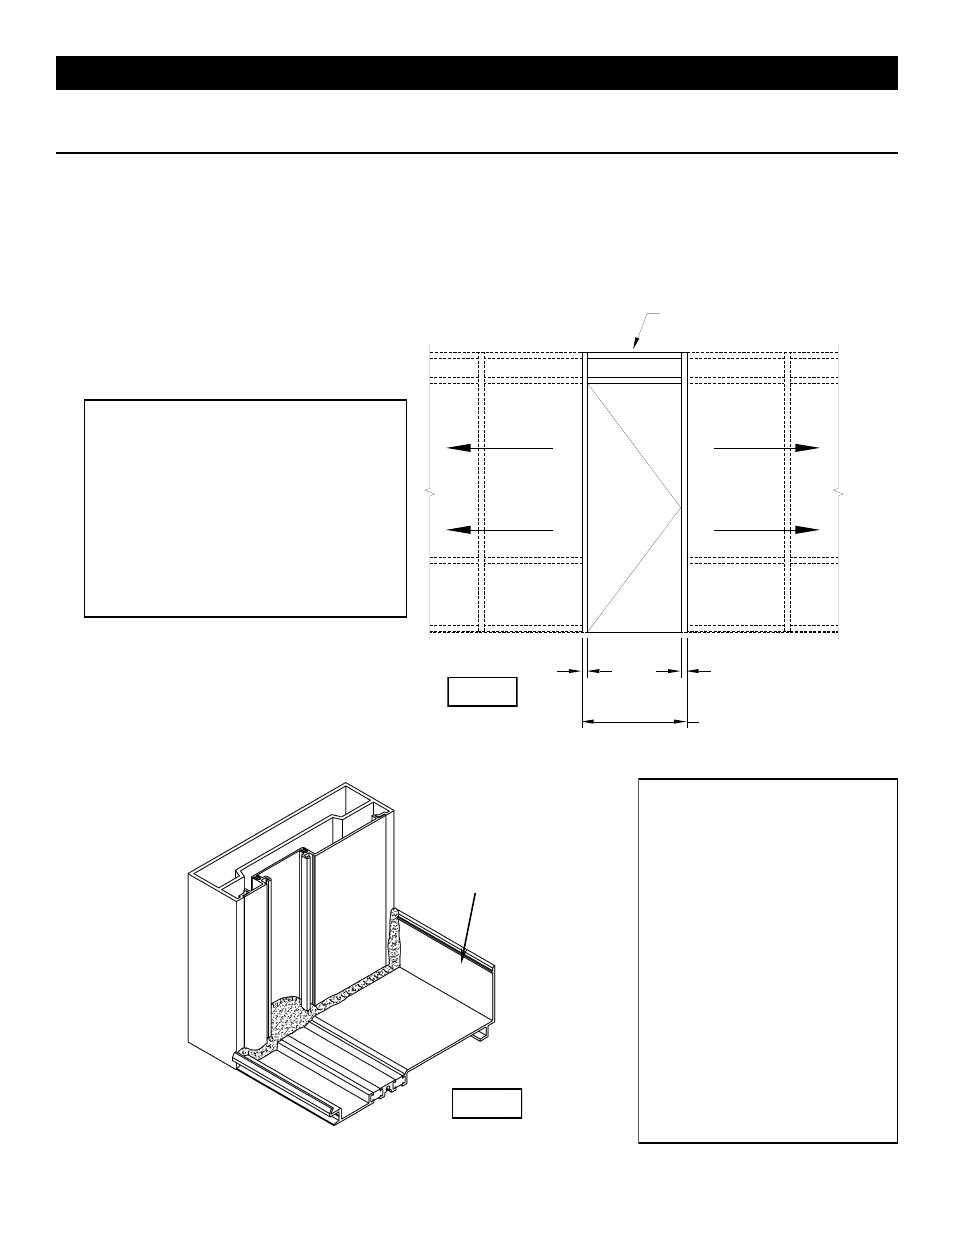
INSTALL 1ST
SUBFRAME CLEARANCE HOLE =
[DOOR OPENING WIDTH + 4"]
2"
2"
Installation Notes:
Correctly locate and install the door
frame into the opening as specified on
the shop drawings or architectural
drawings.
End dams are not required at the door
frame end of a sill flashing.
The sill flashing should butt up tight to
the door frame.
See Fig. #14 for sill flashing to door
frame sealant requirements.
Section 4A. Door Frame Installation
Notes:
If NO door frame is required, proceed to Section 4B.
If a door frame is required, the frame must be installed first. All subsequent ladders must be
installed from the door frame out.
Door frame jambs do not set on sill flashing. Door jambs must run through to the floor condition.
Installation Notes:
Before installing the sill
flashing, apply a bead of
silicone style sealant to the end
of the sill flashing.
After Installation, tool excess
sealant into the joint where sill
flashing and door frame meet.
At glazing pockets build-up
silicone sealant in pocket to the
tallest point of the sill flashing.
Tool the silicone sealant so a
watertight seal is made, and so
that water will be directed out of
the glazing pocket and into the
sill flashing.
See Fig. #14 for sill flashing to
door frame sealant
requirements.
Sill Flashing
Fig. #13
Fig. #14