Series 403x storefront installation instructions – EFCO 403X Series User Manual
Page 21
Series 403X Storefront Installation Instructions
EFCO 2013
Page 21
Section 4B. Sill Flashing Installation
Installation Steps:
1. Chalk Line - Before installing the sill flashing, measure the distance from the exterior of the condition to the desired
location of the exterior of the sill flashing. Do this at both ends of the opening. If the opening is too wide for just two
marks, measure every 15 feet. Snap a chalk line between the marks to align sill flashing.
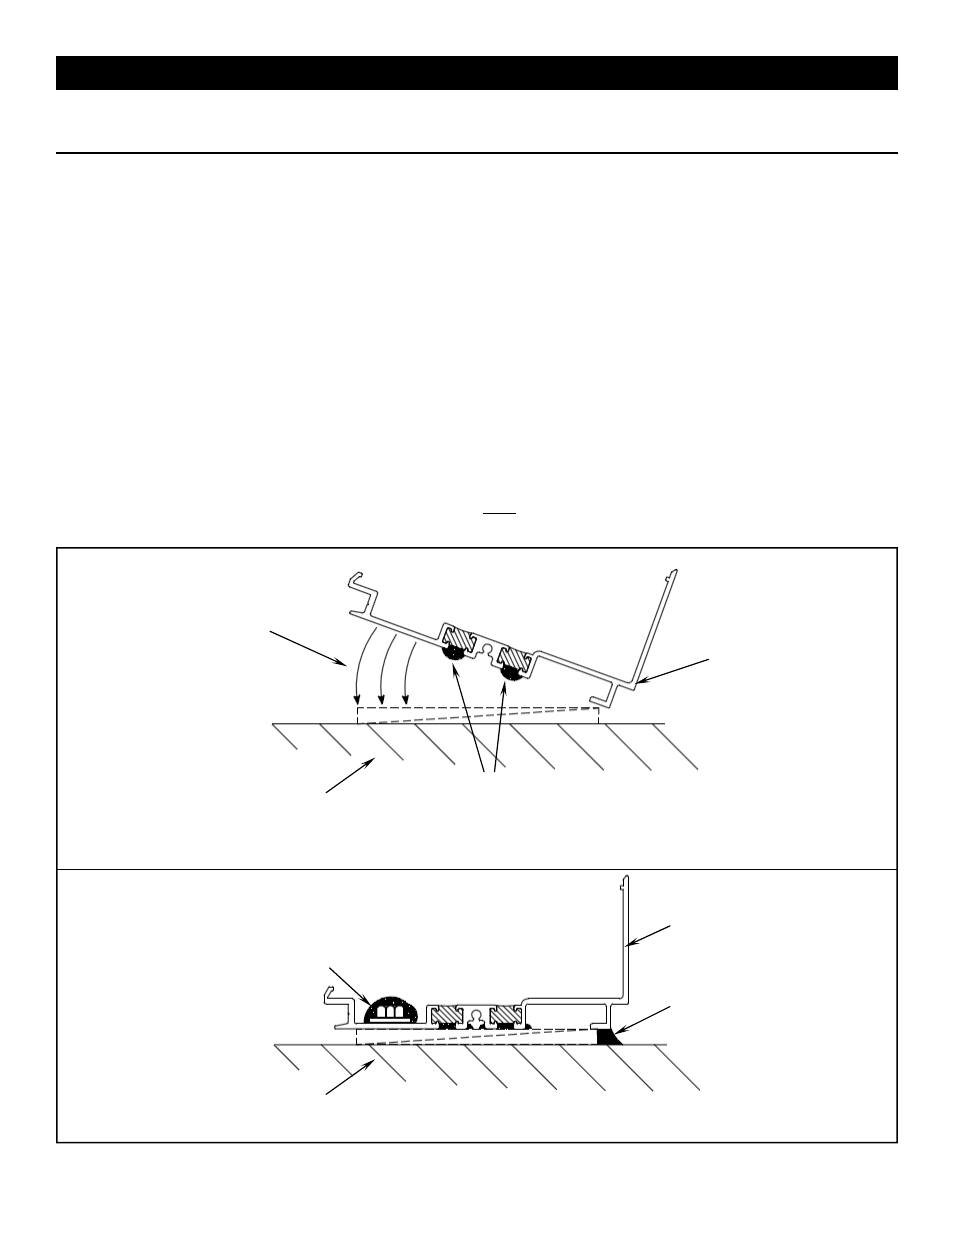
2. Sealant Bed - Apply a silicone style of sealant to the sill flashing as shown in Fig. #21. Place the sill flashing into the
rough opening, and rotate the exterior face down into position also shown in Fig. #21. Apply enough sealant to
ensure a complete seal.
3. Sill Flashing Anchoring - At a minimum, anchor at 6” from each jamb and corner and 16” on center.
4. Sill Flashing Anchor Seal - Sill flashing anchors must be sealed with a silicone type sealant. To ensure a proper
seal, tool the sealant onto the fastener and surrounding metal. This procedure should immediately follow anchor
installation so it is not forgotten. (See Fig. #22)
5. Sill Flashing Perimeter Seal - The interior of the sill flashing should be sealed with a silicone type sealant. Apply the
sealant and tool to ensure a proper seal. Clean off excess sealant. (See Fig. #22)
Notes:
These recommendations are for general erection procedures only.
For actual job conditions, see the details on the shop drawings.
For perimeter anchor type and spacing, refer to approved shop drawings or consult the project design professional.
Anchoring fasteners NOT supplied by EFCO
Fig. #21
Fig. #22
Sealant
21T1 Sill Flashing
Sealant
21T1 Sill Flashing
Setting Condition
Direction of
Installation
Rotation
Setting Condition
Sealant