Series 403x storefront installation instructions – EFCO 403X Series User Manual
Page 20
Series 403X Storefront Installation Instructions
EFCO 2013
Page 20
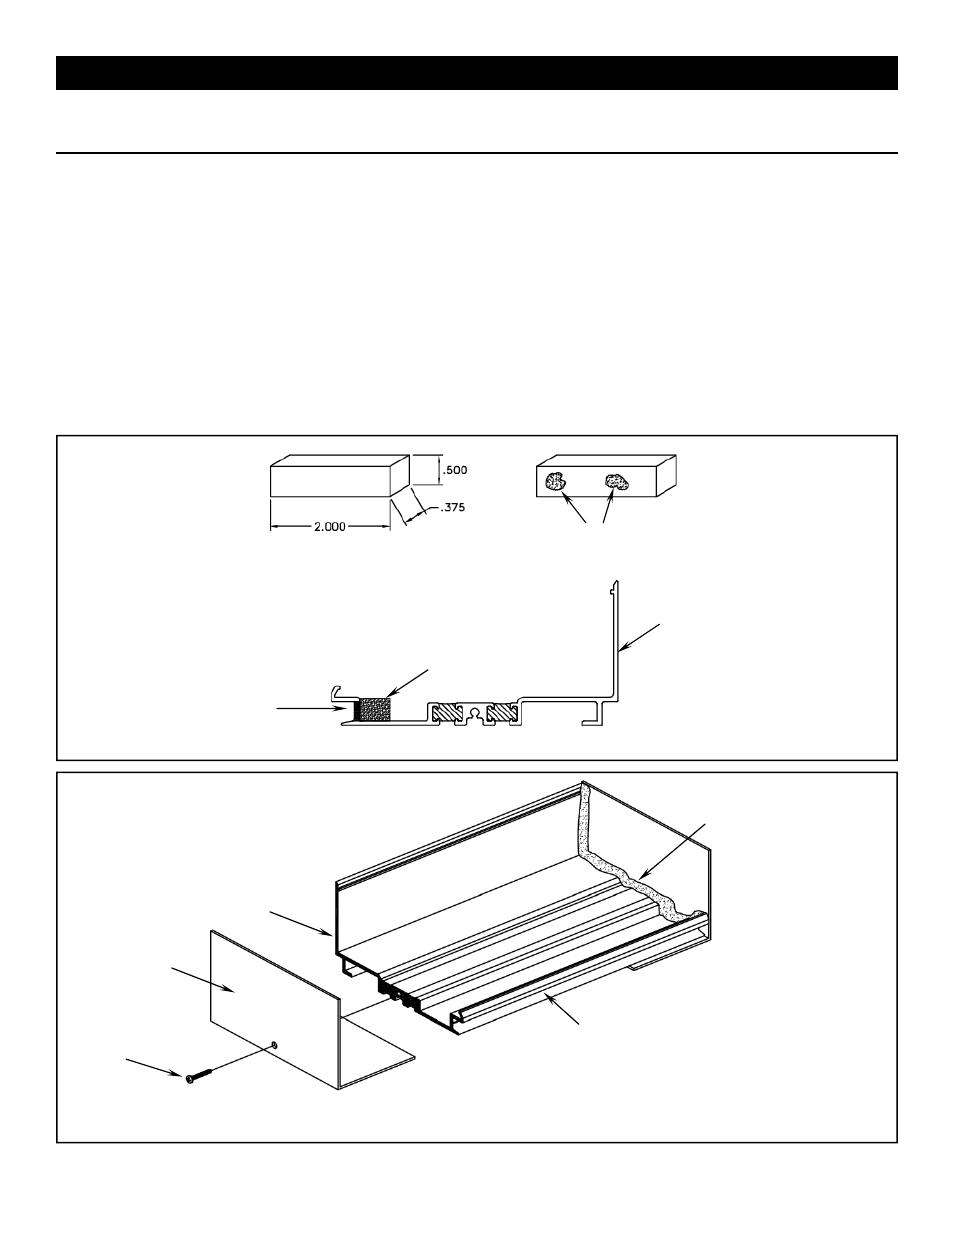
Section 4B. Sill Flashing Fabrication
Fabrication Steps:
1. Cut Length - Measure the rough opening width. Subtract a 1/4” per sill flashing end for the thickness of the water
dam and the fastener head height from the rough opening.
With End Dams: CUT LENGTH = ROUGH OPENING - 1/4” x (# of ends with end dam)
Without End Dams: CUT LENGTH = ROUGH OPENING
2. Weep Holes - Drill a min. 5/16” diameter holes in the sill flashing 6” from each end and at no more than 42” apart.
(Fig. #19)
3. Weep Baffles - Take (1) HCW6 baffle and cut in half to dimensions in Fig. #19. Apply Sealant along bottom and
locate them over the weep holes as shown below.
4. End Dam Installation - Attach the sill flashing with 1 SPZ1 fastener per end dam. Apply a bead of silicone sealant to
the end of the sill flashing prior to attaching the end dam. Tool the sealant at the interior joint of the end dam (see
Fig. 20) to ensure a good watertight seal.
5. Sill Flashing without End Dams - Install sill flashing tight to the condition and then proceed to seal joint between sill
flashing and condition. To ensure a watertight seal use silicone style sealant and tool seal similar to Fig. #20 below.
Fig. #19
Weep Baffle
Fig. #20
Sealant
HCW6
5/16” Dia. Weeps
21T1 Sill Flashing
Sealant
Sealant
21T1 Sill Flashing
SPZ1
KO46
End Dam