Bc a, Jambs, Bumpers – Coral Industries 6000 Bypass with BTB Towel Bar - 26R1-G (Most Common) User Manual
Page 3: Header, Towel bar
26R1-G 5/07
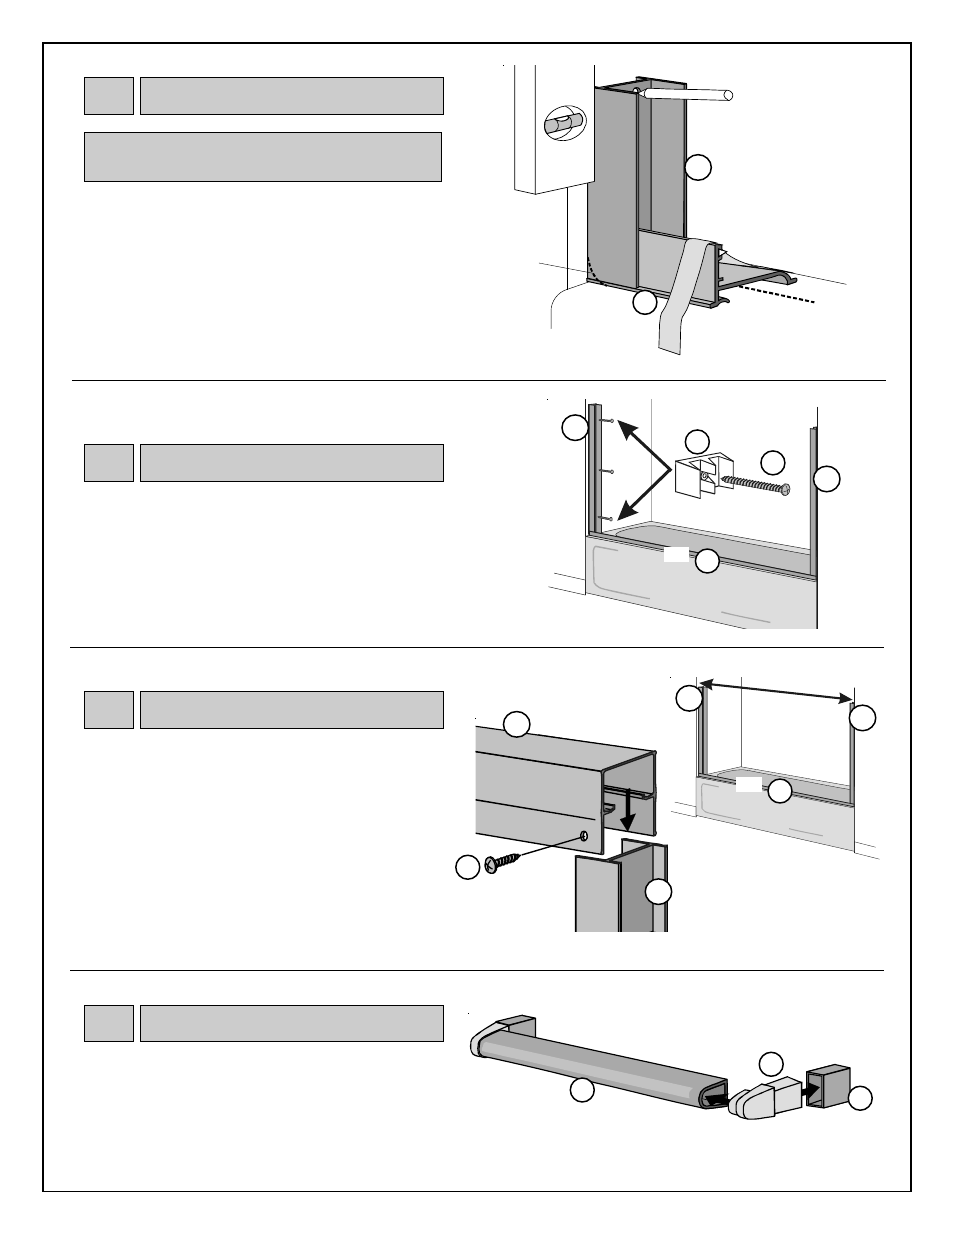
Measure from wall to wall (over the top of both jambs)
and cut header (C) to that measurement.
Lower header over jambs until seated squarely on
jambs.
Secure header to jambs by drilling a 1/8" hole through
header into jambs on inside of tub near walls. Join
using 8A x 3/8" pan head screws (N).
Reposition jambs on tub and mount to wall using
8A x 1 1/4 " pan head screws (I). Top and bottom
holes are mounting positions for bumpers (H).
B
B
Jamb
Jamb
Jamb
B
B
OUTSIDE OF BATH
Jamb
Bumper
H
8A x 1 1/4"
Pan Head
Screw
I
N
INSIDE OF BATH
Jamb
8A x 3/8"
Pan Head
Screw
Header
B
C
A
Sill
Measure
A
Sill
4
Jambs
(B)
/ Bumpers
(H)
5
Header
(C)
B
Sill
Mark wall through
pre-punched
holes and drill.
Level
File to fit
contour of
unit if
needed
Masking
Tape
Jamb
OUTSIDE OF BATH
Centerline
A
Position jamb (B) against wall with short legs toward
wall and notched end of jamb resting on sill. If
necessary for a smooth fit, file back of jambs (short
legs) to fit contour of your unit. Align jambs vertically
using a level and mark wall through prepunched holes.
Repeat procedure with remaining jamb.
Remove jambs from tub and drill where marked using
1/8" drill bit.
When anchors (M) are used holes should be drilled
using 3/16" drill bit. (Use masonry bit for tile.)
3
Jambs
(B)
6
Towel Bar
(D)
D
Towel Bar
Bracket
Towel
Bar
Towel Bar
Bracket
Sleeve
E
E
Slide sleeves from towel bar bracket kit (E) onto towel
bar brackets. Insert towel bar brackets into each end of
towel bar (D).