Installation instructions-09 impala – Code 3 WingMan with TriCore for 2009 Chevy Impala User Manual
Page 3
3
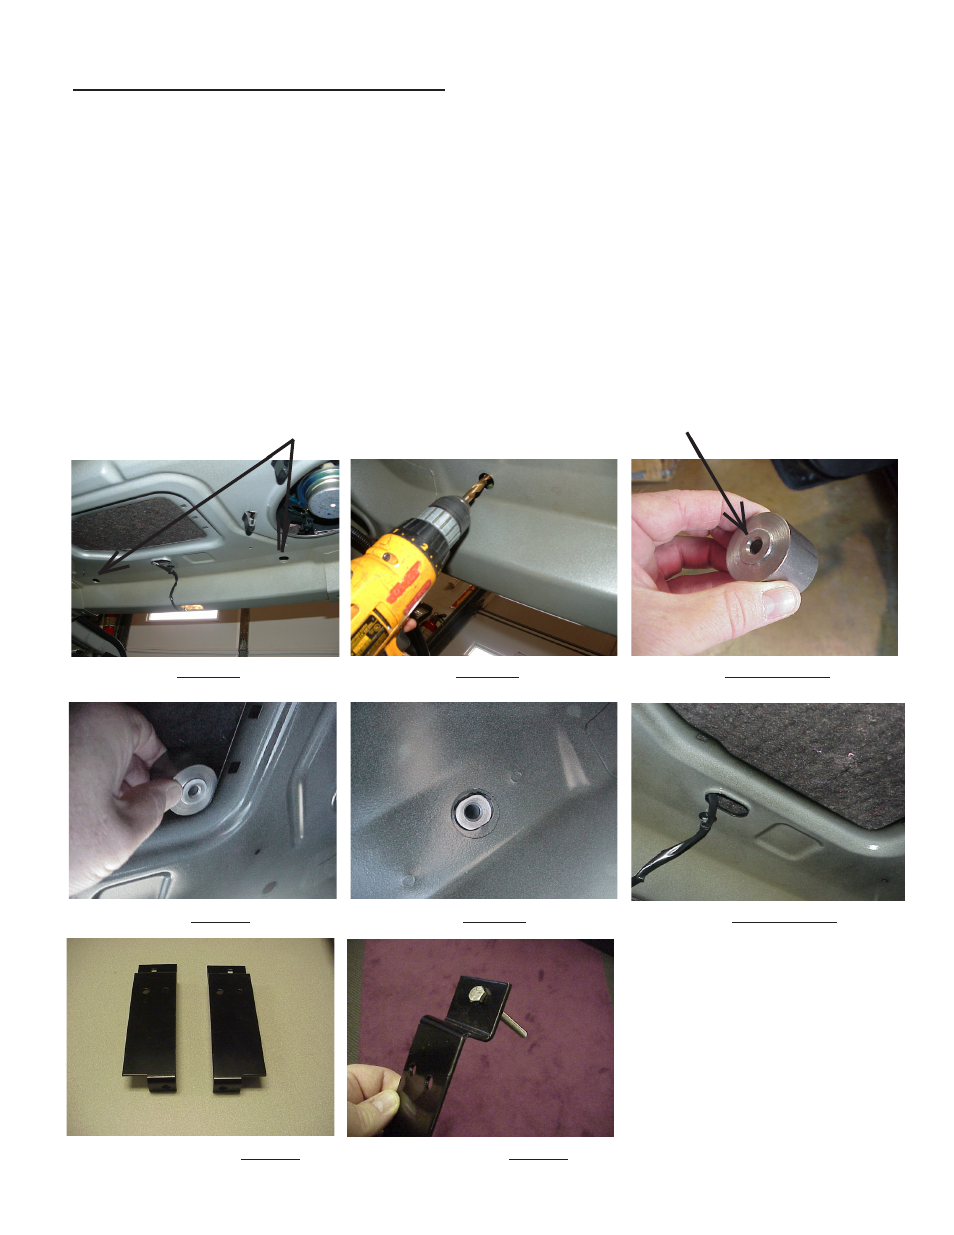
FIGURE 1 FIGURE 2 FIGURE 3
Installation Instructions-09 Impala
Step 1 From inside the trunk of the Impala, locate the two existing holes in the Impala's rear deck (see Figure 1).
Step 2 Center a 3/8" drill in the existing holes as shown in Figure 2 and drill the two mounting holes through the fabric of the rear deck.
Step 3 Locate the two Mounting Bracket Spacer Bushings from the parts bag (the Mounting Bracket Spacer Bushings are shown in Figure
3). Push up on the rear deck fabric and starting in the corner of the open area in the center of the rear deck (as shown in Figure 4), push the
spacer into position with the locating shoulder toward the sheet metal and centered in the existing holes in the Impala's rear deck. When the
Spacer Bushings are installed correctly they will look as shown in Figure 5.
Step 4 Drill a hole for the cable in the desired location through the rear deck with a 3/8" drill. Inside the oblong hole shown in Figure 6 is a good
location for the cable hole or holes. Make sure you don't drill the cable hole too far toward the front of the vehicle.
Step 5 For Mounting Bracket orientation see Figure 7 showing the WingMan™ Mounting Brackets. The Passenger Side Mounting Bracket is
shown on the left side of Figure 7 and the Driver's Side Mounting Bracket is shown on the right side of Figure 7 .
Step 6 Insert the 1/4"-20 X 2 1/2" Hex Head Bolts into the square holes in the Mounting Brackets as shown in Figure 8.
Two Existing Holes
Locating Shoulder
FIGURE 4 FIGURE 5 FIGURE 6
FIGURE 7 FIGURE 8