Warning – Code 3 RMX Lightbar User Manual
Page 7
7
Lamps are extremely hot! Allow to cool completely before attempting to remove. Gloves and
eye protection should be worn when handling halogen lamps as they are pressurized and ac-
cidental breakage can result in fl ying glass.
Lamp Replacement
Remove the lens as outlined above. Next, inspect the lamp and refer below to replace the lamp.
Note: Make sure lamp is cool before attempting to change it. Also, when installing a new lamp, be sure not to touch the glass
with fi ngers. If contact is made, clean the glass with a soft cloth after inspection.
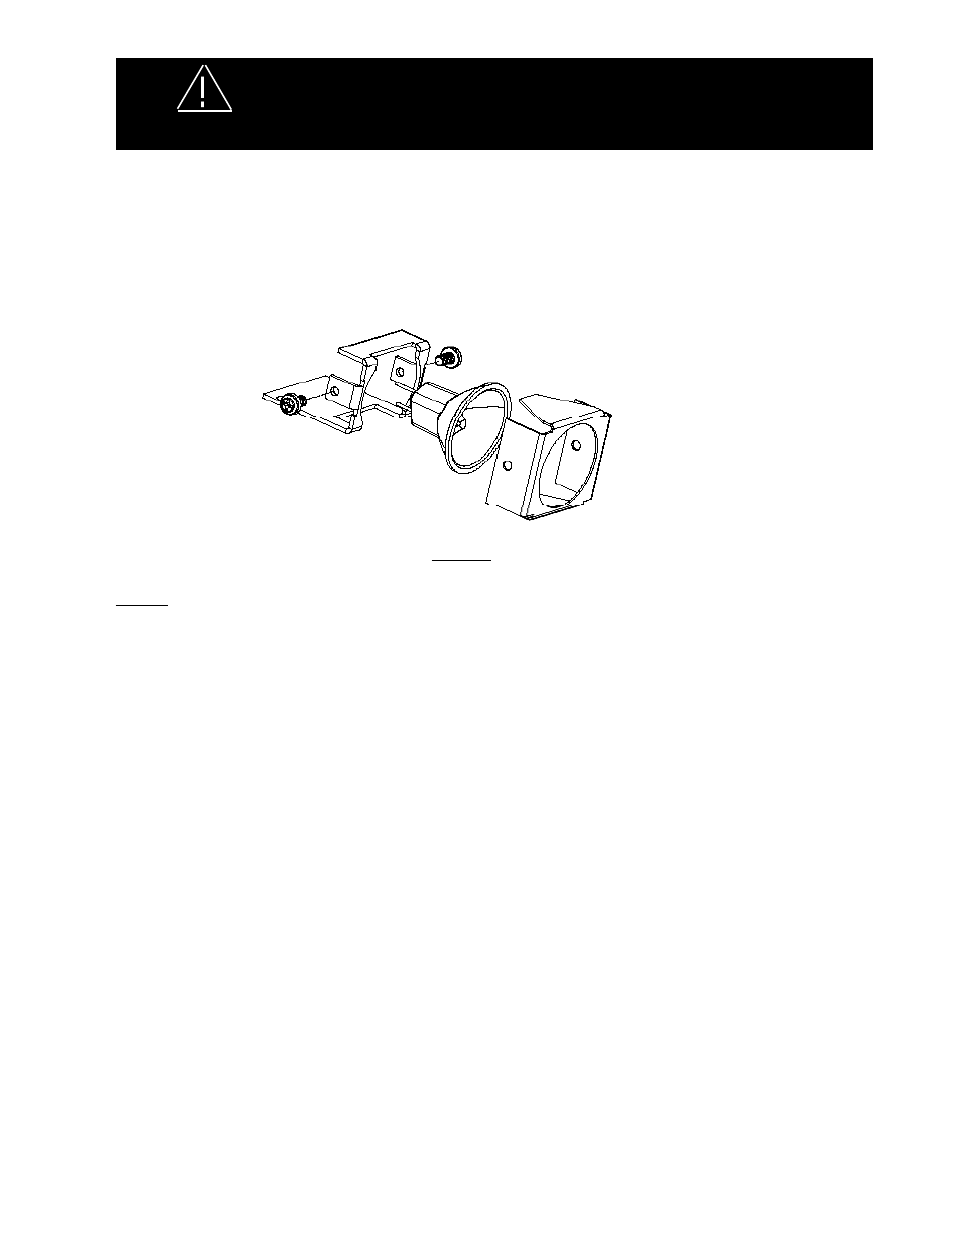
FIGURE 3
MR-11 Style Assembly
For MR-11 style alley light assemblies refer to Figure 3 for lamp replacement. Remove the lamp assembly by
removing the appropriate fasteners, remove fasteners sandwiching MR-11 in bracket, and remove lamp. Replace
the lamp and reassemble.
MR-11 ALLEY ASSEMBLY
H-3 55w Style Assembly
Caution: Extreme care must be taken when removing halogen lamps to prevent burns and bursting of glass.
Step 1 Remove the H-3 55w lighthead from the lightbar by removing the appropriate fasteners and disconnecting the wiring.
Step 2 With the lighthead assembly placed on a work surface with the lighthead up, remove the four screws that attach the lighthead to the
lightbar mounting bracket (See Figure 4). It is not necessary to remove the heat shield.
Step 3 Remove the two lamp mounting screws with a Phillips screwdriver (see Figure 5) and remove the lamp.
Step 4 Replace the lamp and reinstall the two lamp mounting screws making sure to replace and attach the black ground wire with one of the
lamp mounting screws.
Note: Replacement H-3 55 watt lamps are available from Code 3®, Inc. or you may obtain the lamp from your local auto parts store. If
you obtain the lamp from your local auto parts store it may be necessary to change the terminal on the power wire to mate with the
new lamp's terminal (depending on the lamp manufacturer). This terminal (fully insulated 1/4" female quickslide) is also available at
your local auto parts or hardware store.
Step 5 Reinstall the 55w lighthead to the lightbar mounting bracket with the four screws previously removed.
Step 6 Remount the 55w lighthead assembly in the lightbar and reconnect the wiring.
Use the same procedure to replace the lamp for the 55w Dual Lighthead assembly (see Figure 6) .
WARNING!