Code 3 NP 130 NightProbe User Manual
Page 4
4
The Night Probe controller provides a four-position switch for lighthead movement and a push-on/push-off
switch for lamp control. The four-position switch provides either single-speed movement or Pulse Width
Modulated (PWM) acceleration from slowest to fastest speed. This feature is controlled by the position of
the PWM configuration jumper (JP1) which is located inside the Interface Module (see Figure 3). When
the PWM configuration jumper is set to the OFF position depressing and holding the four-position switch in
the LEFT, RIGHT, UP or DOWN direction will cause the Night Probe lighthead to rotate in the appropriate
direction in single speed mode. When the jumper is set to the ON position the Night Probe lighthead will
accelerate from it's slowest speed to full speed over a two second period and stop instantly when the
switch is released. This mode allows for very precise positioning of the light.
The NightProbe 130 RF is designed for use with an optional RF Remote Control.
The NP 130 RF Remote Control comes complete with battery installed. The NP 130 control must be
trained to recognize your remote unit. After installation, apply power to your NP130 system.
Depress and hold the training switch on the receiver located through a hole in the case near
the antenna (see Fig 3). While holding the training switch, depress and release the small
switch (Lamp ON/OFF) on the remote unit. Release the training switch and test the unit.
The RF Remote Control operation is the same as that described for the wired control.
Please note that radio transmitters and other electronic equipment can emit signals
which may interfere with the operation of the RF Remote Control and cause
temporary intermittent operation of the spotlight. This is considered normal. Warning!
CONTROLLER pendant and control module are NOT WATERPROOF
LAMPS ARE EXTREMELY HOT! ALLOW TO COOL COMPLETELY BEFORE ATTEMPT-
ING TO REMOVE. GLOVES AND EYE PROTECTION SHOULD BE WORN WHEN HAN-
DLING HALOGEN LAMPS AS THEY ARE PRESSURIZED AND ACCIDENTAL BREAK-
AGE CAN RESULT IN FLYING GLASS.
W A R N I N G !
!
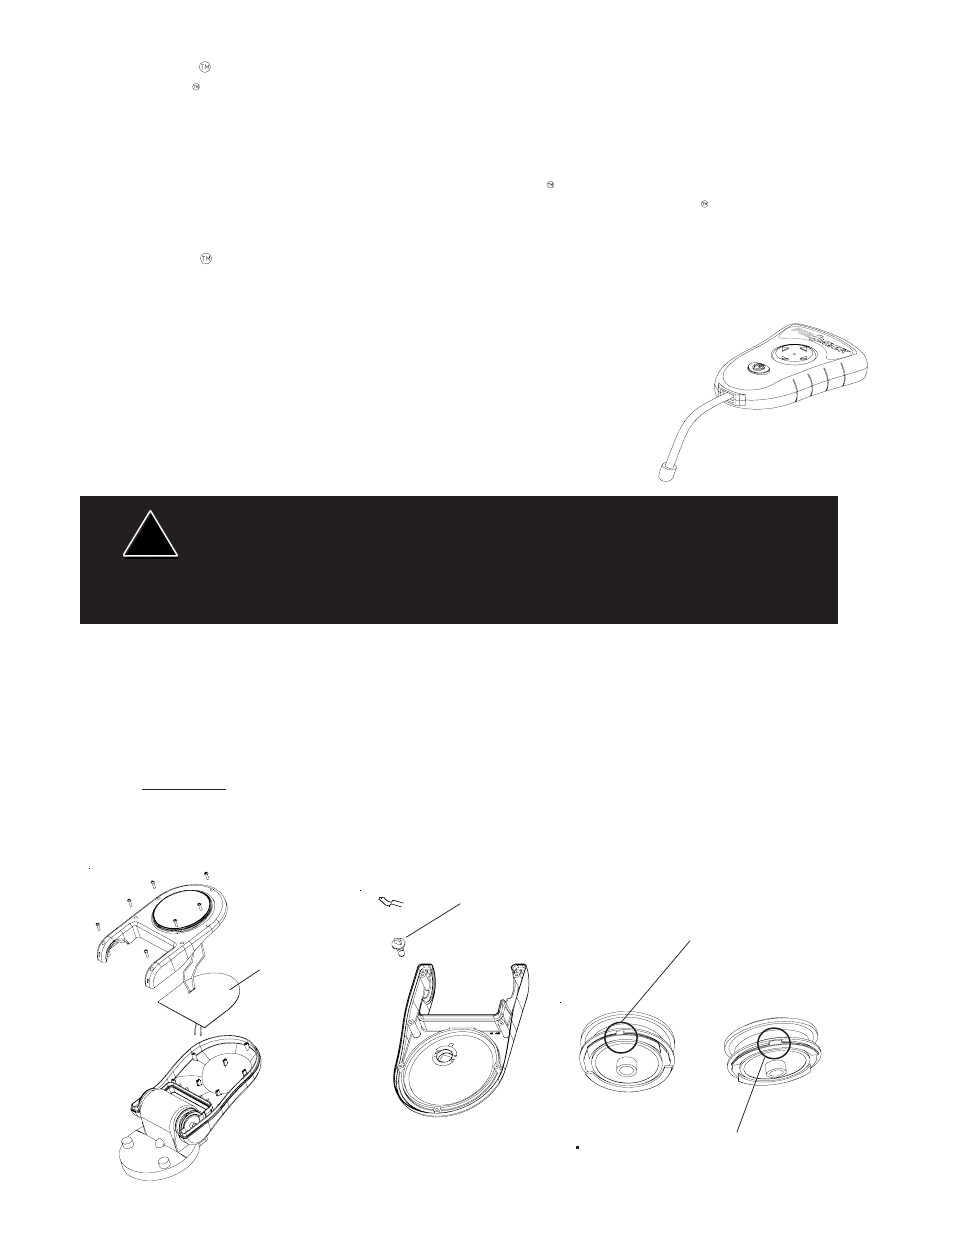
M a i n t e n a n c e
1. Insure that ignition is in off position.
2. Lift spotlight head so that it is facing up as in Figure 5.
3. Remove 7 screws in lower bulb shell and lift it off upper bulb shell.
4. Disconnect power and ground wire from lamp.
5. Replace lamp (H-3 100W) as shown in Figure 6.
6. Connect power and ground to lamp.
(IMPORTANT: FEED POWER AND GROUND WIRE BACK THROUGH
HEAT SHIELD WITH FABRIC SIDE FACING BULB AS SHOWN). Both wires must be positioned
behind the protective heatshield.
7. Be sure to align the upper and lower shells with the proper key on the vertical gear (see Figure 7)
Reattach the 7 screws. Do not overtighten.
Figure 6
Figure 5
Lamp Replacement
O p e r a t i o n
Figure 4
The NightProbe is designed for Electro-mechanical use.
lower shell key
Figure 7
upper shell key
Fabric side
H-3 100 watt lamp