Unpacking & pre-installation, Installation & mounting, N o t e – Code 3 NP 130 NightProbe User Manual
Page 2
2
The use of this or any warning device does not insure that all drivers can or will observe or
react to an emergency warning signal. Never take the right-of-way for granted. It is your
responsibility to be sure you can proceed safely before entering an intersection, driving
against traffic, responding at a high rate of speed, or walking on or around traffic lanes.
The effectiveness of this warning device is highly dependent upon correct mounting and
wiring. Read and follow the manufacturer’s instructions before installing or using this device.
The vehicle operator should insure daily that all features of the device operate correctly. In
use, the vehicle operator should insure the projection of the warning signal is not blocked by
vehicle components (i.e.: open trunks or compartment doors), people, vehicles, or other
obstructions.
This equipment is intended for use by authorized personnel only. It is the user’s responsibil-
ity to understand and obey all laws regarding emergency warning devices. The user should
check all applicable city, state and federal laws and regulations.
Code 3, assumes no liability for any loss resulting from the use of this warning device.
I n t r o d u c t i o n
The NightProbe
, NP 130, product is a remote control spotlight that delivers more signal power and versatility
than any other spotlight product.
Its low profile aerodynamic lines reduce air drag, which results in fuel savings and stability at high speeds.
This product is made of shock-resistant high-temperature engineering thermoplastics and provides a warning
signal that exceeds SAE standards.
The NightProbe and its mounting system is designed to operate in many different locations including on the
driver side, passenger side or center of the automobile hood rear lip.
Unpacking & Pre-installation
Remove the spotlight from the box and examine the unit for transit damage. Refer to parts list to insure that all
parts are present for installation.
Installation & Mounting
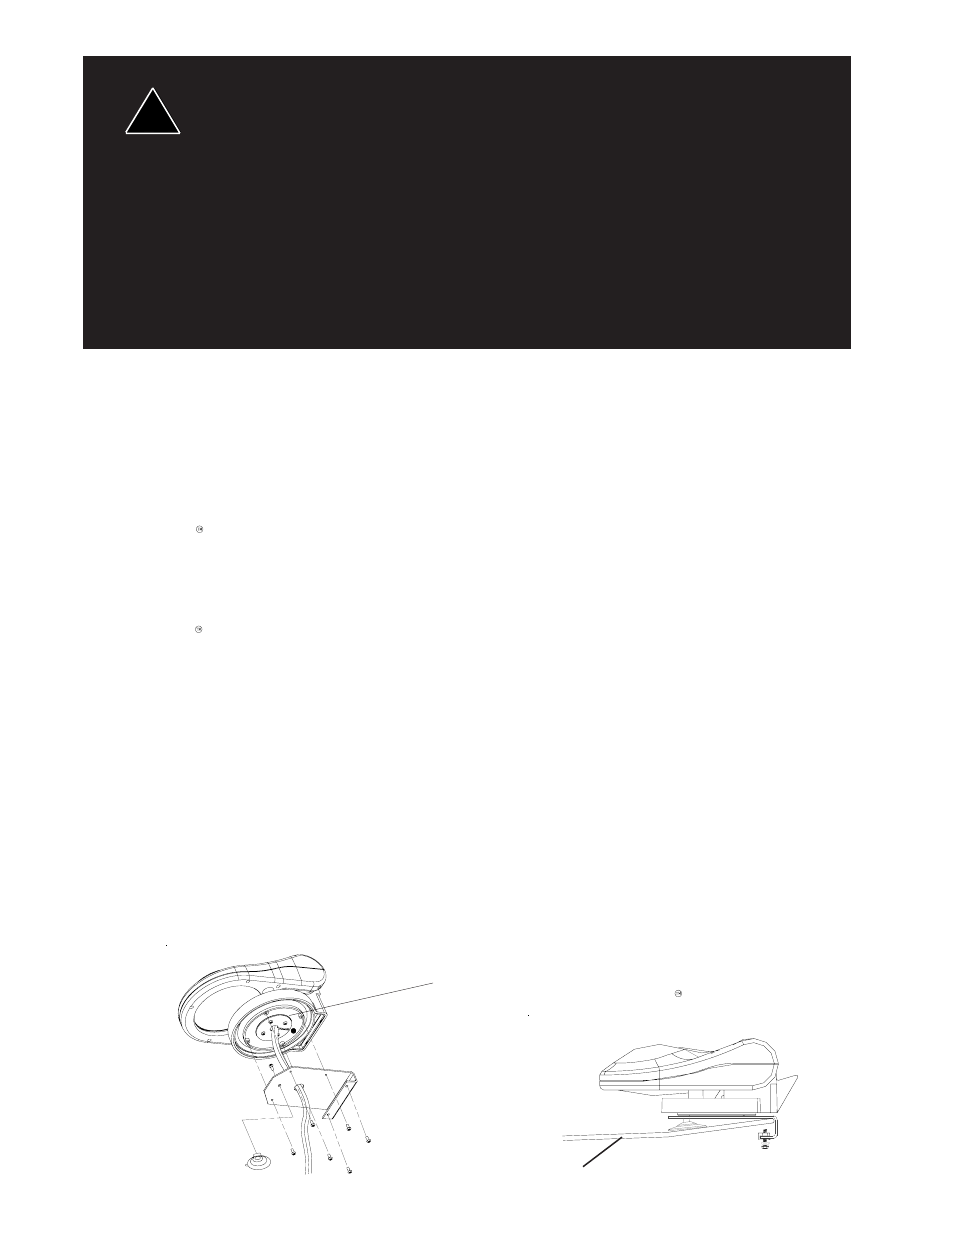
1. Attach suction cup to bottom of mounting bracket with the #10 self tapping screw, do not over tighten.
2. Route the cables from the bottom of the spotlight through the mounting bracket as shown in Figure 1.
3. Attach bracket to spotlight with four round hd phillips 6-20 x 3/8" SS as shown in Figure 1.
4. Choose a location where the spotlight is to be mounted.
5. Lay out the cable to insure that there is an adequate amount to reach the area in which the controller is to
be mounted.
6. Fold wires into pocket of bracket in between the two mounting screws
7. Push bracket over lip of the hood and push down on suction cup
8. Tighten screws under hood until bracket is snug.
W A R N I N G !
!
V e h i c l e
Figure 1
For proper bracket alignment make sure that
the mark is to rear of NightProbe as shown.
This device complies with Part 15 of the FCC Rules. Operation is subject to the following two
conditions: (1) This device may not cause harmful interference, and (2) this device must accept any
interference received, including interference that may cause undesired operation.
The user is cautioned that changes or modifications not expressly approved by CODE 3 for compliance
could void the user's authority to operate this equipment.
N o t e :