Wiring, Installation and mounting, Warning – Code 3 LED Hide-A-Blast User Manual
Page 4
1. First, carefully plan the installation so that the HIDE-A-BLAST LED Lights will not interfere with the mount-
ing or operation of the vehicle's existing light fixtures. Using a 1 inch hole saw, cut a hole in the vehicle's light
fixture in a location that will allow the HIDE-A-BLAST LED light to be mounted in such a way that it will provide
maximum light inside the reflector.
Wiring
1. Install the LED light heads in the desired locations.
2. Route the cables between the light heads and the control switch
panel. Make sure the cable is secure along the chosen routing inside
the vehicle to prevent damage by chafing or binding. Be sure to keep
the cables away from engine hot spots.
3. Secure the cables and the HIDE-A-BLAST flasher module using
plastic wire ties.
4. For synchronized operation of multiple HIDE-A-BLAST lights the
yellow wires from each unit's cable must be connected together.
Insulate this connection using an insulated butt splice to prevent
accidental contact with power or ground.
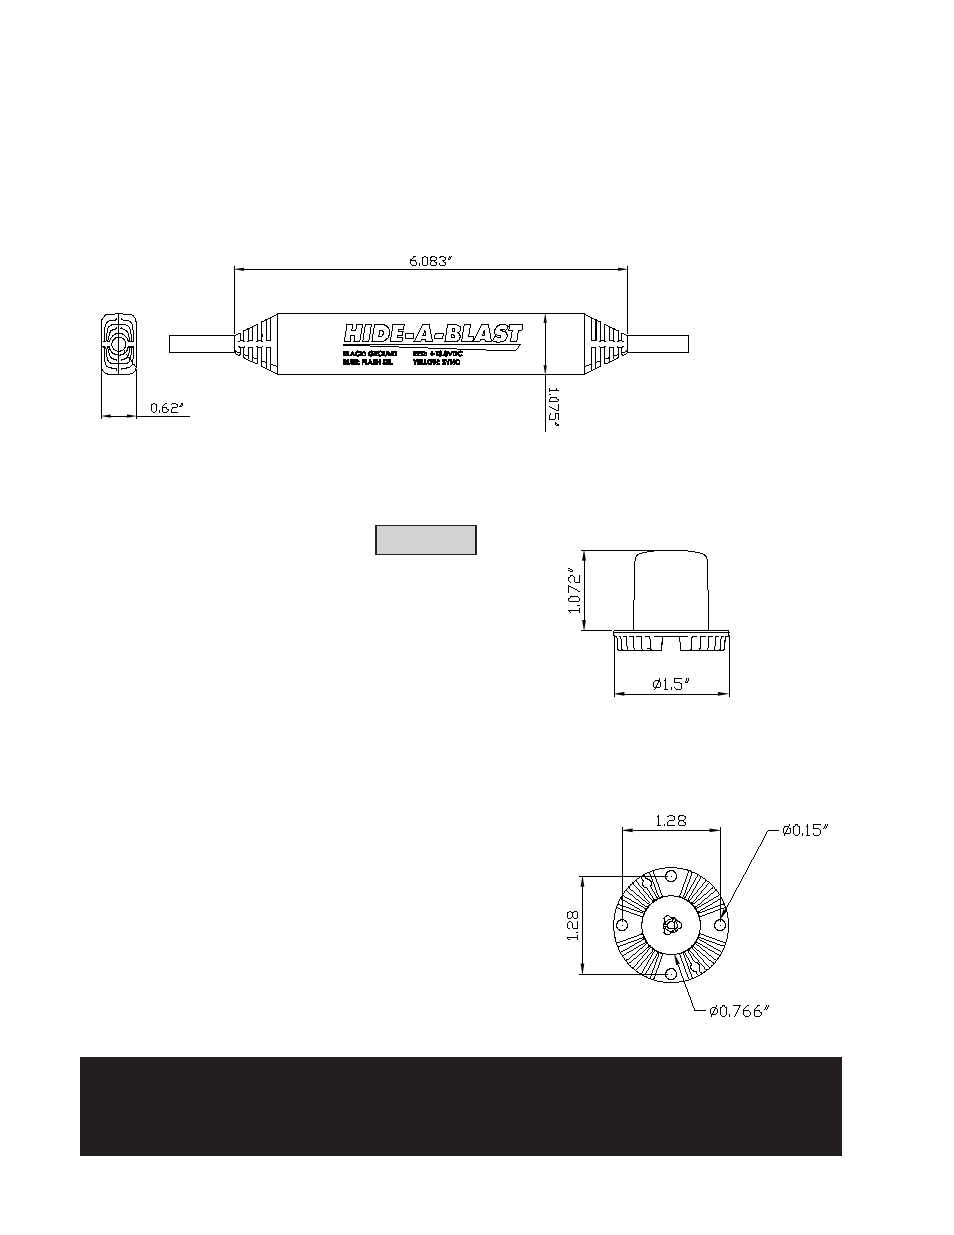
Connections:
Red
+Power (10-30VDC)
Black Ground
Yellow Synchronization
Blue Pattern Selection
FIgURE A
4
Installation and Mounting
The HB Series LED Light components are water resistant but NOT waterproof and should
be located in an area protected from the weather and water.
!
WARNING!