Ii. control box harness connectors, Iii. control box mounting locations – BoonDocker YAMAHA: Non-turbo Control Box Phazer User Manual
Page 2
BoonDocker – 2379 Heyrend Way Idaho Falls, Idaho 83402 – 208-542-4411 / 877-522-7805
www.boondockers.com – email:
– fax: 208-524-7381
Revised 02-14-07
Page 2 of 17
II. Control Box Harness Connectors
There are two 10-pin connectors at the end of the black cable on the control box. One is for the EFI Harness and the other
is for the optional Nitrous Harness. These two connectors are keyed (male/female) so only the correct harness will fit into
the correct plug-in.
Note: Use Dielectric Grease on all plug
connections to help prevent corrosion on the
terminals.
The EFI harness plugs into the stock sled’s injector
connectors as follows:
1. Disconnect the stock harness connector from
each fuel injector. Note which connector goes
to which injector.
2. Determine where the control box will be
mounted and how the harness will be routed.
Route the harness so the injector connectors end
up near the sled’s fuel injectors.
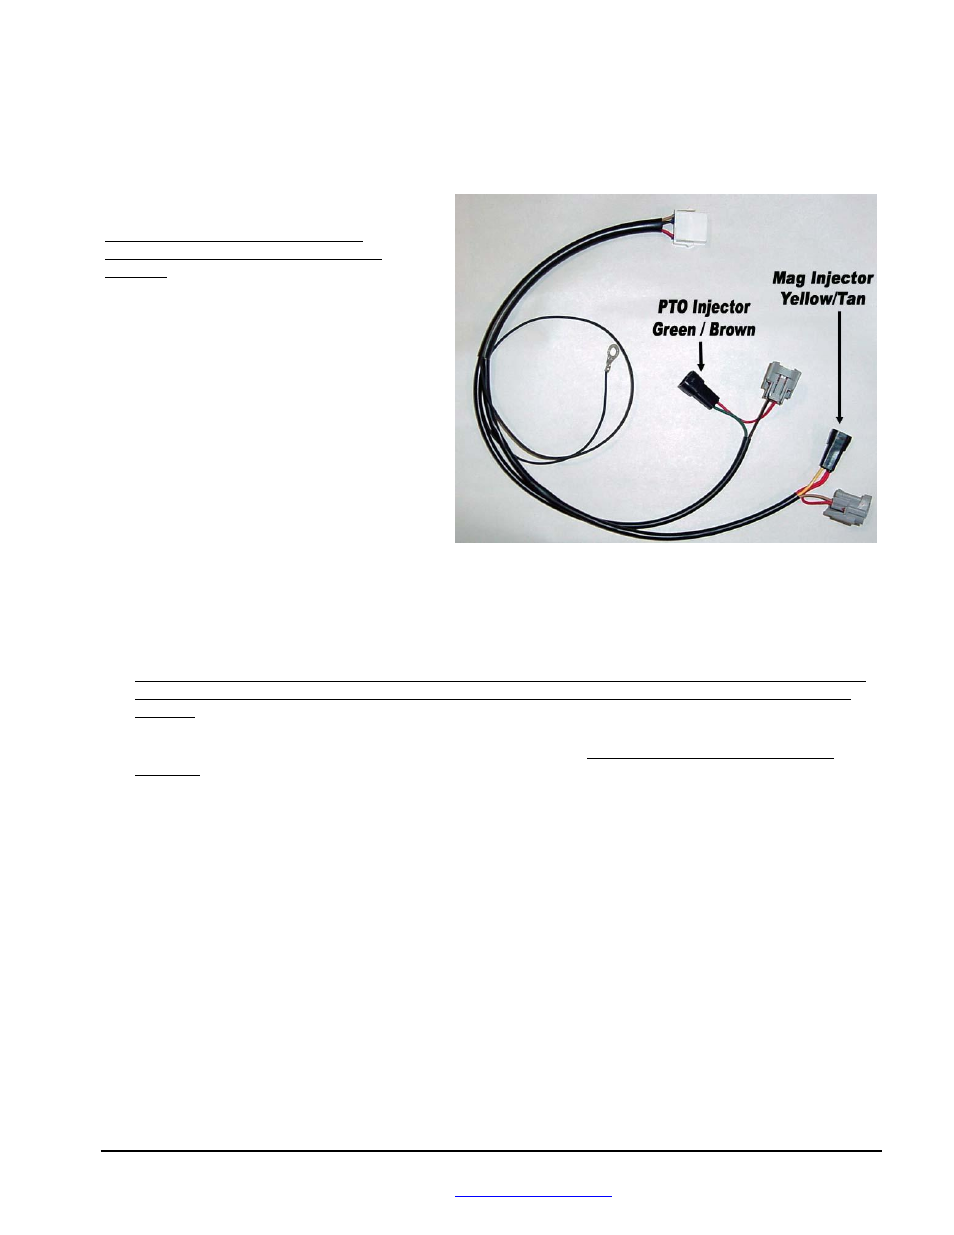
3. There is a left (PTO) and right (MAG) pair of
connectors for each injector (see picture). The
connector pair with the Yellow and Tan wires
goes to the MAG side, and the connector pair with the Green and Brown wires goes to the PTO side.
4. Plug the gray Control Box connector (female) to the sled’s fuel injector, and the black connector to the sled’s gray
injector connector. Do this for both the MAG and PTO sides. The space above each injector is tight – it may help to
rotate the injector 90deg to install the connector, and then rotate it back.
Note: Be sure the black harness connectors latch securely to the gray injector connectors. This may require pushing
the latch on the gray connector down over the tab on the black connector. Do not force the connectors – check for
bent pins.
5. Connect the Control Box harness ground eyelet to a bolt on the chassis. A good ground connection is extremely
important!
6. Use zip ties to keep the harness away from moving parts. Use reflective heat tape if the harness must be routed near
hot items such as the exhaust.
III. Control Box Mounting Locations
The Control Box can be mounted under the hood, on the dash, or on the handlebars using the supplied Velcro strips.
Before applying the adhesive strips, thoroughly clean each surface (rubbing alcohol works well). It is also best if each
surface is room temperature.
If the box is mounted under the hood, keep the box away from excess heat (like the exhaust), and away from the ignition
coil.
Note: The Control Box is designed to be splash proof. Do not submerge or subject the box to high-pressure spray.