Alumax WC 66 User Manual
Page 6
VvVV
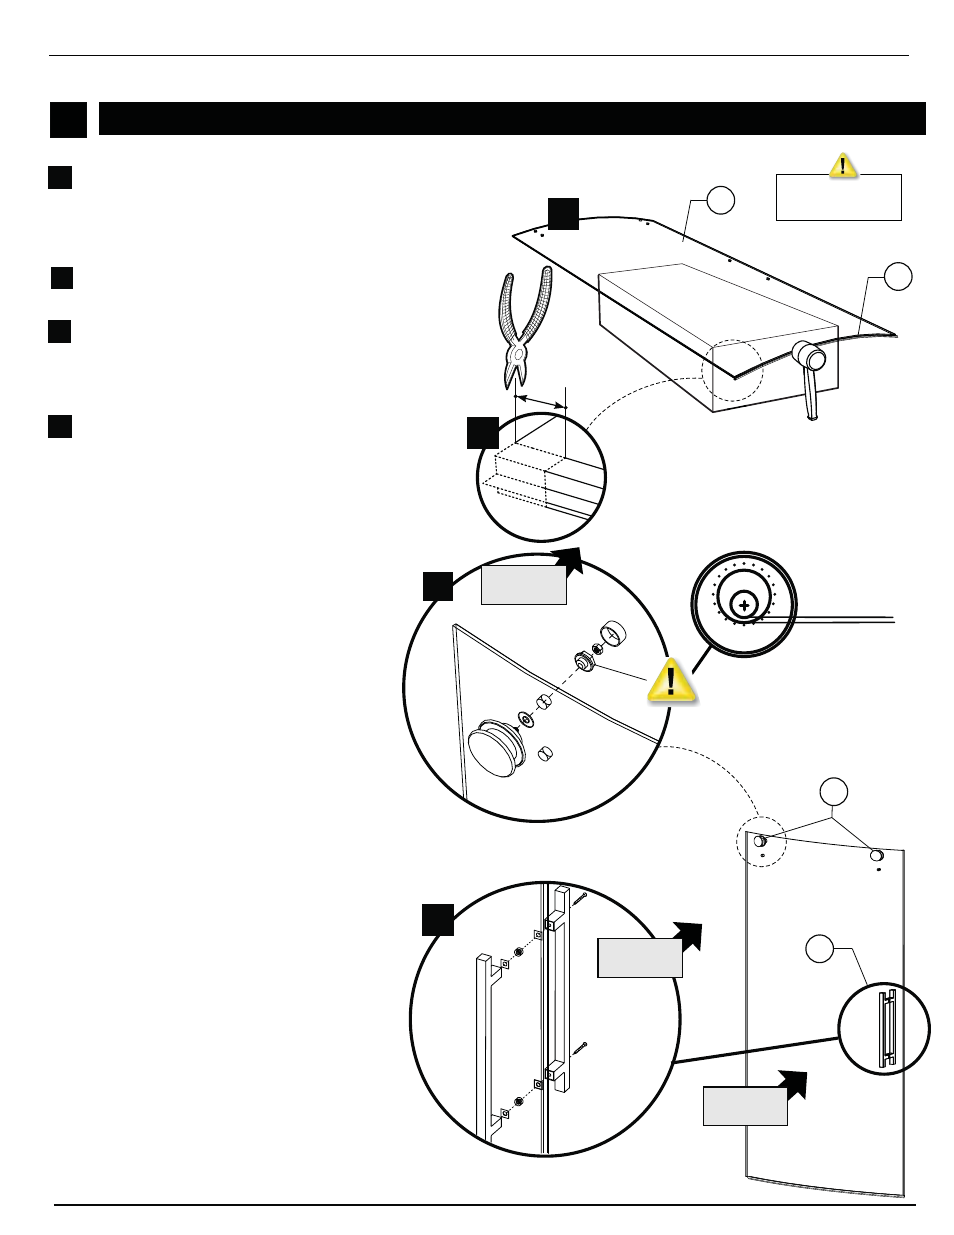
DOOR PANEL ASSEMBLY
1
13
11
3/8’’
6
INSTRUCTION MANUAL
6
7
DOOR HANDLE HOLES
Use a mallet to install the bottom gasket (7)
on the bottom of the door panel (6). To
facilitate installation place the door panel on
the cardboard packaging box and use it as
platform. Notice that the holes are situated at
the top of the door panel.
Measure and cut 3/8” off the edge of the
gasket. Cut on the opposing side of the door
handle holes.
Install both rollers (13) through the top holes
of the door panel. Be sure that the adjustment
wheels are turned on the position of the
minimum thickness that is orientated towards
the bottom.
Install the door handle (11). Holes for the
screws are located on the back of the handle
that must be located on the interior of the
shower area.
1a
1c
1c
1d
1d
1a
1b
1b
INTERIOR
SHOWER SIDE
MINIMUM THICKNESS
ORIENTED TOWARDS
THE BOTTOM
!!
INTERIOR
SHOWER SIDE
INTERIOR
SHOWER SIDE
- 300c (9 pages)
- 300cv (8 pages)
- 300d (9 pages)
- 338 (9 pages)
- 340 (9 pages)
- 340 Deluxe (9 pages)
- 390c Supplement (5 pages)
- 390cv Supplement (4 pages)
- 391 (12 pages)
- 392 (11 pages)
- 393 (11 pages)
- 394 (11 pages)
- 640S (8 pages)
- 640 (8 pages)
- 640D (7 pages)
- 641 Side Panel (6 pages)
- 694 (6 pages)
- 700c (7 pages)
- 733 (8 pages)
- 738 (8 pages)
- 738 Towel Bar (1 page)
- 740D (8 pages)
- 790c Supplement (4 pages)
- 791 (11 pages)
- 792 (12 pages)
- 793 (12 pages)
- 793 Buttress Supplement (1 page)
- 794 (11 pages)
- 794s (9 pages)
- 795 (10 pages)
- 890 (9 pages)
- 890c (8 pages)
- 1040 (9 pages)
- Deluxe Towel Bar (1 page)
- Transportation Latch (1 page)
- DesignLine Hinge (5 pages)
- P-DR1W-48-60 (14 pages)
- P-DR1W-72 (15 pages)
- P-DR1WT-60 (14 pages)
- P-DR2W-48-60-CRP (18 pages)
- P-DR2W-48-60-CW (19 pages)
- P-DR2W-72-CRP (19 pages)
- P-DR2W-72-CW (19 pages)
- P-DR3W-60 (32 pages)
- P-DRA1Y (16 pages)