Alumax W2 CRP User Manual
Page 16
2
4
2
1
INTERIOR
SHOWER SIDE
INSTRUCTION MANUAL
16
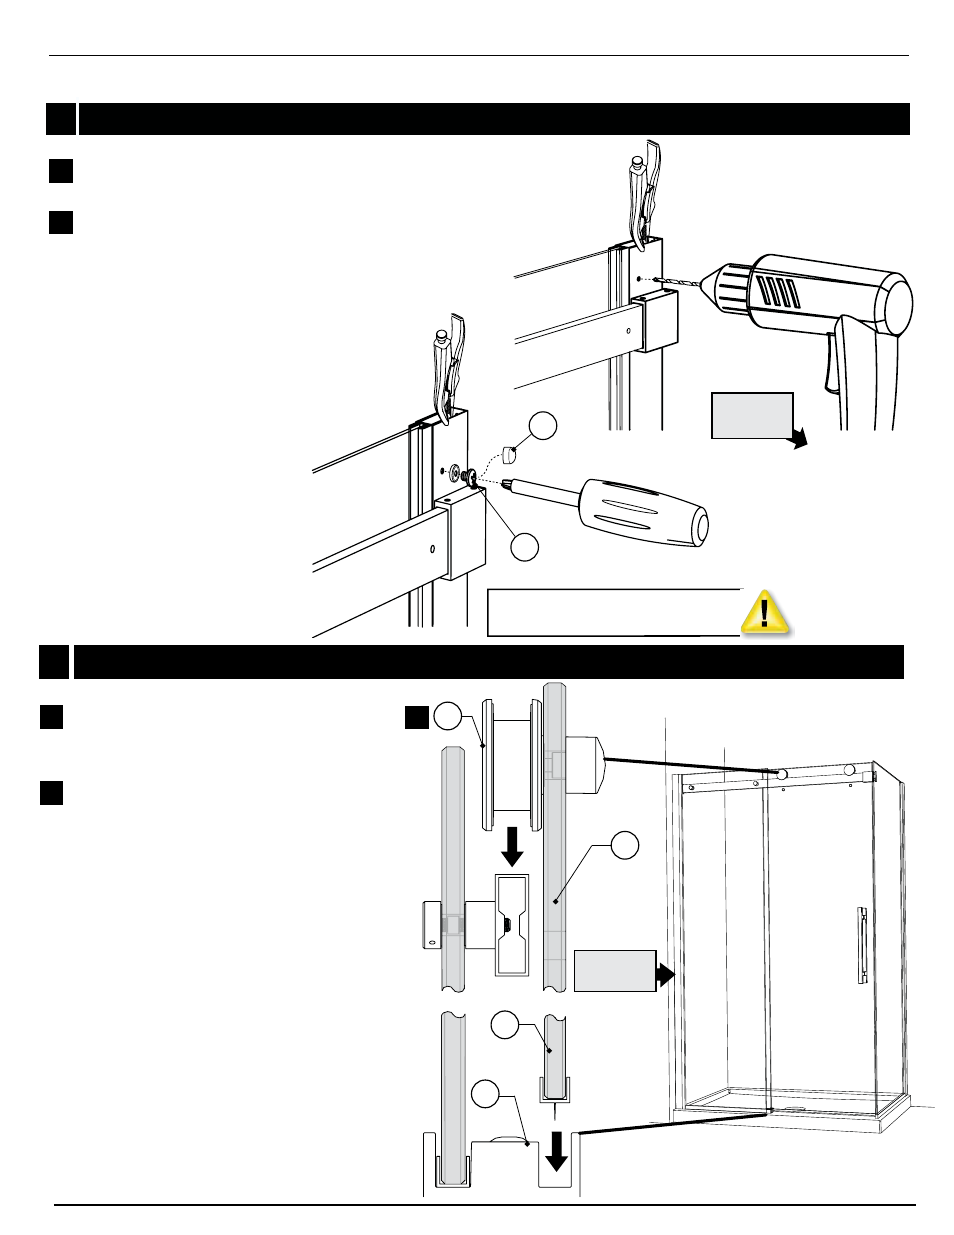
Drill through wall jamb holes with 1/8” drill bit, to
perce
through the expander. (x3)
Screw 3/4” screws (21) through holes to hold ex-
pander and wall jamb together in place (x3). Cover
all screws with screw caps (24).
10 WALL JAMB AND EXPANDER
10a
10b
SAME PROCEDURE FOR RETURN
PANEL WALL JAMB AND EXPANDER
9
Install door panel (9) by aligning the rollers
(11) on running rail (12) and by aligning the
door panel (9) with the back channel of bottom
guide (17).
Slide door to insure a smooth stable glide.
DOOR PANEL INSTALLATION
9
17
11
11
11a
11b
11a
INTERIOR
SHOWER SIDE
See also other documents in the category Alumax For Home:
- 300c (9 pages)
- 300cv (8 pages)
- 300d (9 pages)
- 338 (9 pages)
- 340 (9 pages)
- 340 Deluxe (9 pages)
- 390c Supplement (5 pages)
- 390cv Supplement (4 pages)
- 391 (12 pages)
- 392 (11 pages)
- 393 (11 pages)
- 394 (11 pages)
- 640S (8 pages)
- 640 (8 pages)
- 640D (7 pages)
- 641 Side Panel (6 pages)
- 694 (6 pages)
- 700c (7 pages)
- 733 (8 pages)
- 738 (8 pages)
- 738 Towel Bar (1 page)
- 740D (8 pages)
- 790c Supplement (4 pages)
- 791 (11 pages)
- 792 (12 pages)
- 793 (12 pages)
- 793 Buttress Supplement (1 page)
- 794 (11 pages)
- 794s (9 pages)
- 795 (10 pages)
- 890 (9 pages)
- 890c (8 pages)
- 1040 (9 pages)
- Deluxe Towel Bar (1 page)
- Transportation Latch (1 page)
- DesignLine Hinge (5 pages)
- P-DR1W-48-60 (14 pages)
- P-DR1W-72 (15 pages)
- P-DR1WT-60 (14 pages)
- P-DR2W-48-60-CRP (18 pages)
- P-DR2W-48-60-CW (19 pages)
- P-DR2W-72-CRP (19 pages)
- P-DR2W-72-CW (19 pages)
- P-DR3W-60 (32 pages)
- P-DRA1Y (16 pages)