Installation step 6, Fnstail wall push button – Craftsman 139.53625SR User Manual
Page 13
Attention! The text in this document has been recognized automatically. To view the original document, you can use the "Original mode".
Installation
STEP 6
fnstail Wall Push Button
I
j
DCATE
wall
push
button
(OR ANY ADDiTJONAL PUSH BUTTONS) WHERE THE GARAGE DOOR
IS VISIBLE, AWAY FROM DOOR AND DOOR HARDWARE AND OUT OF THE REACH OF CHILDREN.
SERIOUS PERSONAL INJURY FROM A MOVING GARAGE DOOR MAY RESULT FROM MISUSE OF THE
OPENER. DO NOT ALLOW CHILDREN TO OPERATE WALL PUSH BUTTON{S) OR THE TRANSMITTER.
FASTEN THE CAUTION LABEL ON THE WALL NEAR WALL PUSH BUTTON AS A REMINDER OF SAFE
OPERATING PROCEDURES,
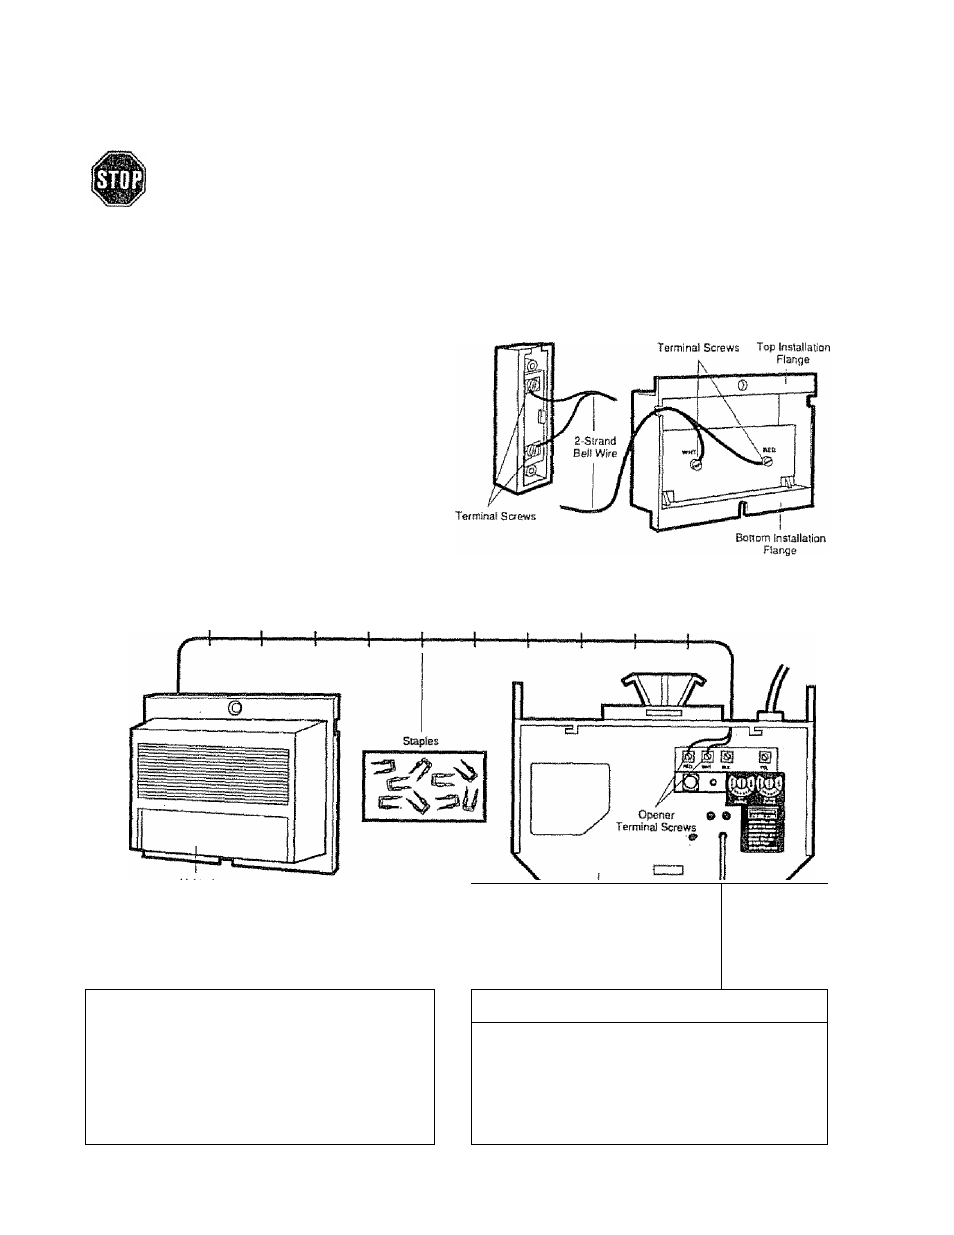
PROCEDURE: Remove about a 1/4* of insulation from
each end of the S-strand bell wire. Connect on© end to the
screw terminals on the back of wall push button (or
doorbelt-type push button) as shown.
Fasten the wall push button with SABxl" sheet metal
screws. The doorbell-type push button has 6ABx1-l/2*
sheet metal screws. Use anchors if attaching to dry wall.
Install on an inside garage door A convenient place is be
side the service door and OUT OF REACH OF CHILDREN.
Run the bell wire up the wall and across the ceiling to the
garage door opener. Secure with insulated staples
The receiver terminals and the antenna are located on the
back panel of the opener chassis, Position antenna wire
as shown. Then connect the wire by color to the white and
red opener terminal screws.
DOOR BELL-TYPE
lighted
push
SUTTOW
WALL PUSH SUTTON
Pusftbutum
Rear Panel
of Opener
-— Antenna
OPERATION OF THE VYALL PUSH BUTTON
WIRING INSTRUCTIONS FOR ACCESSORIES
Press and release to open or close door.
Infrared Reversing Sensor:
Press and releEee again to REVERSE door during
To white and black opener terminals
CLOSING cycle or to STOP door during OPENING
Outdoor Key Switch:
cycle.
To red and white opener terminate
13