Craftsman 137.219100 User Manual
Page 12
Attention! The text in this document has been recognized automatically. To view the original document, you can use the "Original mode".
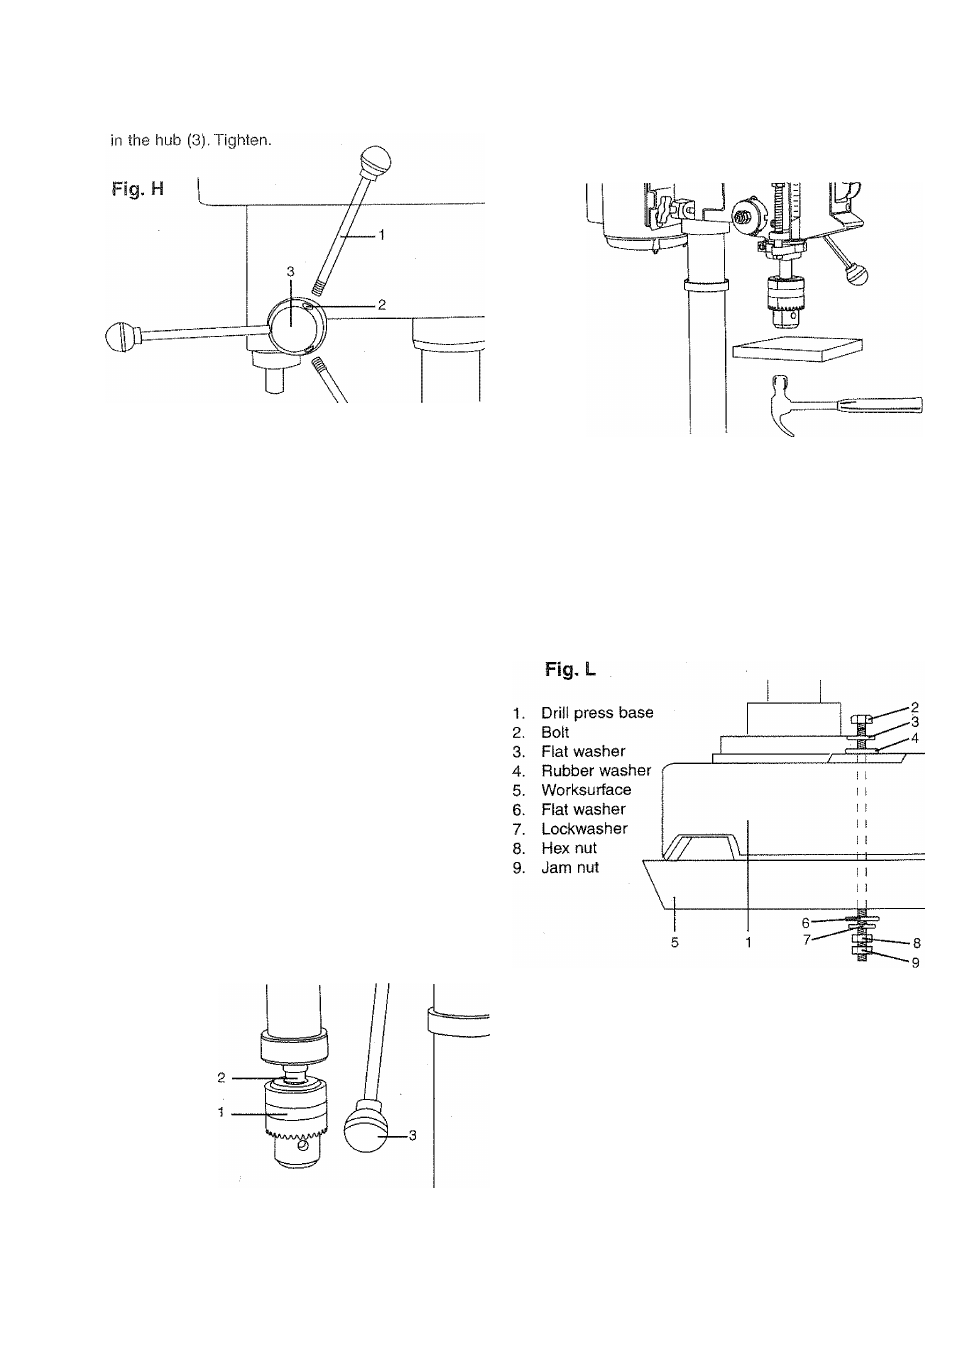
INSTALUI^G FEED HANDLES (FiG. H)
1. Locate three feed handles in the loose parts bag.
2. Screw the feed handles (1) into the threaded holes (2)
INSTALLING THE CHUCK (FIG. I, J and K)
1. Clean out the tapered hole In the chuck (1) with a
dean cloth.
2. Clean tapered surfaces on the spindle (2).
CAUTION: Make sure there are no foreign particles
sticking to the surfaces. The slightest piece of dirt on
any of these surfaces will prevent the chuck from
seating properly. This will cause the drill chuck and
bit to wobble. If tapered hole is extremely dirty, use a
cleaning solvent.
Fig.!
3.
5.
Lower the spindle (2) by turning the feed handles (3)
counterclockwise.
Push the chuck up onto the spindle (2).
Tap gently to ensure seat.
Open the jaws of the chuck (1) by rotating the chuck
sleeve clockwise. To prevent damage, make sure the
jaws are completely receded into the chuck.
Fig. J
6. Using a rubber mallei, plastic-tipped hammer, or a
block of wood and a hammer, firmly tap the chuck
upward into position on the spindle shaft.
Fig.
K
MOUNTING DRILL PRESS TO WORK SURFACE (FIG. L)
1,
If mounting the drill press to a workbench, a solid
wood bench is preferred over a plywood board, to
reduce noise and vibration.
2, Holes should be pre-drilled through the supporting
surface.
3, The hardware to mount this drill press is NOT
supplied with the tool. The hardware as shown in
the illustration should be used:
12