How to replace the friction wheel, Service and adjustment – Craftsman 536.886260 User Manual
Page 25
Attention! The text in this document has been recognized automatically. To view the original document, you can use the "Original mode".
SERVICE AND ADJUSTMENT
position for the friction wheel. See
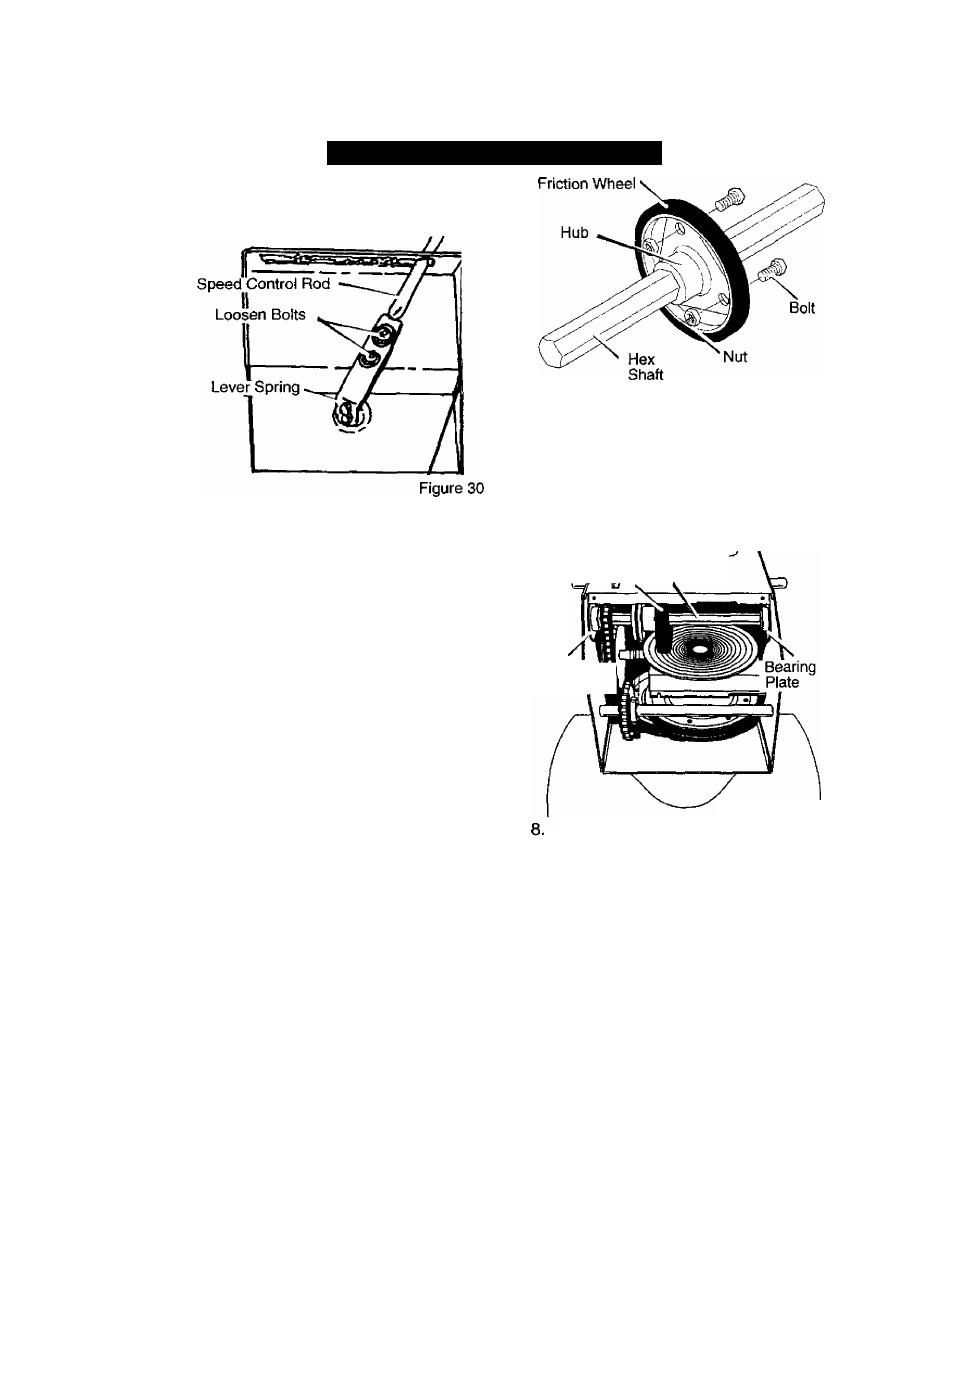
Figure 30.
2. Install the
bottom panel.
See
Figure 28.
3. Tighten the
bolts
on each side of
the
bottom panel.
4. Install the
bolts
on each side of the
bottom panel.
How To Replace The Friction Wheel
If the friction wheel is worn or damaged,
the snow thrower will not move forward.
The friction wheel must be replaced as
follows.
1, Remove the gas from the gas tank.
Stand the snow thrower up on the
front end of the auger housing.
A
WARNING: Drain the gasoline
outdoors, away from fire or
flame.
2. Disconnect the spark plug wire.
3. Remove the
top bolts
on each side
of the
bottom panel.
See
Figure 28.
4. Loosen the
bottom bolts
on each
side of the
bottom panel.
Remove the
bottom panel.
5.
6.
Remove the three
fasteners
that
hold the
friction wheel
to the
hub.
See Figure 31.
F-001088J
Figure 31
7. Remove the four bolts that hold the
bearing plates
on each side of the
hex shaft.
See Figure 32.
NOTE: Take special note of the
position of the washers and retain
ing ring on the hex shaft and the
sprocket assembly.
/m
" “
Friction Wheel
Shaft
Bearing
Plate
25
Figure 32
Remove the
bearing plate
from the
right side. Do not remove the
hex
shaft.
Leave the
hex shaft
in posi
tion. Carefully raise
hex shaft
just
enough to allow the
friction wheel
to be removed.
9. Remove the
friction wheel
from the
hub.
Slip the
friction wheel
toward
the right off the
hex shaft.
See
Figure 31.
10. Assemble the new
friction wheel
onto
hub
with the fasteners re
moved earlier.
11.
Install the
bearing plate
onto the
right side. Make sure the
hex shaft
is engaged with both
bearing
plates
and that the washers and re
taining ring are installed in the origi
nal position. See Figure 32.