Snow chute assembly, How to set the skid height, How to set the length of the cables – Craftsman 536.886260 User Manual
Page 10: Checklist, Assembly
Attention! The text in this document has been recognized automatically. To view the original document, you can use the "Original mode".
ASSEMBLY
SNOW CHUTE ASSEMBLY
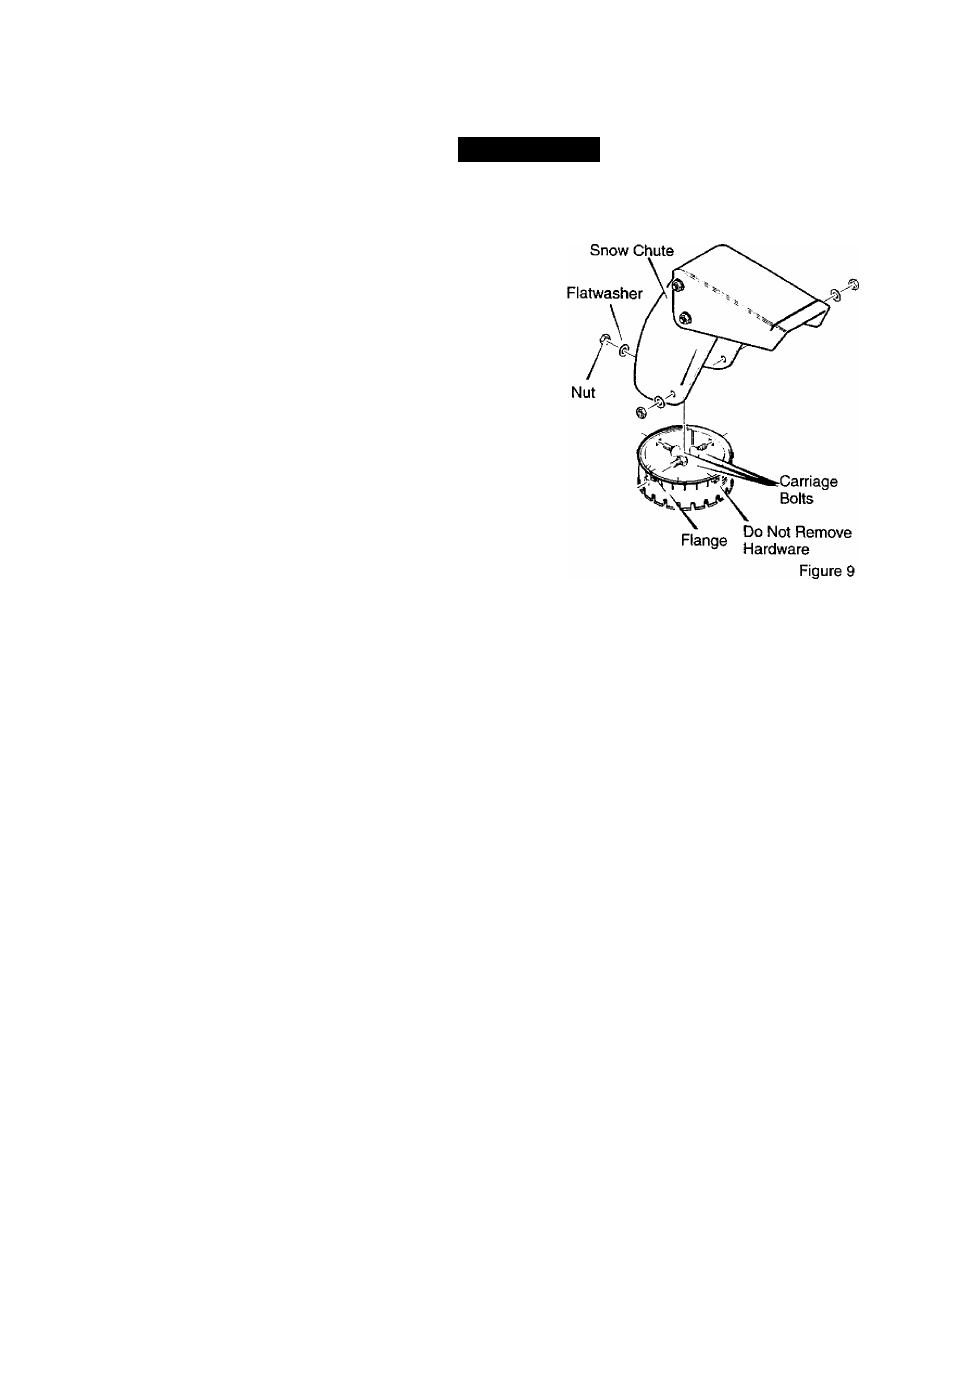
1. Turn crank assembly counterclock
wise until it stop.
2. Position
snow chute
on inside of
snow chute
flange
and align the
three holes in the
snow chute
with
holes on snow chute
flange.
(See
Figure 9)
3. Place three
5/16-18 carriage bolts
from inside of chute as shown in
Figure 9. (hardware is found in
parts bag).
4. Place three
5/16-18 flatwashers
and three
5/16-18 nuts
on outside
of flange.
5.
Tighten all
four carriage bolts
se
curely.
NOTE; DO NOT overtighten carriage
bolts. *.
6. Turn crank assembly clockwise and
make sure all carriage bolts are
tight.
HOW TO SET THE SKID HEIGHT
Your snow thrower is equipped with
height adjust skids on the outside of the
auger housing. To adjust the skid
height for different conditions, see
To
Adjust Skid Height
paragraph in the
Service And Adjustment
section.
HOW TO SET THE LENGTH OF THE CABLES
The cables were adjusted at the factory
and no adjustments should be neces
sary. However, after the handles are put
in the operating position, the cables can
be too tight or too loose. If an adjust
ment is necessary, see “How To Check
And Adjust The Cables” in the Service
And Adjustment section.
^ CHECKLIST
Before you operate your new snow
thrower, to ensure that you receive the
best performance and satisfaction from
this quality product, please review the
following checklist:
All assembly instructions have been
completed.
The discharge chute rotates freely.
No remaining loose parts in carton.
While learning how to use your snow
thrower, pay extra attention to the fol
lowing important items:
Engine oil is at proper level.
Make sure gas tank is filled properly
with clean, fresh, unleaded gasoline.
Become familiar with all controls-
their location and function. Operate
controls before starting engine.
F-001088J
10