Adjusting the color of the picture (color), Adjusting the quality of the picture (conv), Adjusting the osd position (osd) – Sony CPD-420GS User Manual
Page 11: Additional settings (option)
Attention! The text in this document has been recognized automatically. To view the original document, you can use the "Original mode".
Adjusting the color of the picture
(COLOR)
The COLOR settings allow you to adjust the picture’s color
temperature by changing the color level of the white color field.
Colors appear reddish if the temperature is low, and bluish if the
temperature is high. This adjustment is useful for matching the
monitor’s colors to a printed picture’s colors.
This setting is stored in memory for all input signals.
1 Press the MENU button.
The main MENU appears on the screen.
2 Press the p: «/e and 3 ♦ /♦ buttons to highlight ^
COLOR and press the MENU button again.
The COLOR menu appears on the screen.
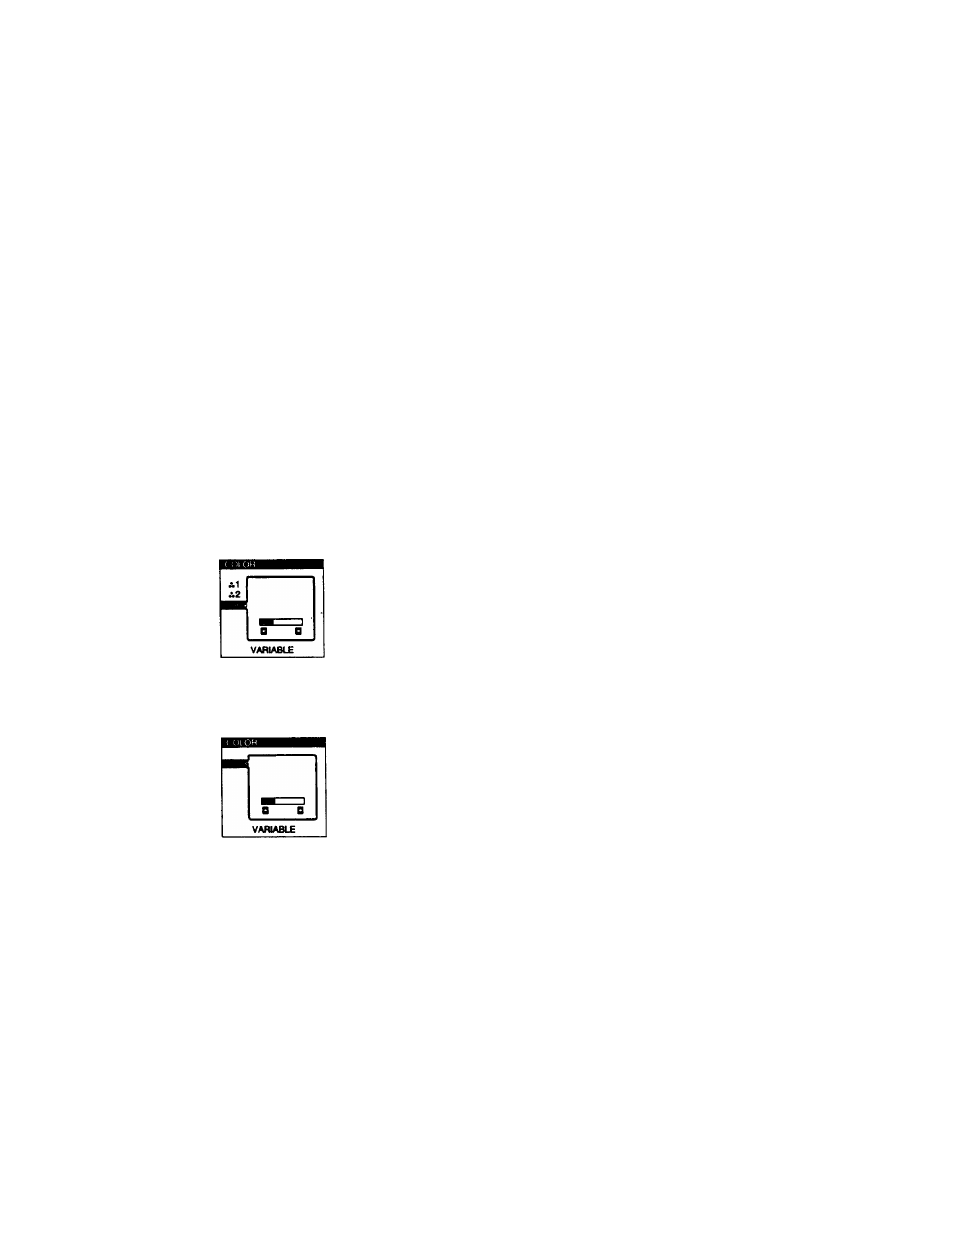
3 Press the ip
W é
buttons to select a color
temperature.
The preset color ten^ratures are 1 (9300K) and 2
(5000K). Since the default setting is 9300K, the whites
change firom a bluish hue to a reddish hue as the temperature
is lowered to 5000K.
You can also fine tune the color temperature by selecting @
in step 2 above, and using the O buttons to adjust the
color temperature manually.
If you are using the Presentation or GraphicAfideo mode, the
following COLOR OSD appears when “0 COLOR” is
selected.
This OSD allows you to adjust the color temperature between
ll,000Kto9,300K.
Press the 3 buttons to adjust the color temperature.
The OSD automatically disappears after about 30 seconds. To
close the OSD, press the MENU button again.
Adjusting the quality of the picture
(CONV)
The CONV settings allow you to adjust the quality of the picture
by eliminating red or blue shadows around letters, characters and
lines.
Both settings are stored in memory for all input signals.
1 Press the MENU button.
The main MENU appears on the screen.
2 Press the ip and 3 buttons to highlight OD
CONV and press the MENU button again.
The CONVERGENCE menu appears on the screen.
3 Press the 3 buttons to adjust the horizontal
convergence, or the p
* /*
buttons to adjust the
vertical convergence.
The OSD automatically disappears after about 30 seconds. To
close the OSD, press the MENU button again.
Adjusting the OSD position (OSD)
This setting is stored in memory for the current input signal.
1 Press the MENU button.
The main MENU spears on the screen.
2 Press the
ip 4
/e and 3
buttons to highlight @
OSD and press the MENU button again.
The OSD POSITION menu appears on the screen.
3 Press the
ip
ti/e buttons to adjust the vertical
position or the 3 buttons to adjust the
horizontal position.
The OSD automatically disappears after about 30 seconds. To
close the OSD, press the MENU button again.
Additional settings (OPTION)
You can manually degauss (demagnetize) the screen, lock the
controls, change the OSD language, restore the color image, and
cancel the moire.
1 Press the MENU button. .
The main MENU appears on the screen.
2 Press the
ip
and 3 buttons to highlight &
OPTION and press the MENU button again.
The OPTION menu appears on the screen.
3 Press the
ip
buttons to highlight the desired
adjustment item.
Adjust the selected item according to the following
instructions.
The OSD automatically disappears after about 30 seconds. To
close the OSD, press the MENU button again.
1 1