Aeroclassics oil cooler, Oil cooler installation, 4sonex aircraft – Sonex Jabiru 3300 Oil Cooler Upgrade Installation Instructions User Manual
Page 4: Assemble and attach the oil cooler
AeroClassics Oil Cooler
4
Sonex Aircraft
LLC
© 2008 All Rights Reserved.
OIL COOLER INSTALLATION
Assemble and Attach the Oil Cooler
Materials Needed:
q
Aero-Classics Oil Cooler, Model 8000075
q
AN3-5A Bolts, Qty 6.
q
AN960-10 Washer, Qty. 12
q
MS20365-1032 Stop Nut, Qty 6
q
Aluminum Extrusions (provided)
q
Baffle Seal
q
Locktite 242
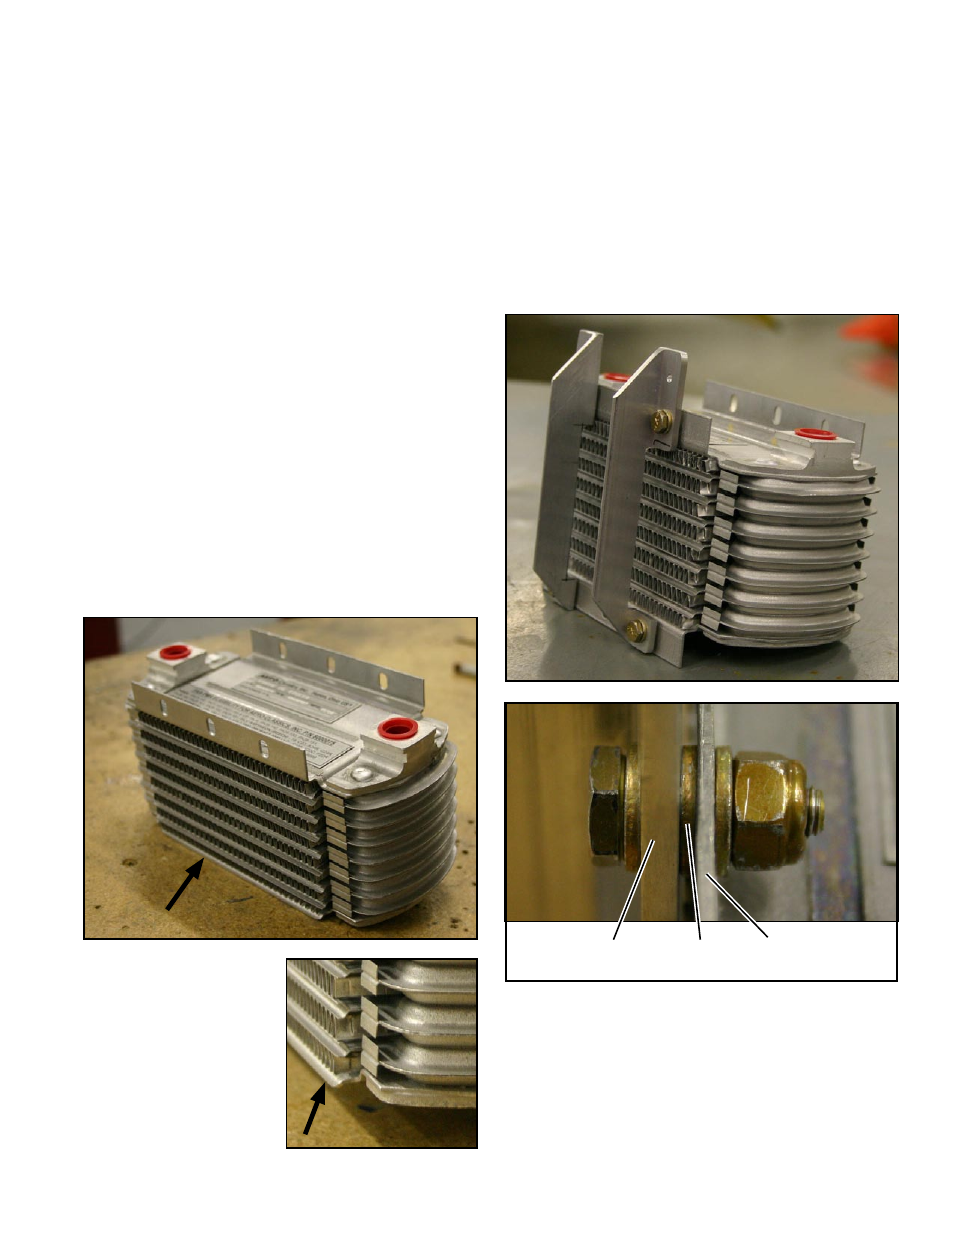
Install the Oil Cooler and Shroud
1. Attach the -43L and -43R brackets to the "back" of the
oil cooler, as shown in the photo below. The brackets are
attached to the cooler with:
AN3-5A Bolt, Qty 4
AN960-10 Washer, Qty. 12
MS20365-1032 Elastic Stop Nut, Qty. 4
Note: One washer may need to be placed between the
bracket and the oil cooler's flange as a spacer to prevent
the brackets from contacting the cooling fins.
Manufacture the Oil Cooler Brackets
1. Manufacture the three mounting brackets (SNX-P20-43L
and -R, and SNX-P20-42t. The details for these brackets
are in the back of this manual.
Modify the Oil Cooler
1. Remove a lower flange from the oil cooler to provide
clearance for the cowling.
Note: There is no left or right to the oil cooler so either
lower flange can be removed.
Above, a lower flange has
been removed to clear the
cowling. The side with the
flange removed is now the
"front' of the oil cooler.
Right, a close-up after the
flange has been removed.
If needed, an MS20365-1032 washer can be placed between
the oil cooler flange and the aluminum mounting bracket to
keep the bracket from contacting the oil cooler's fins.
Mounting Bracket
Oil Cooler Flange
Washer
This oil cooler installation applies to the Jabiru 3300 only.