Sonex Upholstery Installation Instructions User Manual
Sonex aircraft, Upholstery installation
1
Sonex Aircraft,
LLC
© 2010 All Rights Reserved.
Upholstery Installation
(0600910)
1
The optional Sonex upholstery can be attached in any num-
ber of ways as long as it is secured to prevent fouling of the
controls. The following tips and photographs are the methods
used by Sonex Aircraft LLC to secure the upholstery in the
Sonex Aircraft factory aircraft. Other methods may be used as
desired.
P.O. Box 2521 Oshkosh, WI 54903-2521
Tel. (920)-231-8297 Fax. (920)-426-8333
www.sonexaircraft.com
sonex aircraft
LLC
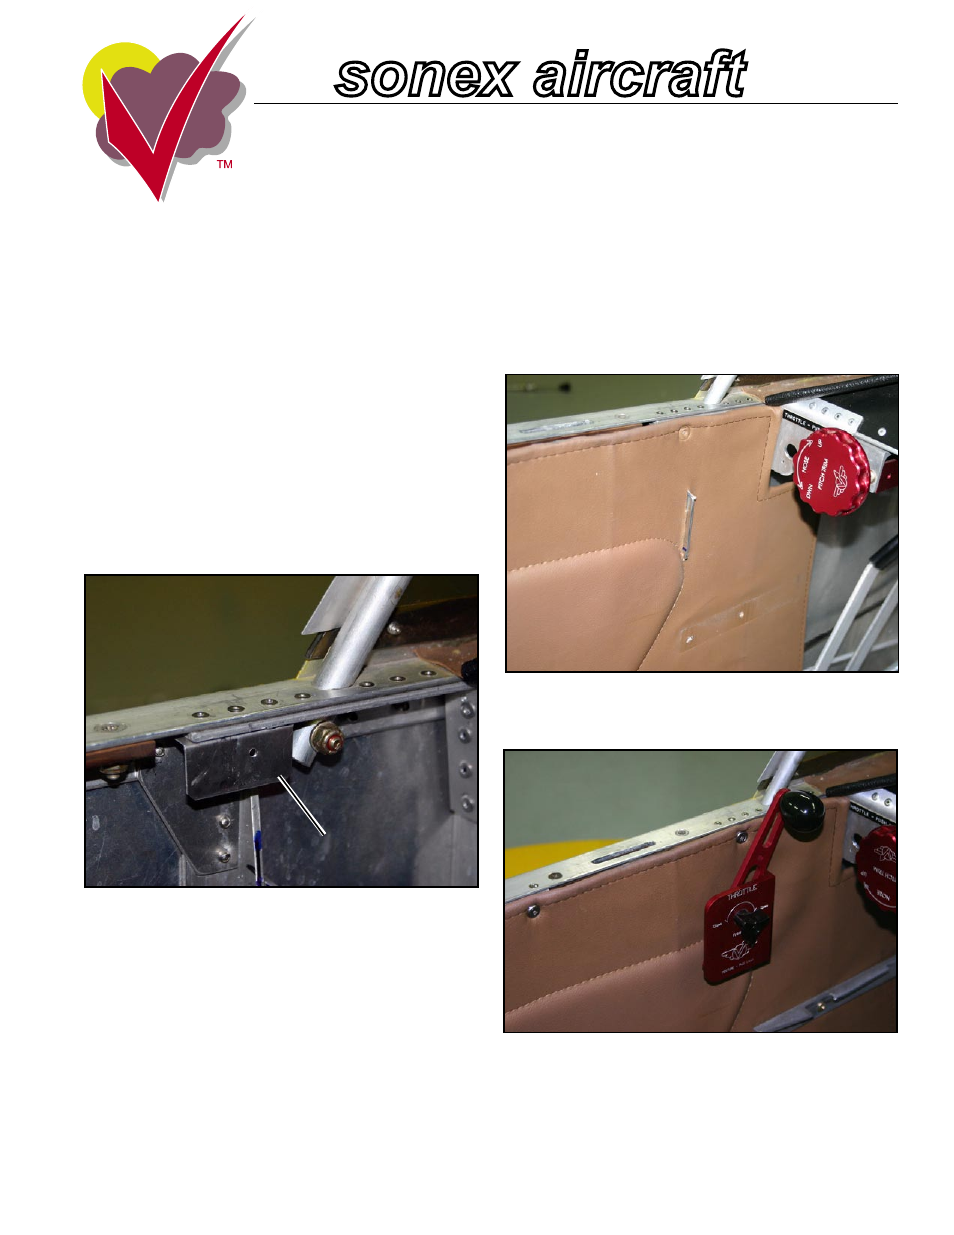
Side Panels
As the cockpits of individual aircraft vary from one to the
other, the side panels may require modification for your par-
ticular aircraft.
The perimeter of the side panels can be secured with #8 or #10
self-tapping flat head screws and finishing washers. To accom-
modate these screws we make tabs from .025" 6061-T6 and
rivet them under the upper longeron and elsewhere as needed.
If a side mounted throttle quadrant and/or standard flap detent
bracket is installed, you will need to cut a slot and puncture
holes in the side panels to accommodate these items. This is
easily accomplished through careful measuring and the use of
a utility knife.
This side panel has been slotted for the throttle quadrant
mounting bracket and holes have been punctured for the
screws which secure the flap detent bracket.
This photo shows the throttle quadrant and flap detent bracket
re-installed. MS21059 floating anchor nuts replace standard
nuts where possible to ease installation and removal of these
items. The side panel has been secured to the tabs with #8 or
#10 self-tapping screws and finishing washers.
Tabs, such as the one shown here, riveted to the fuselage side
structure provide simple mounting locations for interior side
panels.
Mounting Tab