Sonex Wing Rib Forming Instructions (Scratch Building) User Manual
Sonex aircraft, Forming wing ribs
1
sonex aircraft,
LLC
© 2013 All Rights Reserved.
511 Aviation Road Oshkosh, WI 54902 Tel. (920)-231-8297 www.sonexaircraft.com
sonex aircraft
LLC
Forming Wing Ribs
2 pages, Revision A, 05/09/2013
These instructions illustrate the process of laying and forming
a typical Sonex Aircraft wing rib. This is necessary only for
builders who choose to scratchbuild a Sonex. Airframe kits
purchased from Sonex Aircraft include pre-formed ribs.
Note: A video depicting this process can be viewed on the
Sonex Aircraft website.
1. Lay the rib form block on the aluminum with at least 1/2”
of aluminum extending out from the form block in all
directions.
A
B
C
A
2. Hold the form block firmly in place and, using the two
outer tooling holes (A) as guides, drill through the alumi-
num sheet and into your workbench with a 1/4” drill bit.
After each hole is drilled, insert a 1/4 bolt (A) to hold the
form block in position on the aluminum.
3. Using the two inner tooling holes (B) as guides, drill
through the aluminum sheet with a 1/4” drill bit.
4. Using the two corner notches (C) as guides, drill through
the aluminum sheet with a 1/4” drill bit.
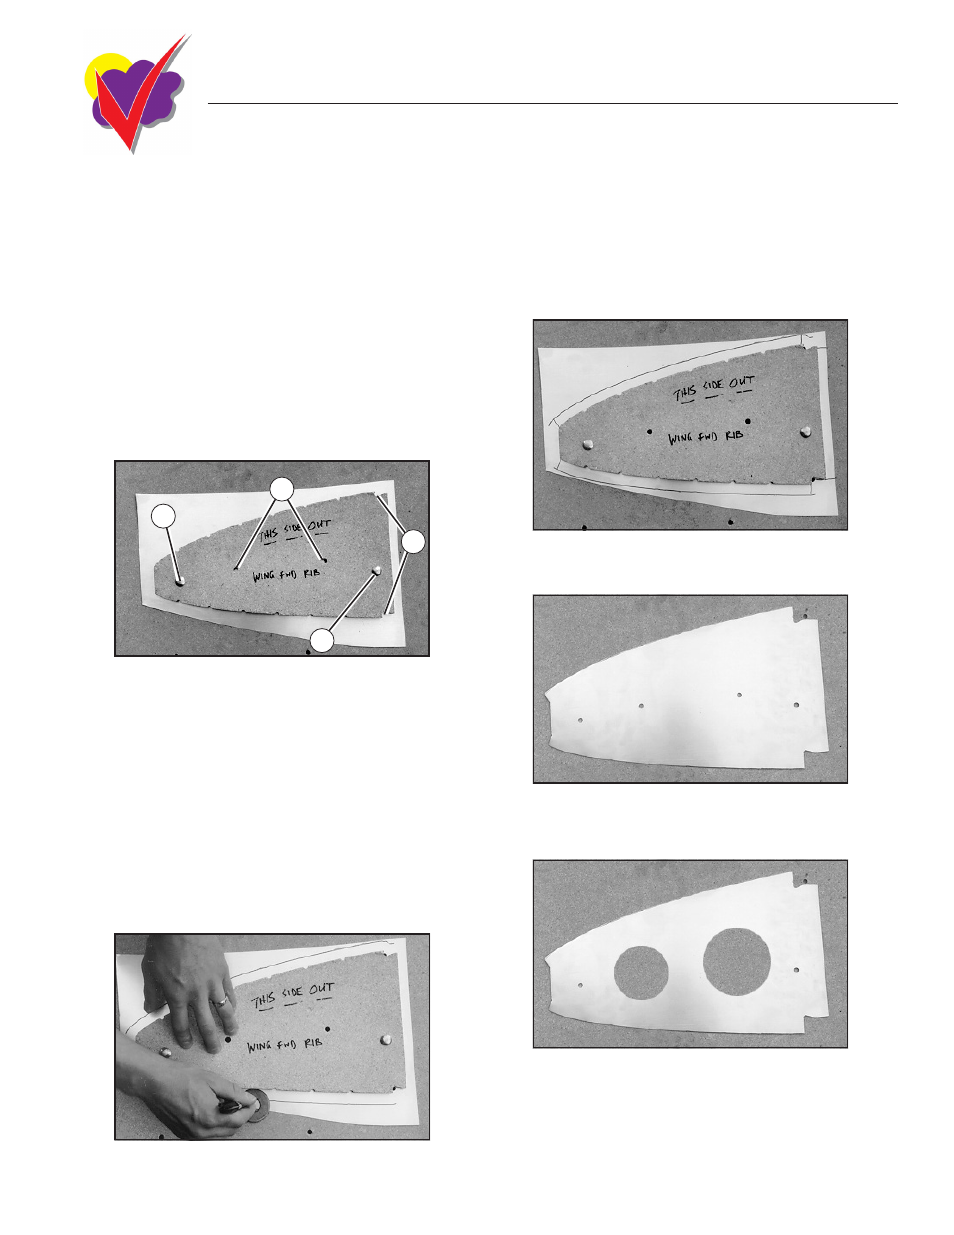
5. Trace around the form block with a washer that measures
1/2” from its outside edge to its inside edge.
This photo illustrates seteps 1 through 4.
6. Complete the outline of the rib blank as shown on the
plans and in the accompanying photograph.
7. Remove the form block and cut the rib blank from the
aluminum sheet.
8. Use the two 1/4” holes in the center of the blank as pilot
holes for fly-cutting the two lightning holes.
9. Deburr all of the edges of the rib blank.