Externally accessible drive assemblies, Inch diskette drive assembly, Externally accessible drive assemblies -8 – Dell OptiPlex E1 User Manual
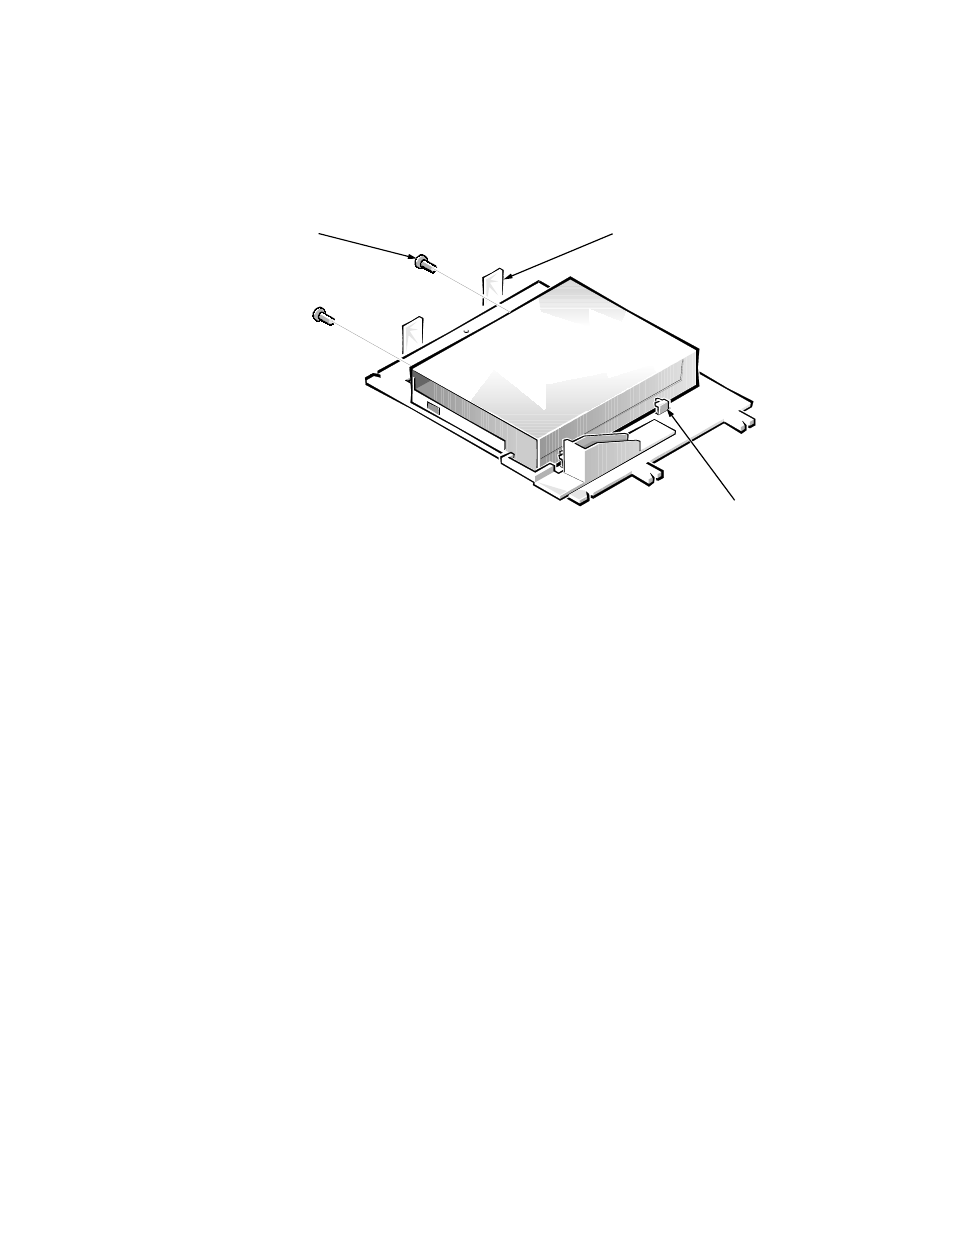
Page 54: Inch diskette drive assembly -8, Figure 4-7. 3.5-inch diskette drive removal -8, Whuqdoo\$ffhvvleoh'ulyh$vvhpeolhv, Qfk'lvnhwwh'ulyh$vvhpeo
4-8
Dell OptiPlex E1 Managed PC Service Manual
([WHUQDOO\$FFHVVLEOH'ULYH$VVHPEOLHV
The following subsections contain removal/replacement procedures for drives
installed in the externally accessible drive bays.
,QFK'LVNHWWH'ULYH$VVHPEO\
)LJXUH ,QFK 'LVNHWWH 'ULYH 5HPRYDO
To remove the 3.5-inch diskette drive assembly, follow these steps:
'LVFRQQHFW WKH '& SRZHU FDEOH DQG WKH LQWHUIDFH FDEOH IURP WKH
EDFN RI WKH GLVNHWWH GULYH
3UHVV WKH WZR LQFK GLVNHWWHGULYHDVVHPEO\ ODWFKHV WR WKH OHIW
WR UHOHDVH WKH DVVHPEO\
Rotate the left side of the assembly up, and lift the assembly out of the
chassis.
5HPRYH WKH WZR GULYHPRXQWLQJ VFUHZV IURP WKH OHIW VLGH RI WKH
GULYH DQG UHPRYH WKH GULYH IURP WKH EUDFNHW
When you replace the 3.5-inch diskette drive, be sure that the mounting holes
on the right side of the drive engage the two hooks on the bracket.
3.5-inch diskette-drive-assembly
latches (2)
drive-mounting
screws (2)
hooks (2)
front of computer