Replacing the microprocessor, Removing the microprocessor – Dell Dimension 2350 User Manual
Page 25
5.
.
6.
.
7.
.
8.
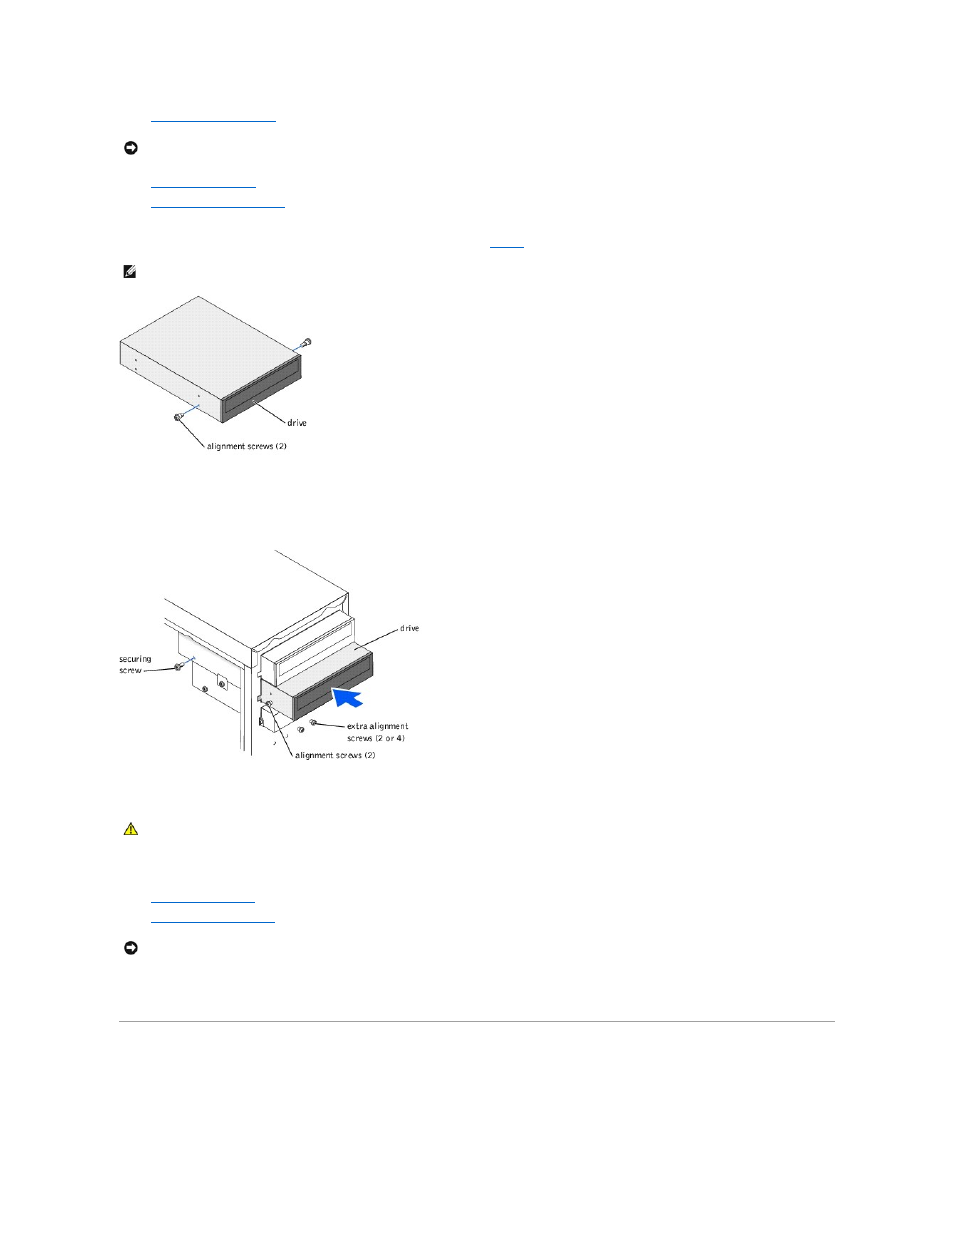
Ensure that the jumper setting on the new drive is set for "cable select" (see the documentation that came with the drive for information).
9.
Remove two of the extra alignment screws, shown in the illustration below
, from the front of the computer and insert them into the drive.
10.
Gently slide the drive into place.
11.
Once the drive is in place, apply pressure to ensure the drive is fully seated.
12.
Use the securing screw that came with the drive to attach the drive to the computer.
13.
Connect a power cable to the new drive.
14.
Locate the data cable from the CD/DVD drive in the upper drive bay and connect its middle data connector to the new drive.
15.
Check all cable connections, and fold cables out of the way to provide airflow for the fan and cooling vents.
16.
.
17.
.
18.
Connect your computer and devices to electrical outlets, and turn them on.
19.
See the documentation that came with the drive for instructions on installing any software required for drive operation.
Replacing the Microprocessor
Removing the Microprocessor
NOTICE:
Before touching anything inside your computer, ground yourself by touching an unpainted metal surface, such as the metal at the back of the
computer. While you work, periodically touch an unpainted metal surface to dissipate any static electricity that could harm internal components.
HINT:
Some computers come with only two extra alignment screws; others come with four. You only need two alignment screws for this procedure.
CAUTION:
Match the colored strip on the cable with pin 1 on the drive (pin 1 is marked as "1").
NOTICE:
To connect a network cable, first plug the cable into the network wall jack and then plug it into the computer.