Fan assembly, Removing the fan assembly – Dell Dimension 9200c User Manual
Page 54
Removing and Installing Parts: Dell Dimension 9200C Service Manual
file:///T|/htdocs/systems/dim9200C/en/SM_EN/parts.htm[10/31/2012 8:07:53 AM]
NOTICE:
Ensure that the heat sink is correctly seated and secure.
3. Replace the CD/DVD drive (see
4. Replace the computer cover (see
).
Fan Assembly
CAUTION:
Before you begin any of the procedures in this section, follow the safety instructions in the
Product Information Guide.
Removing the Fan Assembly
2. Remove the CD/DVD drive, if installed (see
CAUTION:
The heat sink assembly can get very hot during normal operation. Be sure that the assembly has
had sufficient time to cool before you touch it.
3. Remove the heat sink assembly (see
Removing the Heat Sink Assembly
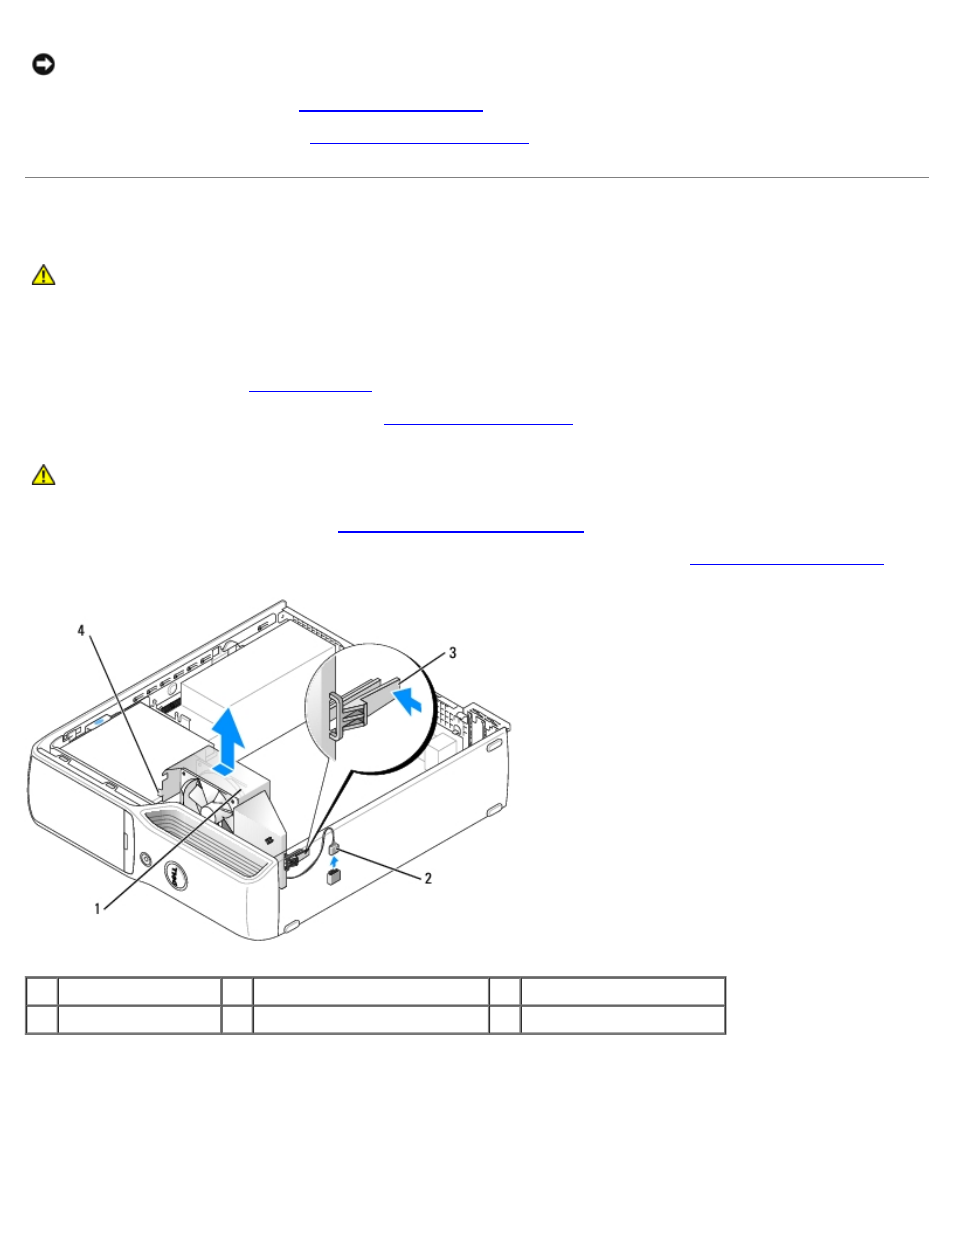
4. Disconnect the fan power cable from the CPUFAN connector on the system board (see
1
fan assembly
2
fan cable connector
3
fan release lever
4
fan tabs (2)
5. Press the fan release lever, then slide the fan towards the back of the computer to release the two fan tabs from the
keyhole slots in the chassis.
6. Carefully, remove the fan from the computer.