Installing the back system fan – Dell PowerEdge 800 User Manual
Page 47
1.
Turn off the system, including any attached peripherals, and disconnect the system from the electrical outlet.
2.
Remove the bezel. See "
Removing the Bezel
" in "Troubleshooting Your System."
3.
Lay the system on its right side.
4.
Remove the cover. See "
Removing the Cover
" in "Troubleshooting Your System."
5.
Remove the cooling shroud. See "
."
6.
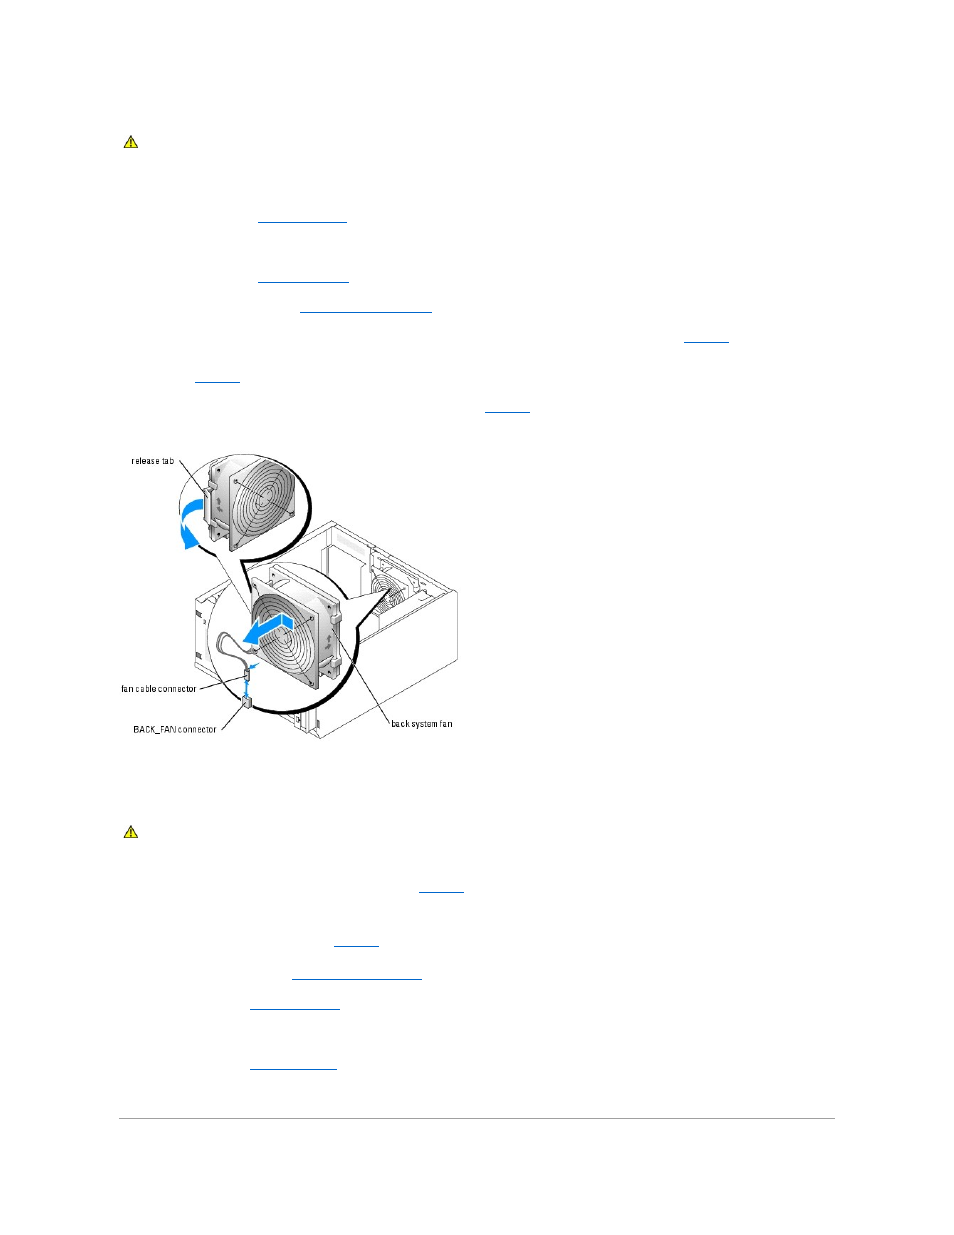
Disconnect the fan cable from the BACK_FAN connector on the system board. To identify system board connectors, see
Figure A
-3
.
7.
Pull the release tab on the fan assembly away from the back panel and slide the fan assembly about 0.63 cm (0.25 inch) toward the expansion-card
slots. See
.
8.
Pull the fan assembly forward and lift the assembly out of the system. See
.
Figure 6-4. Removing the Back System Fan
Installing the Back System Fan
1.
Align the tabs on the fan bracket with the mounting holes in the back panel and slide the fan assembly toward the power supply about 0.6 cm (0.25
inch) until the fan bracket release tab snaps into place. See
.
2.
Connect the fan cable to the BACK_FAN connector on the system board.
To identify system board connectors, see
Figure A
-3
.
3.
Install the cooling shroud. See "
."
4.
Install the cover. See "
Replacing the Cover
" in "Troubleshooting Your System."
5.
Stand the system upright.
6.
Install the bezel. See "
Installing the Bezel
" in "Troubleshooting Your System."
7.
Reconnect the system to its electrical outlet and turn the system on, including any attached peripherals.
CAUTION:
See your Product Information Guide for complete information about safety precautions, working inside the computer, and protecting
against electrostatic discharge.
CAUTION:
See your Product Information Guide for complete information about safety precautions, working inside the computer, and protecting
against electrostatic discharge.