Dell PowerVault DL2100 User Manual
Page 23
Symantec Corporation World Headquarters
20330 Stevens Creek Blvd., Cupertino, CA 95014 USA
+1 (408) 517 8000 / +1 (800) 721 3934
www symantec com
© 2008 Symantec Corporation. All rights reserved. Symantec and the Symantec logo are trademarks or registered trademarks of Symantec Corporation or its affiliates in the U.S. and other countries.
Other names may be trademarks of their respective owners.
4. Click Run Now to run the backup. A pop up may appear indicating that the job has been submitted. If the
pop up appears, click Ok to continue.
5. Navigate to the Backup Exec Job Monitor tab and wait for the backup job to complete.
6. Once the backup job has completed, select New Restore Job from Backup Exec. The Restore Job Wizard
appears.
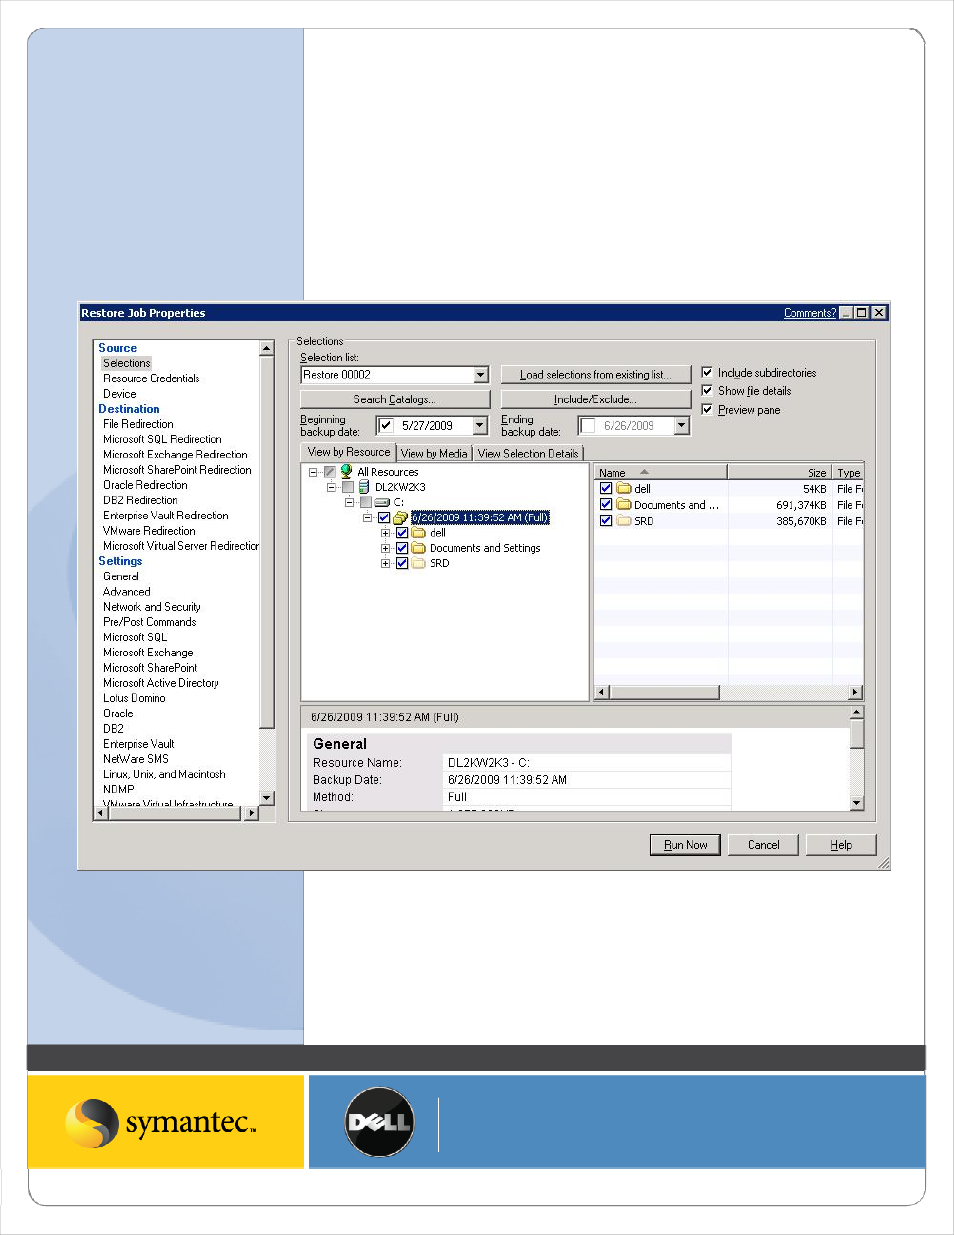
7. Select the data that is to be restored as part of the seeding process. In this example, the folders dell,
Documents and Settings, and SRD need to be restored. Using the Selections tab, select these folders for
the restore job.
Figure: Backup Exec Restore Selection
8. From the File Redirection tab, select the checkbox for Redirect file sets. In the Restore to path: box enter
the path to the CPS Backup Destination specified earlier in this document. In this example, the CPS Backup