Processor, Removing the processor, Installing the processor – Dell Inspiron 710M User Manual
Page 28
Back to Contents Page
Processor
Dell™ Inspiron™ 700m/710m Service Manual
Removing the Processor
1.
Remove the
battery
.
2.
Remove the
keyboard
.
3.
Disconnect the black and white antenna cables from the Mini PCI Card.
4.
Remove the
display module
.
5.
Remove the
palm rest
.
6.
Remove the
system board
.
7.
Gently turn the system board upside down.
8.
Remove the
processor thermal-cooling assembly
.
9.
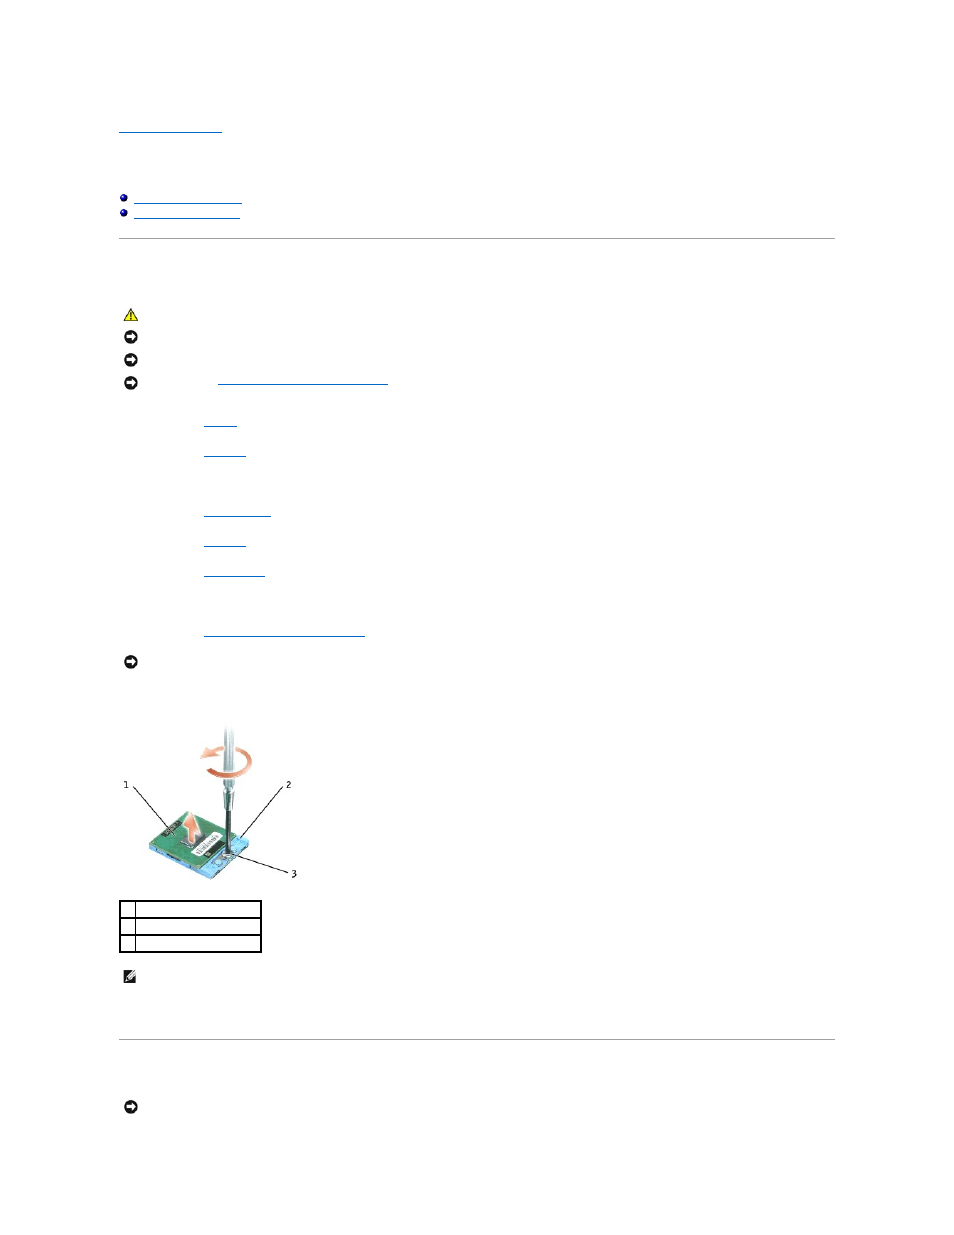
To loosen the ZIF socket, use a small, flat-blade screwdriver and rotate the ZIF-socket cam screw counterclockwise until it comes to the cam stop.
10.
Lift out the microprocessor module.
Installing the Processor
CAUTION:
Before you begin any of the procedures in this section, follow the safety instructions in the Product Information Guide.
NOTICE:
Disconnect the computer and any attached devices from electrical outlets.
NOTICE:
To avoid ESD, ground yourself by using a wrist grounding strap or by touching an unpainted metal surface on the computer.
NOTICE:
Read "
Before Working Inside Your Computer
" before performing the following procedure.
NOTICE:
When removing the microprocessor module, pull the module straight up. Be careful not to bend the pins on the microprocessor module.
1 processor
2 cam stop
3 ZIF socket cam screw
NOTE:
The ZIF-socket cam screw secures the microprocessor to the system board. Take note of any directional indicators on the ZIF-socket cam screw.
NOTICE:
Ensure that the cam lock is in the fully open position before seating the microprocessor module. Seating the microprocessor module properly in
the ZIF socket does not require force.