Flashing the bios – Dell Studio XPS 8000 (Late 2009) User Manual
Page 48
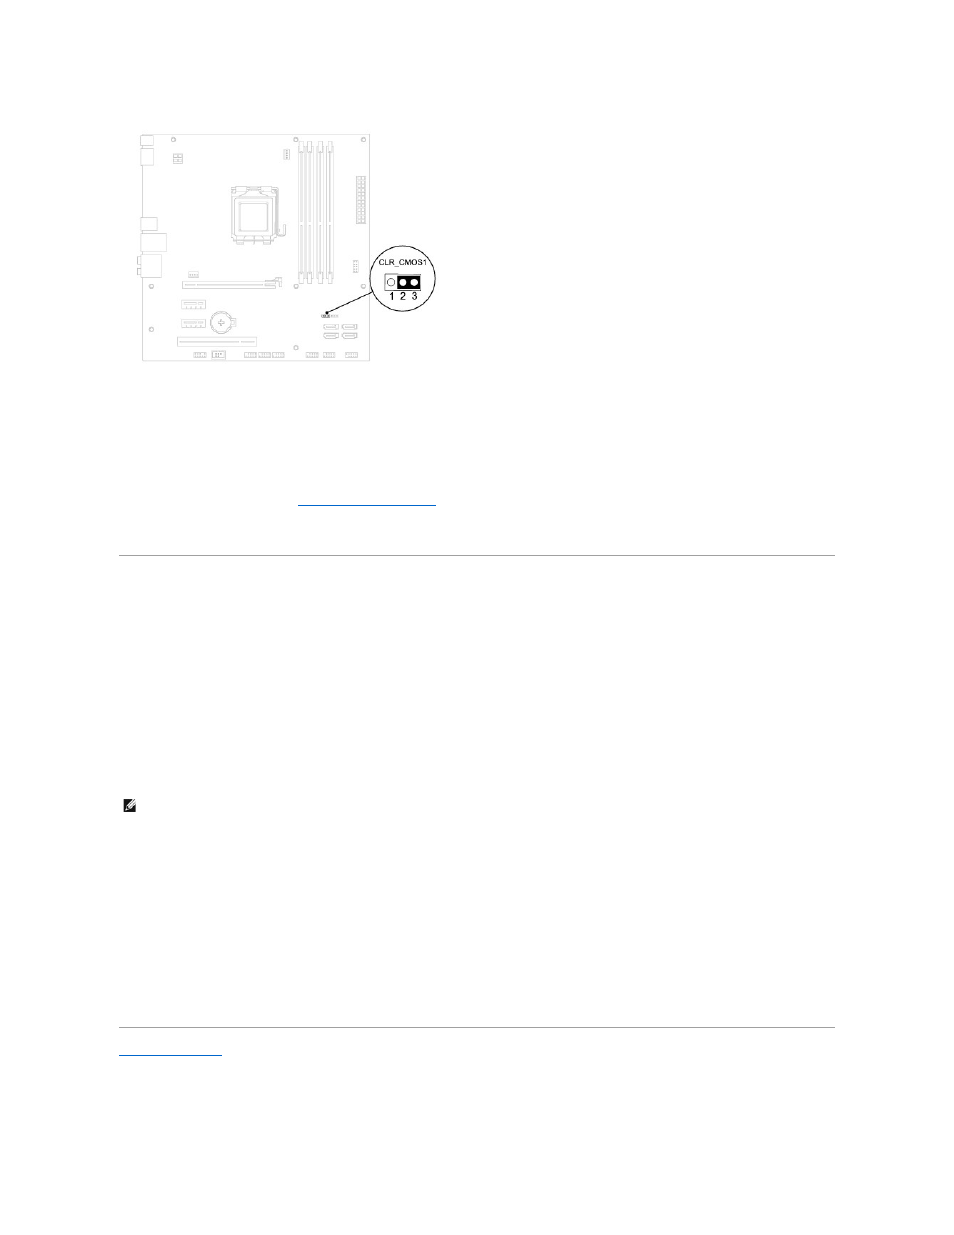
4.
Remove the 2-pin jumper plug from pins 2 and 3 and fix on pins 1 and 2.
5.
Wait for approximately five seconds to clear the CMOS setting.
6.
Remove the 2-pin jumper plug from pins 1 and 2 and replace it on pins 2 and 3.
7.
Replace the computer cover (see
Removing the Computer Cover
).
8.
Connect your computer and devices to electrical outlets, and turn them on.
Flashing the BIOS
1.
Turn on the computer.
2.
Go to the Dell Support website at support.dell.com.
3.
Click Drivers & Downloads®Select Model.
4.
Select the type of product in the Select Your Product Family list.
5.
Select the product brand in the Select Your Product Line list.
6.
Select the product model number in the Select Your Product Model list.
7.
Click Confirm.
8.
A list of results appear on the screen. Click BIOS.
9.
Click Download Now to download the latest BIOS file. The File Download window appears.
10.
Click Save to save the file on your desktop. The file downloads to your desktop.
11.
Click Close if the Download Complete window appears. The file icon appears on your desktop and is titled the same as the downloaded BIOS update
file.
12.
Double-click the file icon on the desktop and follow the procedures on the screen.
Back to Contents Page
NOTE:
If you have selected a different model and want to start over again, click Start Over on the top right of the menu.