Removing the filler bracket, Replacing the filler bracket – Dell Studio XPS 8000 (Late 2009) User Manual
Page 26
3.
Remove the FlexDock from its packaging.
4.
Gently slide the FlexDock into the FlexDock bay through the front of the computer.
5.
Align the screw holes on the FlexDock with the screw holes on the drive panel.
6.
Replace the two screws that secure the FlexDock to the drive panel.
7.
Connect the FlexDock USB cable to the system board connector (see
System Board Components
).
8.
Replace the front bezel (see
Replacing the Front Bezel
).
9.
Replace the computer cover (see
Replacing the Computer Cover
).
10.
Connect your computer and devices to electrical outlets, and then turn them on.
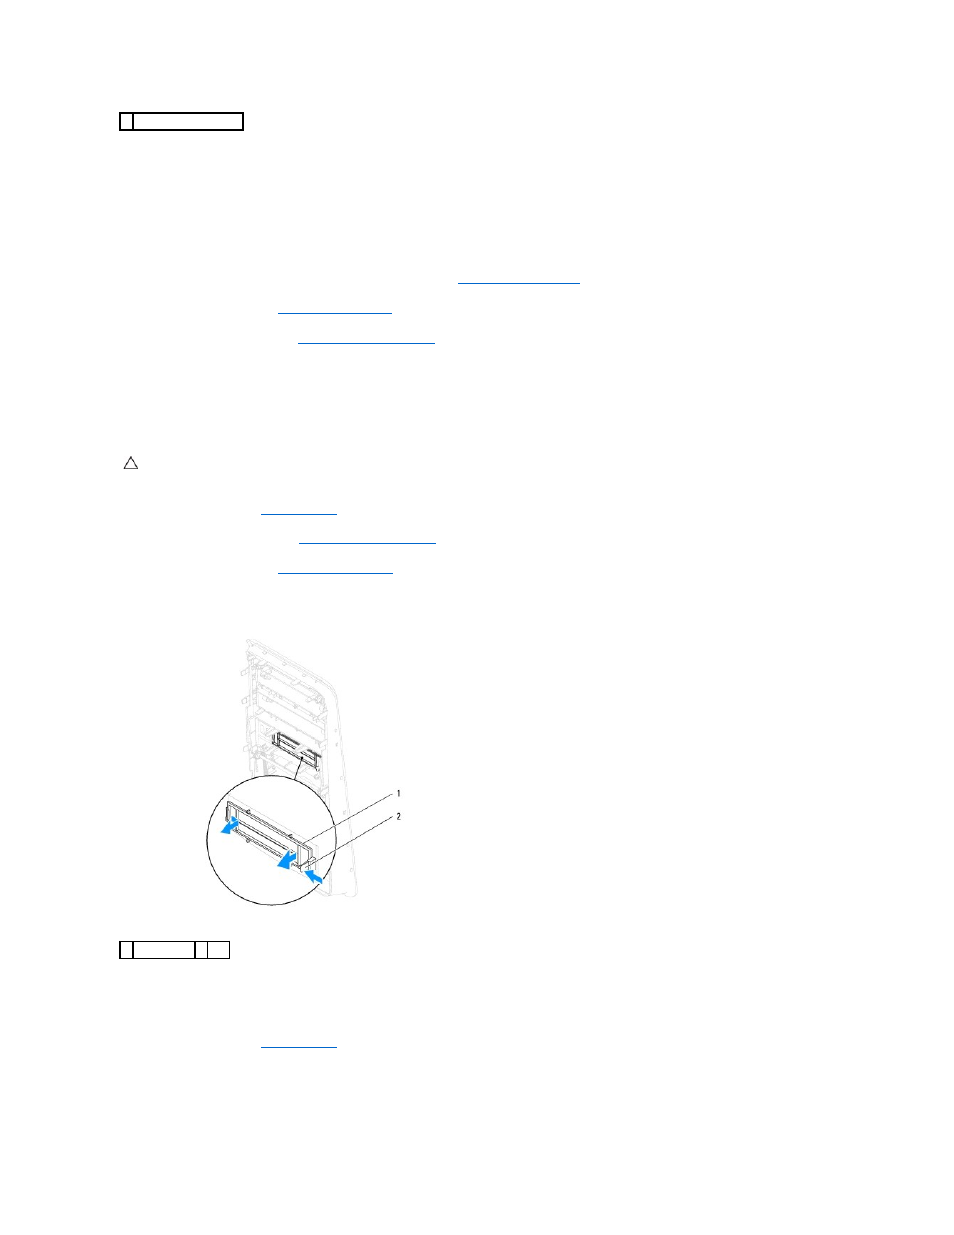
Removing the Filler Bracket
1.
Follow the procedures in
Before You Begin
.
2.
Remove the computer cover (see
Removing the Computer Cover
).
3.
Remove the front bezel (see
Removing the Front Bezel
).
4.
Gently press the tab as shown in the illustration to release the filler bracket from the front bezel.
Replacing the Filler Bracket
1.
Follow the procedures in
Before You Begin
.
2.
Align the tab in the filler bracket to the slot in the front bezel.
3.
Gently press the tab and push the filler bracket to fix it to the front bezel.
1 breakaway metal plate
CAUTION:
To comply with FCC regulations, it is recommended that you replace the filler bracket whenever the FlexDock or optical drive is
removed from the computer.
1 filler bracket 2 tab