Graphics card bracket, Removing the graphics card bracket, Replacing the graphics card bracket – Dell Studio XPS 8100 (Late 2009) User Manual
Page 31
Back to Contents Page
Graphics Card Bracket
Dell™ Studio XPS™ 8100 Service Manual
Removing the Graphics Card Bracket
Replacing the Graphics Card Bracket
Removing the Graphics Card Bracket
1.
Follow the procedures in
Before You Begin
.
2.
Remove the computer cover (see
Removing the Computer Cover
).
3.
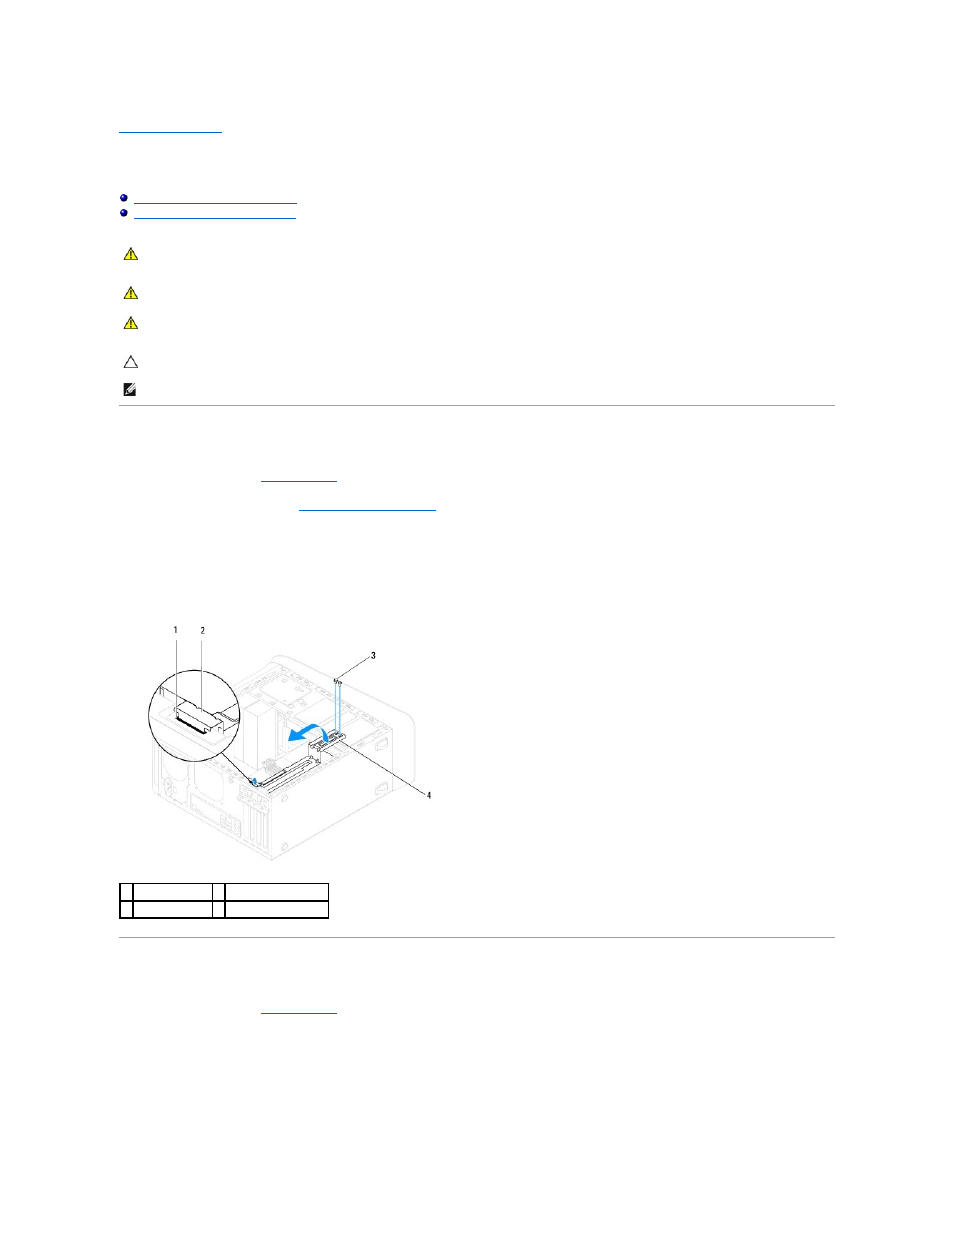
Remove the two screws that secure the graphics card bracket to the drive panel.
4.
Pivot the graphics card bracket up and lift it off the hinge clamp slot.
5.
Set the graphics card bracket aside in a secure location.
Replacing the Graphics Card Bracket
1.
Follow the procedures in
Before You Begin
.
2.
Align and insert the hinge clamp on the graphics card bracket into the hinge clamp slot on the chassis.
3.
Pivot the graphics card bracket downward.
4.
Replace the two screws that secure the graphics card bracket to the drive panel.
WARNING:
Before working inside your computer, read the safety information that shipped with your computer. For additional safety best
practices information, see the Regulatory Compliance Homepage at www.dell.com/regulatory_compliance.
WARNING:
To guard against electrical shock, always unplug your computer from the electrical outlet before removing the cover.
WARNING:
Do not operate your computer with any cover(s) (including computer covers, bezels, filler brackets, front-panel inserts, etc.)
removed.
CAUTION:
Only a certified service technician should perform repairs on your computer. Damage due to servicing that is not authorized by Dell™
is not covered by your warranty.
NOTE:
The graphic card bracket is present in your computer only if you ordered a double-width graphics card at the time of purchase.
1 hinge clamp slot 2 hinge clamp
3 screws (2)
4 graphics card bracket