Dell Inspiron 5100 User Manual
Page 112
112
Adding and Replacing Parts
www
.dell.com | support.dell.com
9
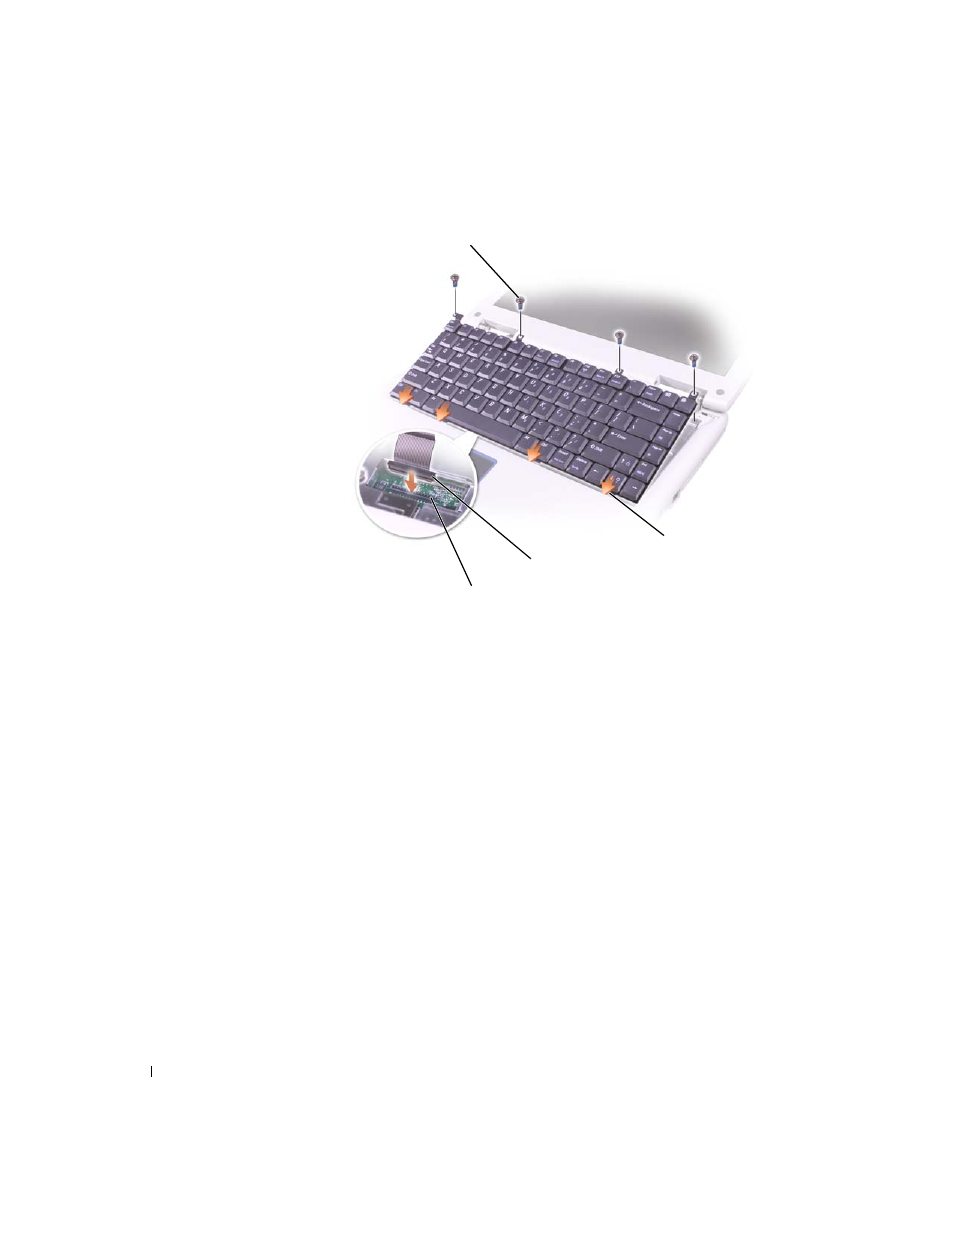
Insert the four securing tabs on the keyboard into their respective slots in the palm
rest, and lower the keyboard into the bottom case.
Ensure that all four securing tabs are engaged before trying to completely seat the
keyboard.
10
Replace the four keyboard screws.
11
Replace the hinge cover.
interface connector
keyboard connector
screws (4)
securing tabs (4)
This manual is related to the following products:
See also other documents in the category Dell Notebooks:
- Latitude E6410 (8 pages)
- Latitude E6410 (52 pages)
- Latitude D630 (218 pages)
- Latitude E6400 (99 pages)
- Latitude E6400 (70 pages)
- Latitude E6400 (2 pages)
- Latitude E6400 (8 pages)
- Latitude E6400 (4 pages)
- Latitude D630 (168 pages)
- Latitude D630 (43 pages)
- Latitude D630 (69 pages)
- Latitude D620 (43 pages)
- Latitude D620 (102 pages)
- Inspiron 1545 (4 pages)
- Inspiron 1545 (51 pages)
- Inspiron 1545 (72 pages)
- LATITUDE C510 (55 pages)
- LATITUDE C510 (170 pages)
- Inspiron 1200 (45 pages)
- Latitude D531 (224 pages)
- Latitude D531 (Mid 2007) (46 pages)
- Inspiron 1300 (142 pages)
- Inspiron 1300 (44 pages)
- INSPIRON 2600 (168 pages)
- INSPIRON 2600 (2 pages)
- INSPIRON 2600 (134 pages)
- INSPIRON 2600 (87 pages)
- Inspiron 1100 (40 pages)
- Inspiron 1100 (164 pages)
- Inspiron E1505 (45 pages)
- Inspiron E1505 (186 pages)
- Inspiron 1150 (112 pages)
- Inspiron 1150 (38 pages)
- Inspiron M5040 (2 pages)
- Inspiron 3520 (72 pages)
- A860 (96 pages)
- 1000 (98 pages)
- STREAK 7 (141 pages)
- XPS 14Z (L412z) (2 pages)
- Latitude D520 (124 pages)
- Latitude D520 (96 pages)
- Latitude D520 (168 pages)
- Latitude D520 (99 pages)
- Latitude D520 (42 pages)