Coleman Dome 9556A605K User Manual
6’x5’ dome, Connect frame to tent, Layout & positioning of tent, pole assembly
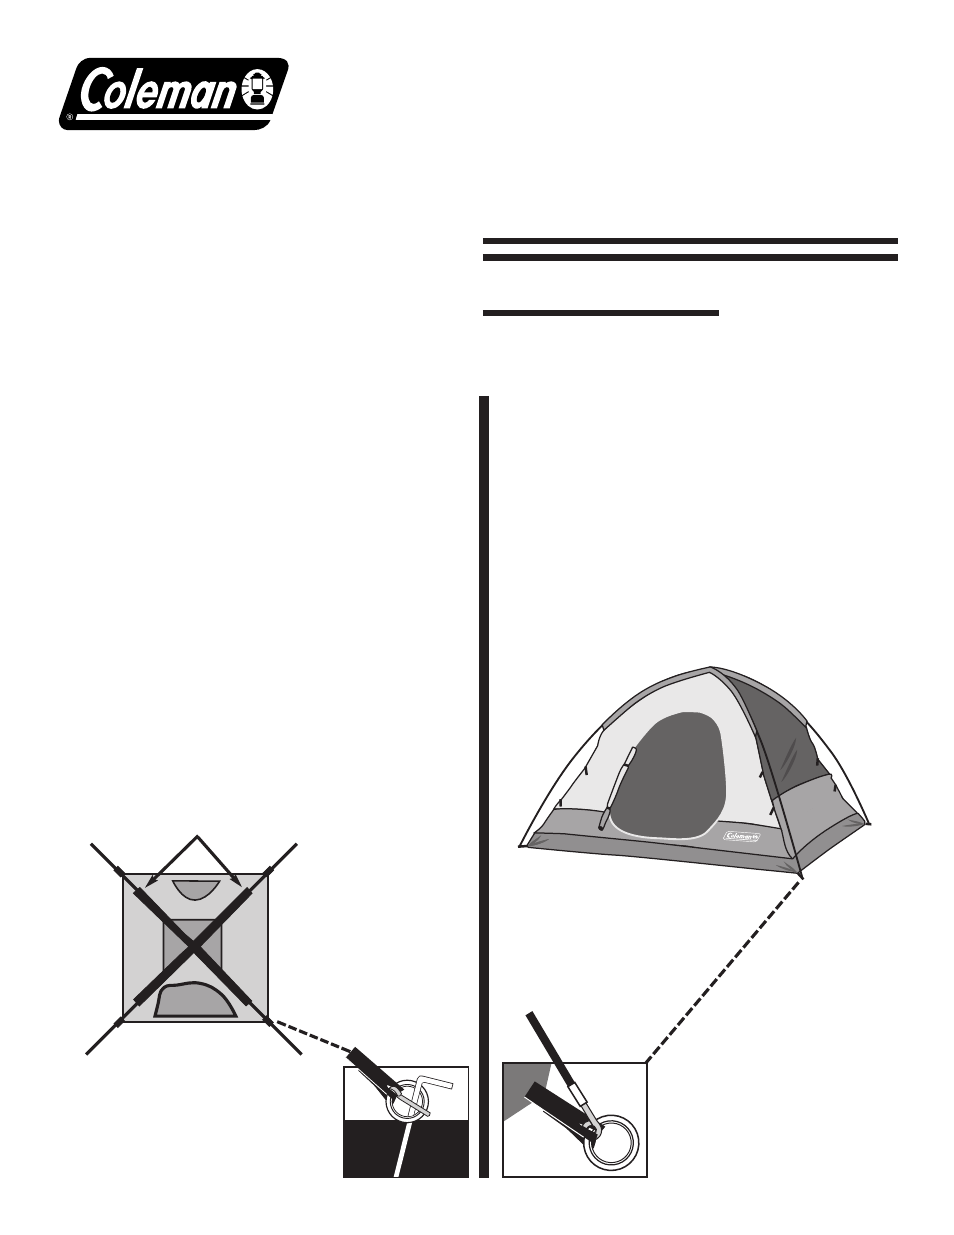
Connect Frame to Tent
– Insert one end of main tent pole
onto pin of pin & ring system, at tent
corner. (illus. 3)
– Go to opposite end of pole and
gradually apply pressure to the pole
forming an arch until you are able to
insert the pin into the pole.
– Repeat for second pole. (illus. 4)
1
Layout & Positioning
of Tent, Pole Assembly
– Layout and position tent with door
facing desired direction. (illus. 1)
– Unzip door.
– Stake down tent corners only, using
the rings at the end of the stake loops.
(illus.2) Keep the floor taut.
– Assemble frame poles by
interlocking shock-corded poles.
This will make two long poles.
– Insert the poles diagonally into pole
sleeves. The center of the poles
should cross forming an “X” in the
middle of tent. (illus. 1)
2
Assembled poles
inserted through
pole sleeves
illus. 1
illus. 2
Tent stake through ring
illus. 3
Insert pole end onto
pin & ring
illus. 4
Tent frame set-up
6’x5’ DOME
When You Are Ready
To Set Up Your Tent
– Select a level campsite clear of
rocks, branches and other hard
or sharp objects.
– Do not set up your tent under trees.
– For best results in windy conditions,
do not position the door of tent
into the wind.
(1) Rainfly
Pole
Rainfly Part No. 9556-1081
(2) Main Tent
Poles
POLE ASSEMBLY PARTS
Instructions apply to Part Number 9556A605K
Part No. 9556-1061
Part No. 9556-1071