Hard-disk drive assembly, Dug'lvn'ulyh$vvhpeo – Dell Latitude CPx H User Manual
Page 18
support.dell.com
Dell Latitude CPt V/CPt S Series and CPx H/CPx J Series Service Manual
11
+DUG'LVN'ULYH$VVHPEO\
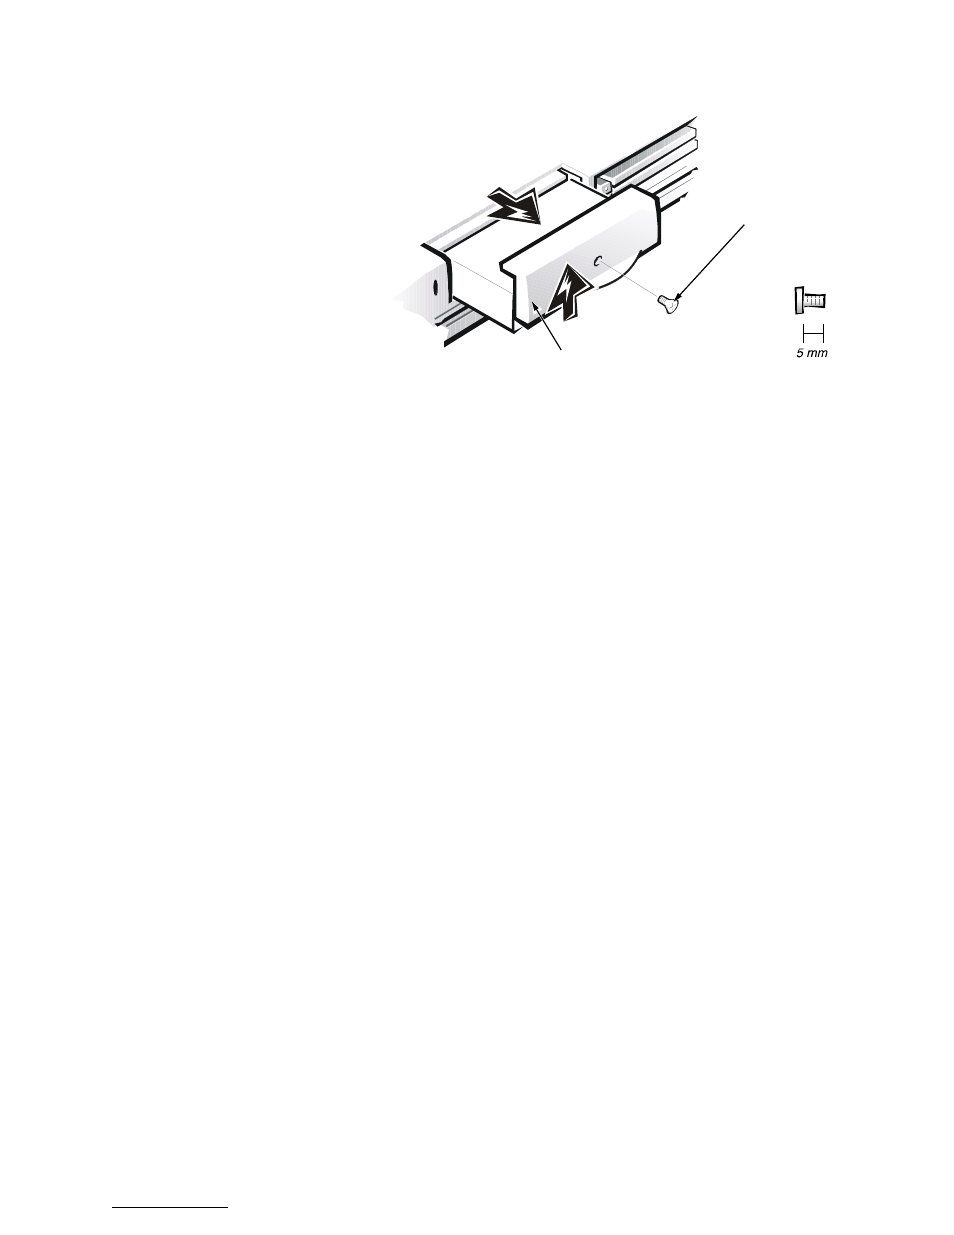
)LJXUH+DUG'LVN'ULYH$VVHPEO\5HPRYDO
127,&(7RDYRLGGDPDJLQJWKHV\VWHPERDUG\RXPXVWUHPRYHWKH
PDLQEDWWHU\EHIRUH\RXVHUYLFHWKHFRPSXWHU
127,&(0DNHVXUHWKDWWKHZRUNVXUIDFHLVFOHDQWRSUHYHQWVFUDWFK
LQJWKHFRPSXWHUFRYHU
127,&(7KHKDUGGLVNGULYHLVYHU\VHQVLWLYHWRVKRFN+DQGOHWKH
DVVHPEO\E\LWVHGJHVGRQRWVTXHH]HWKHWRSRIWKHKDUGGLVNGULYH
FDVHDQGDYRLGGURSSLQJLW
5HPRYLQJWKH+DUG'LVN'ULYH$VVHPEO\
1.
Remove the main battery and secondary battery (if present).
2. Turn the computer over, and remove the 5-mm screw from the center of
the hard-disk drive door (see Figure 6).
The drive is on the left side of the computer.
3. Slide the drive door up and pull the drive assembly out of the computer.
5HSODFLQJWKH+DUG'LVN'ULYH$VVHPEO\
1.
Push the drive assembly into the opening on the left side of the computer.
2. Slide the drive door down until it aligns with the cover.
3. Turn the computer over and replace the 5-mm screw on the drive door.
bottom of computer
hard-disk drive door
5-mm screw
M3.0x5