Coin-cell battery, Removing the coin-cell battery, Replacing the coin-cell battery – Dell Inspiron 700M User Manual
Page 26
Back to Contents Page
Coin-Cell Battery
Dell™ Inspiron™ 700m Service Manual
Removing the Coin-Cell Battery
Replacing the Coin-Cell Battery
Removing the Coin-Cell Battery
1.
Remove the
battery
.
2.
Remove the
keyboard
.
3.
Remove the
display module
.
4.
Remove the
palm rest
.
5.
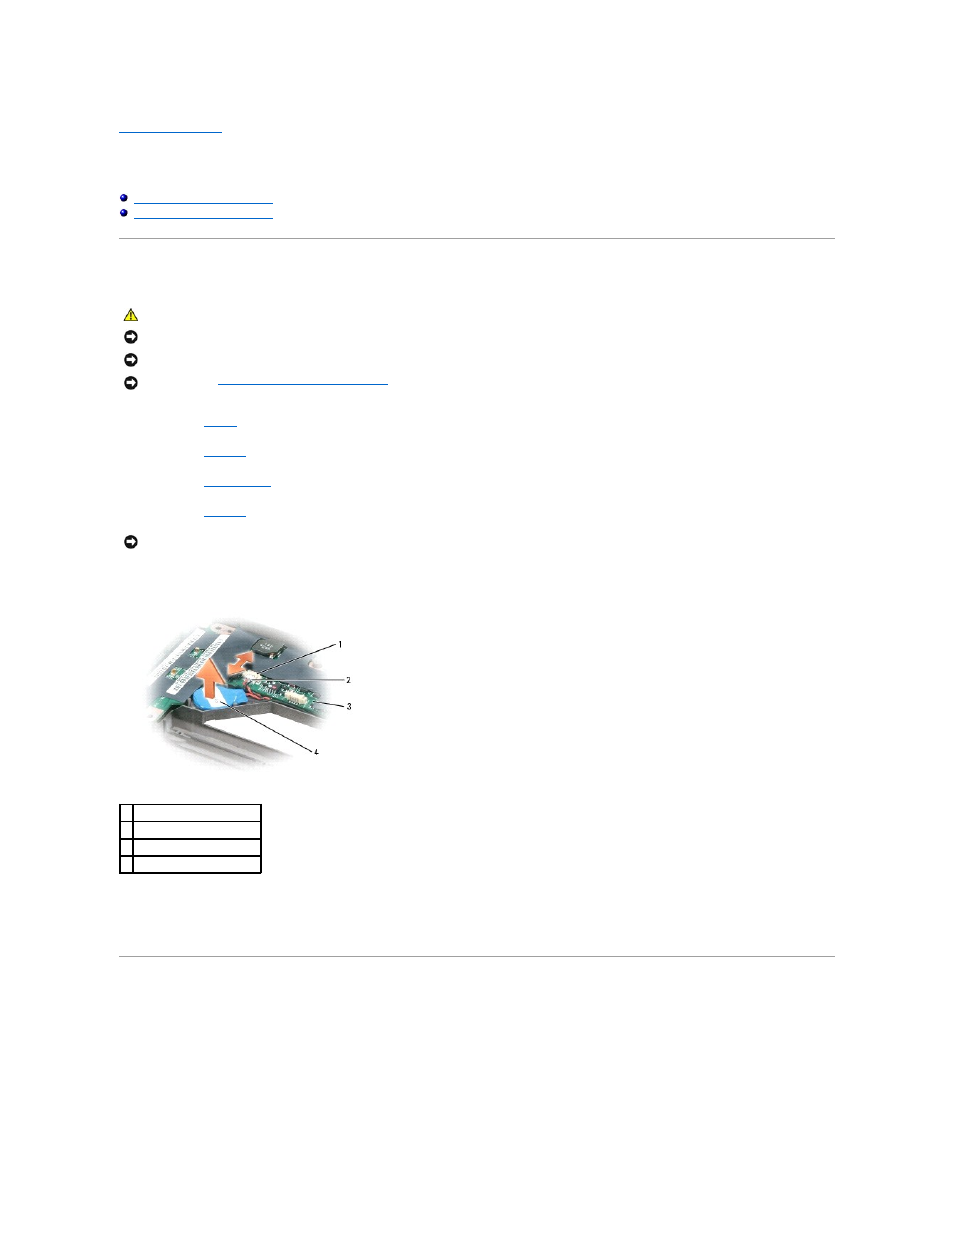
Disconnect the coin-cell battery cable from the system board connector.
6.
Pry the coin-cell battery free from the bottom case. The coin-cell battery is attached to the bottom case with a piece of adhesive tape.
7.
Remove any remnants of the adhesive tape from the bottom case.
Replacing the Coin-Cell Battery
1.
Connect the coin-cell battery connector to the system board connector.
2.
Press the coin-cell battery into place on the bottom case.
3.
Ensure that the cable is routed correctly as shown to avoid damaging the cable.
4.
Update the CMOS settings.
CAUTION:
Before you begin any of the procedures in this section, follow the safety instructions in the Product Information Guide.
NOTICE:
Disconnect the computer and any attached devices from electrical outlets.
NOTICE:
To avoid ESD, ground yourself by using a wrist grounding strap or by touching an unpainted metal surface on the computer.
NOTICE:
Read "
Before Working Inside Your Computer
" before performing the following procedure.
NOTICE:
Do not pull on the coin-cell battery cable. Pull from the coin-cell battery connector to disconnect the cable.
1 system board connector
2 coin-cell battery connector
3 system board
4 coin-cell battery